12 Fall Centerpiece Ideas: Step By Step Instructions And Tips
Twelve fall centerpiece ideas with step by step instructions and helpful styling tips. Simple, doable arrangements using pieces you likely already own, plus natural touches that bring the beauty of the season into any room.
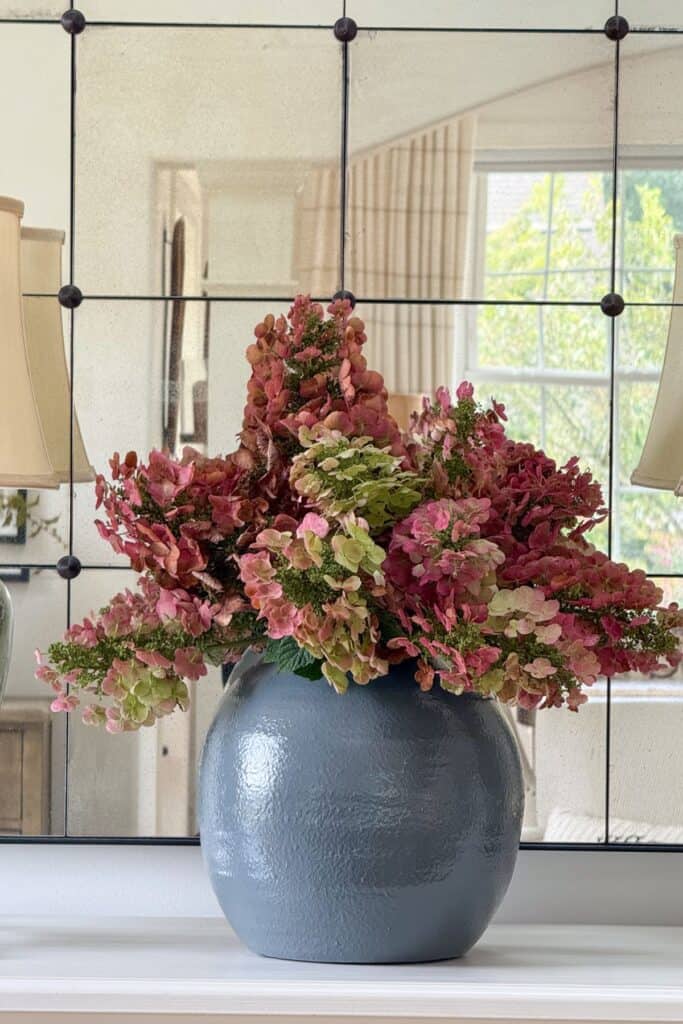
A fall centerpiece will add more beauty to the season than anything else you put in your home. It’s true. One good centerpiece, styled with a little thought, does more for a room than a dozen scattered decorations ever could.
Decorating for fall is simpler than you might think. All it takes is choosing one flat surface in a room and adding a beautiful fall centerpiece. Most rooms only need a few key elements: a couple of seasonal pillows, a cozy chunky throw, and one well-styled arrangement to feel completely dressed for the season.
Whether it’s a dining table, a coffee table, or an entryway console, a fall centerpiece sets the tone for the whole room. In this post, I’m sharing my favorite fall centerpiece ideas, each one simple, doable, and built from things you likely already have on hand or can find easily. No fussy florals, no complicated technique, just pretty, natural elements arranged with a little intention.
I’ll walk you through exactly how I create each one, along with the tips I’ve picked up over years of styling tables for every season. Take what works for your home and skip what doesn’t. That’s the whole idea behind a good centerpiece: it should feel like you, not like a magazine spread.
Let’s Create Beautiful Fall Centerpieces
Our dining and kitchen tables are often the focal points of our homes, so it makes sense to dress them up for fall. And the good news is you likely already own most of what you need. A fall centerpiece isn’t about buying a whole new set of decor each season; it’s about pairing a few pieces you already have with natural elements that bring in the beauty of autumn.
Use What You Have
Take a look around your home before you shop for anything new. A vase from spring, a bowl from your kitchen cabinet, or candlesticks tucked away in a closet can all become the foundation for a beautiful centerpiece. Having a few versatile pieces on hand means you can create something new for every season without buying decor that works for only a few weeks a year.
Here’s a list of items you likely already have that work beautifully in a centerpiece:
- Large Vase
- Ginger Jars
- Dough Bowl
- Candlestick and Candles
- Lanterns
- Pedestal Bowl
- Decorative Tray
- Hurricane Candleholder
- Mason Jars
- Wooden Crate
- Glass Cloche
- Tiered Stand
- Basket
- Seasonal Candle Rings
- Fruit Bowl
- Vintage Pitcher
- Burlap Runner
Mix and match these pieces to create a centerpiece that suits your style, then let the natural elements do the rest of the work. Mix and match these items to create a centerpiece that suits any style or season!
Collect Natural And Faux Organics
Once you’ve gathered your base pieces, add natural and faux organics. This is where a centerpiece truly comes to life. Fall offers so much beauty right outside your door, and bringing a little of it indoors is one of the simplest ways to make a space feel seasonal.
Whether you gather fresh leaves, acorns, and pinecones from your yard, or reach for faux pumpkins and berries from your decor stash, these elements instantly warm up a room. Decorating with natural touches is as easy as a short walk outside or a quick stop at your local craft store.
Here are some of my favorite fall naturals and organics to use:
- Fall Leaves, Real or Faux
- Acorns and Pinecones
- Real or Faux Pumpkins and Gourds
- Dried Corn Husks
- Wheat Stalks
- Preserved Eucalyptus
- Branches and Twigs
- Faux Berries
- Dried Hydrangeas
- Cotton Stems
- Faux Fall Garlands
- Indian Corn
- Dried Orange Slices
- Cinnamon Sticks
- Birch Logs
- Faux Sunflowers
- Real or Faux Apples and Pears, Dried Ones Too
- Dried Lavender
- Faux Magnolia Leaves
- Moss
- Mums
- Sedum
- Combining what you already own with a few natural touches is the secret to a centerpiece that looks pulled together without costing a fortune.
- Now let’s walk through my favorite fall centerpieces, step by step.
Fall Dough Bowl Centerpiece
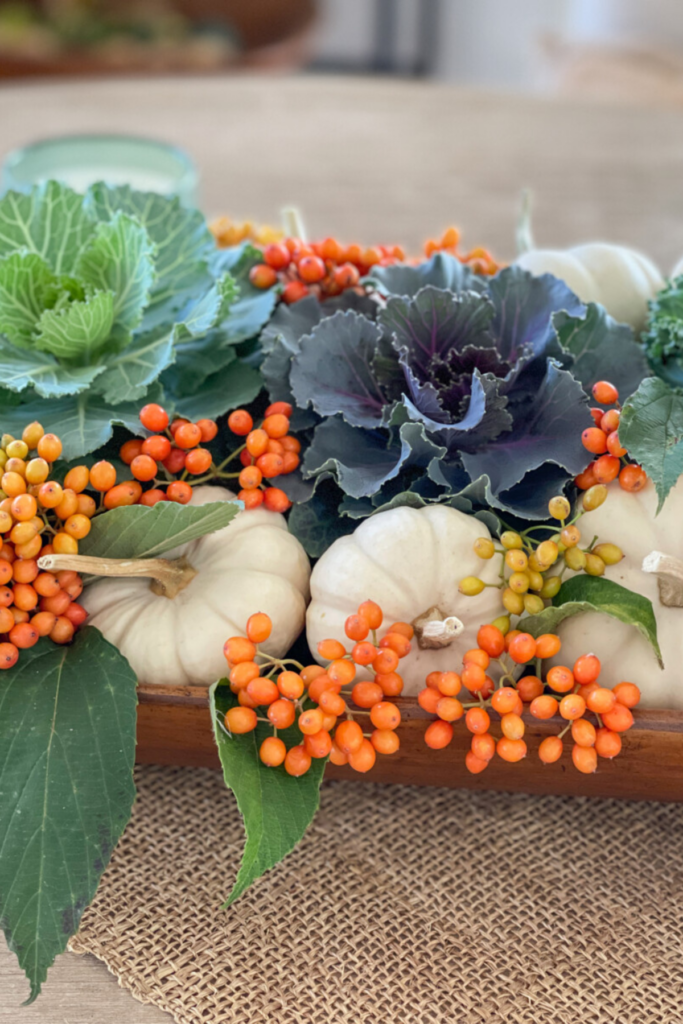
A dough bowl is one of those pieces that earns its keep in every season. Once you own one, you’ll find yourself reaching for it again and again, for fall, for spring, for a simple gathering of candles on a random Tuesday.
For this centerpiece, I like to keep everything tucked down into the bowl rather than piled high. The natural elements peek just over the rim, which keeps the whole look relaxed and low, perfect for almost any table in your home.
What You Will Need
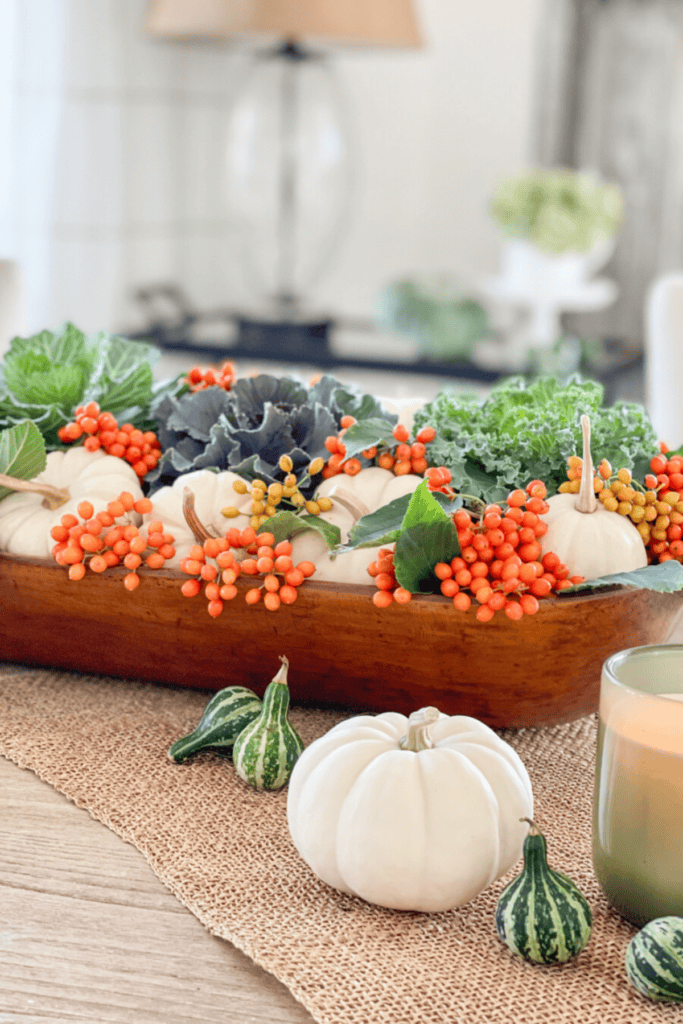
To make this dough bowl centerpiece, you will need…
How To Make The Fall Dough Bowl Centerpiece
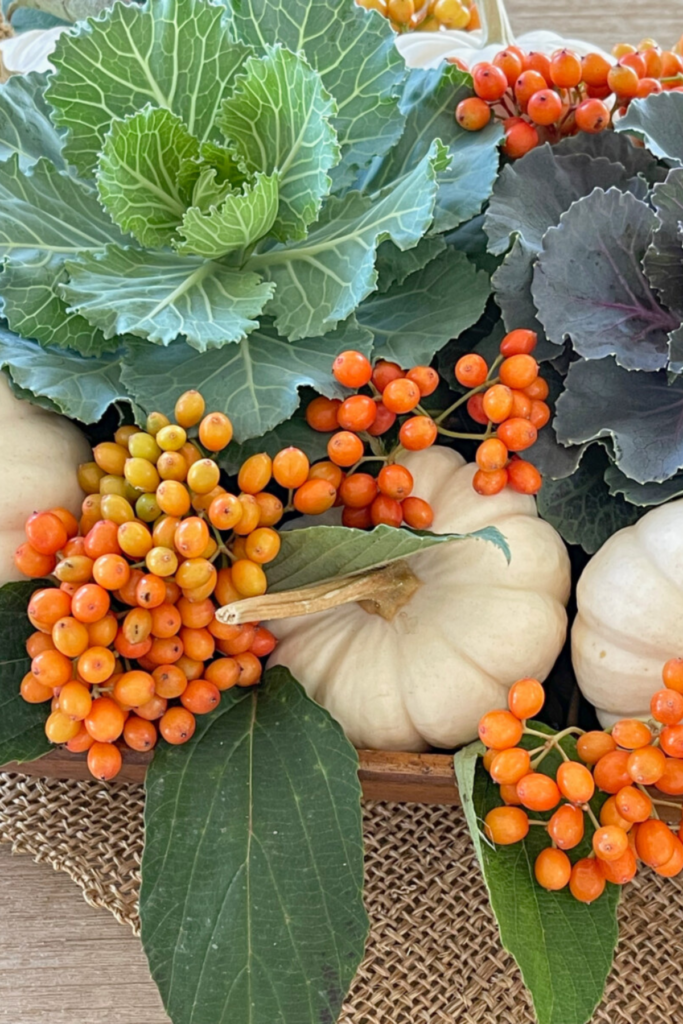
- Start with the flowering cabbage or kale, placing it in the bowl first. Choose a size that fits the scale of your bowl so nothing feels crowded.
- Fill the gaps between the cabbage with pinecones. They’re my go-to filler because they add volume, keep everything from sliding around, and give the arrangement a stable base.
- Once the pinecones are settled, tuck in the mini white pumpkins, then finish with fall leaves, berries, or bittersweet for a last layer of texture and color.
🌿 TIP BOX: To keep berries, twigs, or leaves from shifting, secure them in place with a bit of floral wire or clear tape.
If you have extra room on the table, a few candles or votives are a nice addition, and don’t forget to tuck in a mini pumpkin or two. This arrangement is especially good for dinner parties since it stays low enough that it never gets in the way of conversation.
Fall Branches Centerpiece
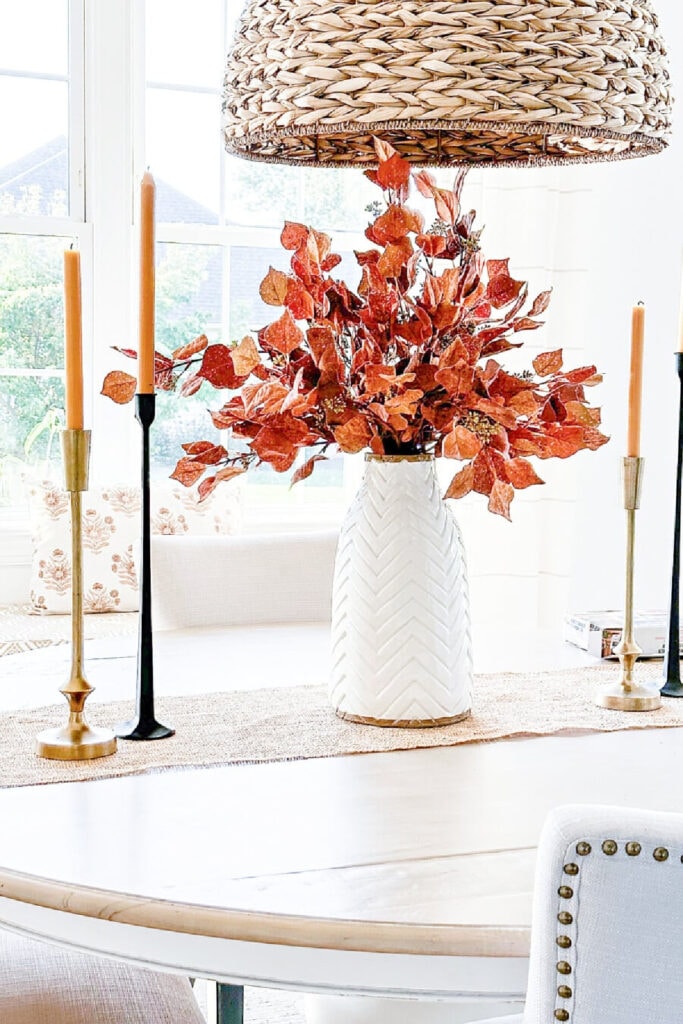
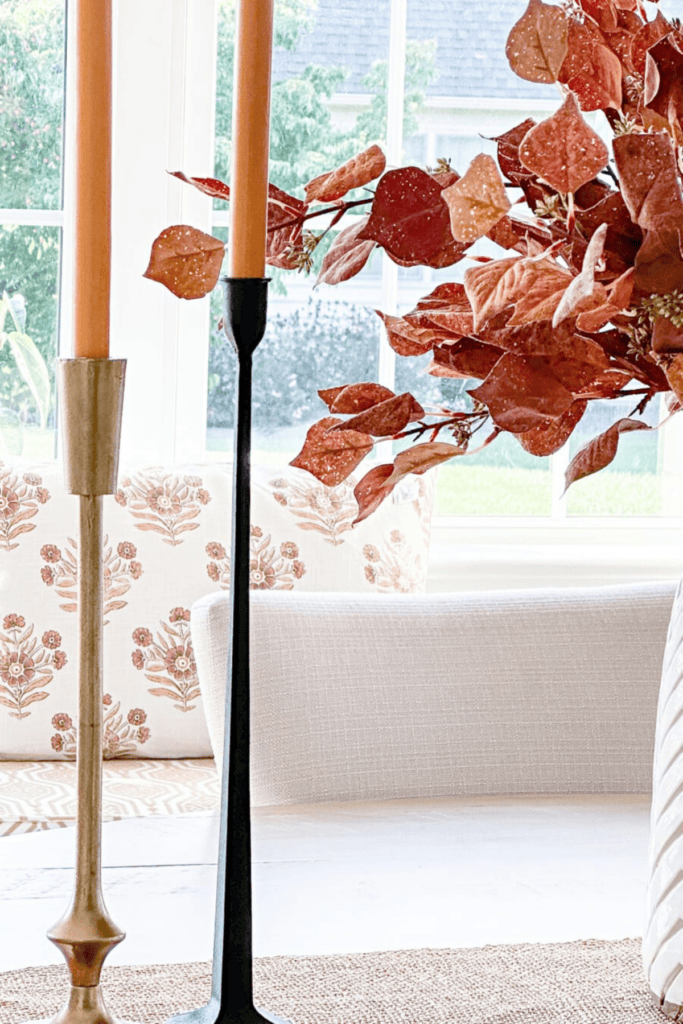
From a local decor shop. And I found these faux branches with stunning burnt orange leaves at a local shop. I scooped them up because I thought they would make a statement on our dining room table.
A fall arrangement like this works on a buffet, a kitchen island, or anywhere you need something tall.
How To Style This Fall Centerpiece
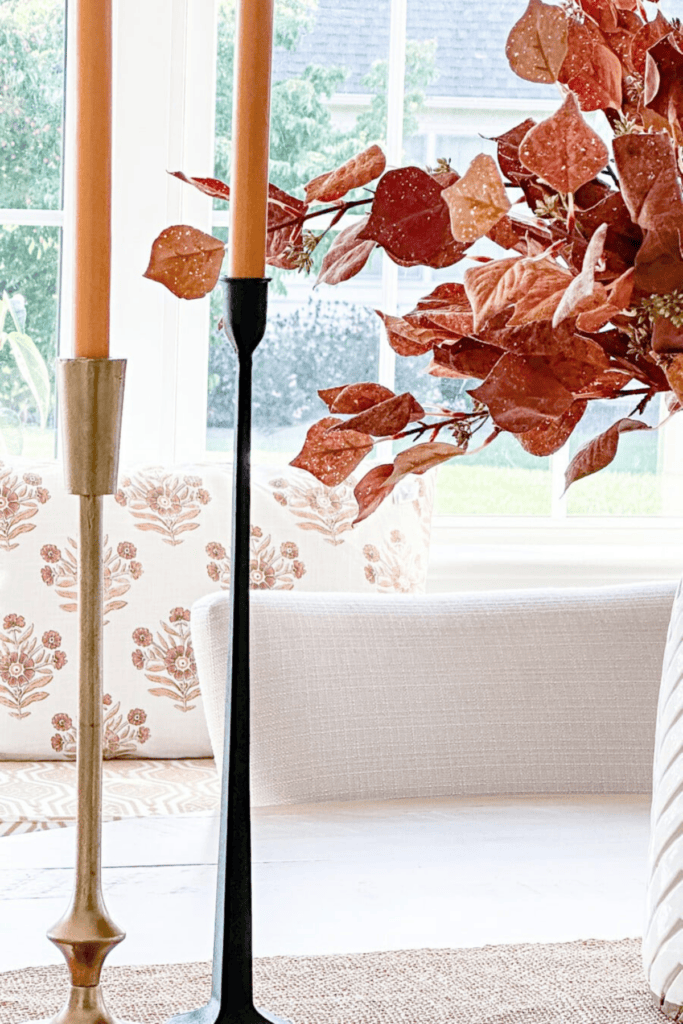
This centerpiece is quintessentially fall. It’s traditional, symmetrical, and one of the simplest looks to pull together, yet it never fails to feel pretty and pulled together on a table.
Our eyes are naturally drawn to symmetry, which is exactly why this arrangement always reads as well styled. It’s a good technique to have in your back pocket for more than just fall centerpieces, so if you’d like to go deeper on the topic, The Decor Element Of Balance And How To Use Symmetry walks you through it.
What You Will Need
- faux or real branches with colorful leaves or fall foliage
- a vase, urn, or pitcher
- candlesticks and candles
- a table runner
I always reach for a large vase for this one. Small vases tend to get lost in the center of a dining table, so look for something with a bit of substance and personality; a chalky finish, an aged pitcher, or anything with texture works beautifully.
How To Style This Fall Centerpiece
- Place the vase where you plan to use it, then add branches one stem at a time, fluffing the leaves as you go so the arrangement looks full and balanced from every angle.
- Flank the centerpiece with candlesticks and tall taper candles. Choosing a candle color that echoes a tone in your branches, like a honey or amber shade against orange leaves, ties the whole look together.
This centerpiece also works beautifully without candles, on a buffet or kitchen island, anywhere that calls for a bit of height. And it isn’t limited to branches. Real or faux flowers work just as well here, especially fall blooms like chrysanthemums, dahlias, and drying hydrangeas. Zinnias are another pretty option for an early fall arrangement.
🌿 TIP BOX: A large-scale vase keeps this look from feeling sparse. If your branches seem thin, adding two or three stems instead of one instantly makes the arrangement feel full and intentional.
This one is about as low-effort as centerpieces get, and it will always look attractive on your table.
Here is another version of the centerpiece without candles on our white buffet.
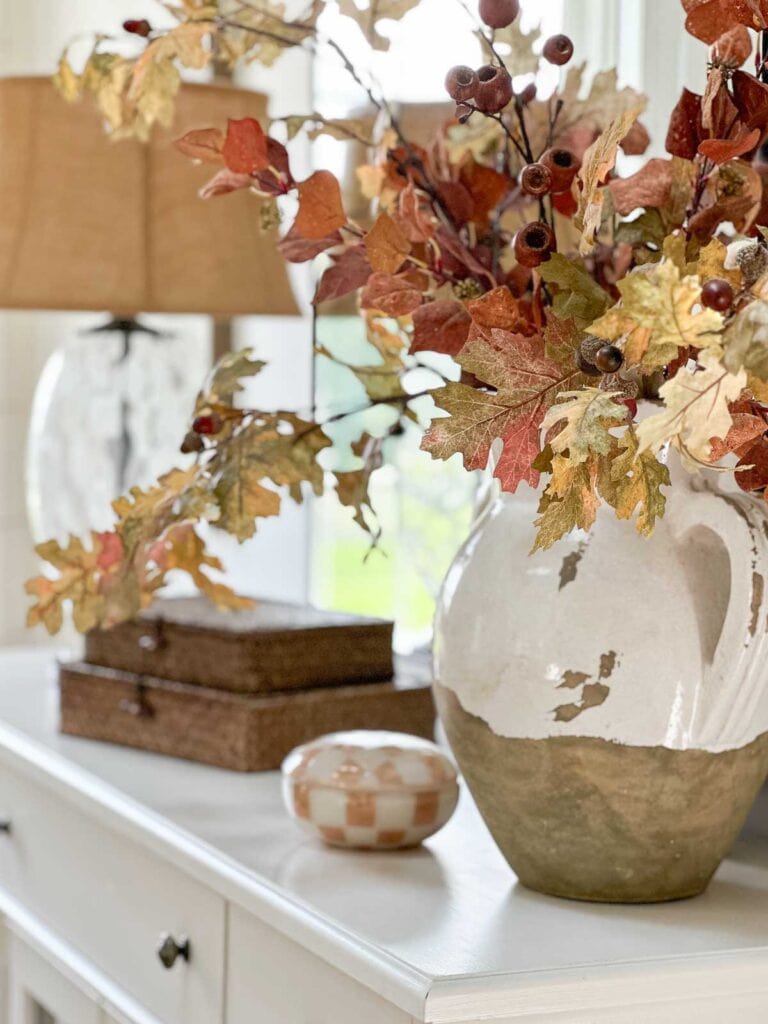
Fall Vignette In A Basket
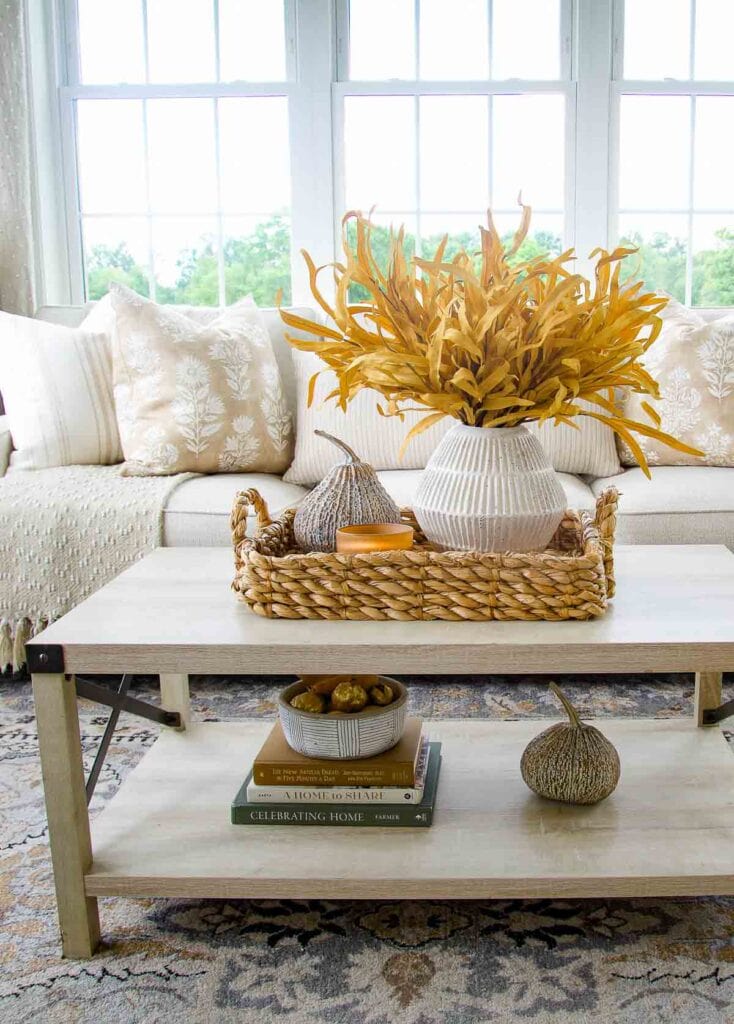
With its tight color palette, this fall vignette is one of the easiest to put together, and it never fails to feel thoughtful and complete.
Every element here nods to the season, celebrating fall’s rich textures and warm colors. It’s a great example of how a few well-chosen pieces, arranged with a little care, can create a centerpiece that draws the eye with little effort.
What You Need
Choose three thoughtful items for this vignette, and let your own collection guide you.
- a low-sided basket
- a vase or container for organics
- fall-inspired organics
- a fall element, like a gourd or pumpkin
- a candle in a coordinated color
How To Make This Centerpiece
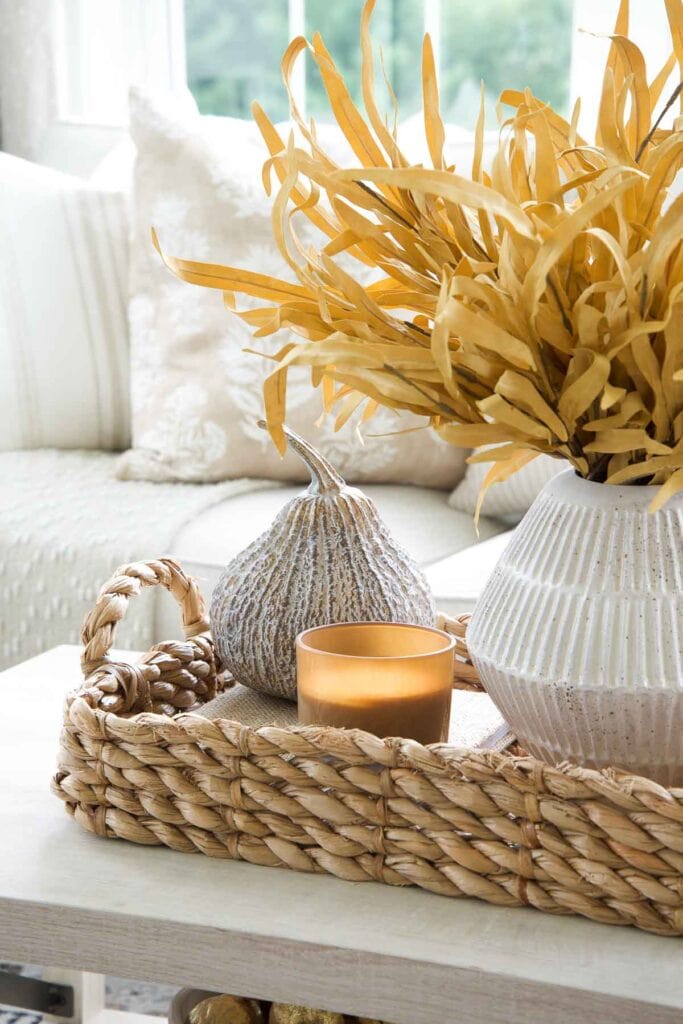
Create this vignette using a low-sided basket. It adds texture and warmth to your space and gives the arrangement a defined boundary, making it feel organized and cohesive.
Texture is the secret of interior designers’ success. You can use it, too! Read HOW TO USE TEXTURE LIKE A DESIGNER.
In this fall vignette, I’ve used the rule of three to create a simple and visually pleasing look. Using The Rule Of Three.
- Start with a low-sided basket that comfortably fits all the items in your vignette.
- Then add a container of fall organics to add height and a touch of autumn hues.
- Next, add a pumpkin or gourd. Make sure it is large enough to be seen over the side of the basket. If you need a little height, perch it on a stack of books (I used one burlap book) or a wood round.
- Then, add a candle that works with the vignette’s color palette.
Pampas grass would look very pretty in this arrangement, too.
Grouped Fall Centerpiece
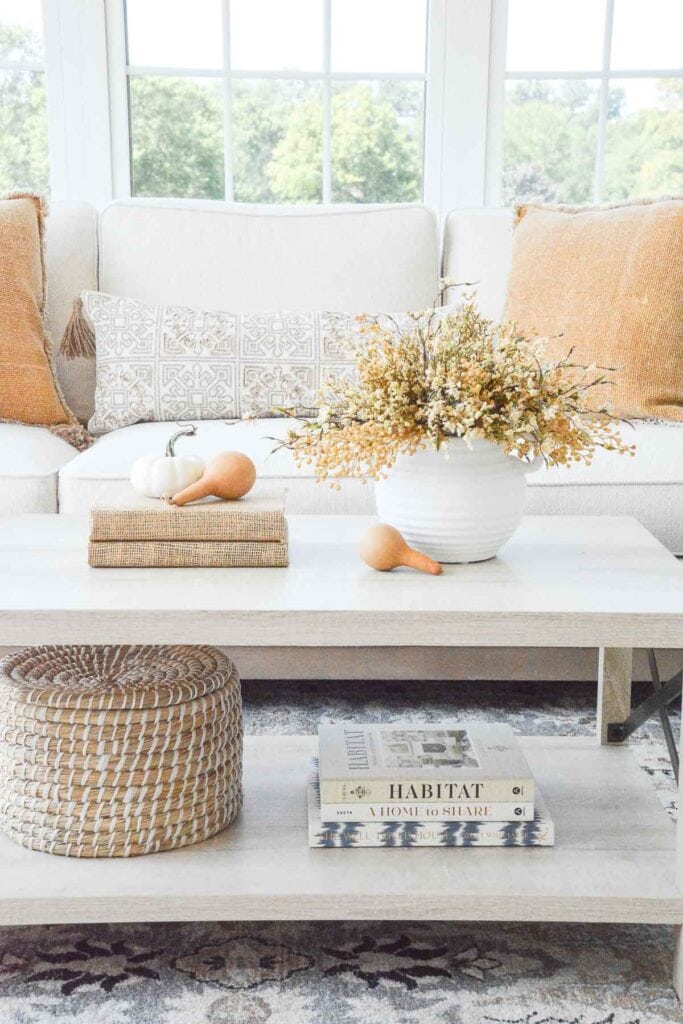
This is one of my favorite fall centerpieces to create. It works on a coffee table, a dining table, or any flat surface in your home, and I love the almost effortless, tossed-together look it has. I build this one with bits and pieces of faux fall stems, berries, and dried flowers, layering them until the arrangement feels full.
If you’re using this look for a dining table, skip the books and instead scatter a few more pumpkins, gourds, and votive candles across the surface for a slightly more relaxed, spread-out feel.
What You Will Need
- a container or vase
- fall stems and faux fill for the arrangement
- books for height; burlap-covered books work especially well, and you can make your own with Make Burlap Covered Books You Can Still Read
- pumpkins and dried gourds
How To Make This Arrangement

How To Make This Arrangement
- Craft or buy a fall-inspired centerpiece for your container or vase.
- Scatter a few baby boo pumpkins and mini dried gourds to one side of the arrangement. For added height, set a pumpkin or dried gourd on top of a stack of books.
🌿 TIP BOX: The secret to this arrangement is a tight color palette. Sticking to just two or three coordinating colors instantly makes a loosely arranged centerpiece look more upscale and pulled together.
If you’d like more variations on this look, Fall Arrangements Using 8 Items walks through seven beautiful, simple ways to build on this same idea.
Simple Apple Centerpiece
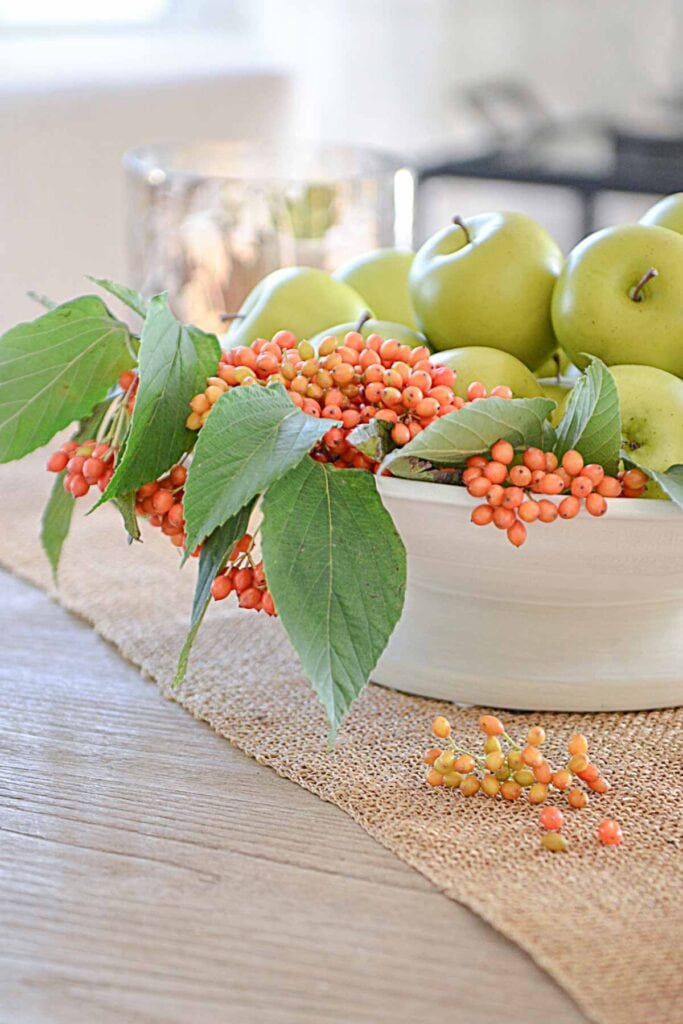
Every one of these fall centerpieces is simple, but this one might be the simplest of all: a big, beautiful bowl of apples, or any fruit you love, with a few greens and candles tucked in. It’s proof that less really can be more, creating an elegant, understated look with almost no effort.
Think about using real or faux fruit here. Pears would be just as pretty in a pedestal bowl, and pumpkins or gourds work nicely too if you’d rather lean into a more traditional fall look.
What You Will Need
You may already have what you need right in your kitchen!
- a large shallow pedestal bowl
- fruit or pumpkins, real or faux
- a bit of real or faux leaves or berries
- a candleholder and candles
How To Make This Arrangement
- a large shallow pedestal bowl
- fruit or pumpkins, real or faux
- a bit of real or faux leaves or berries
- a candleholder and candles
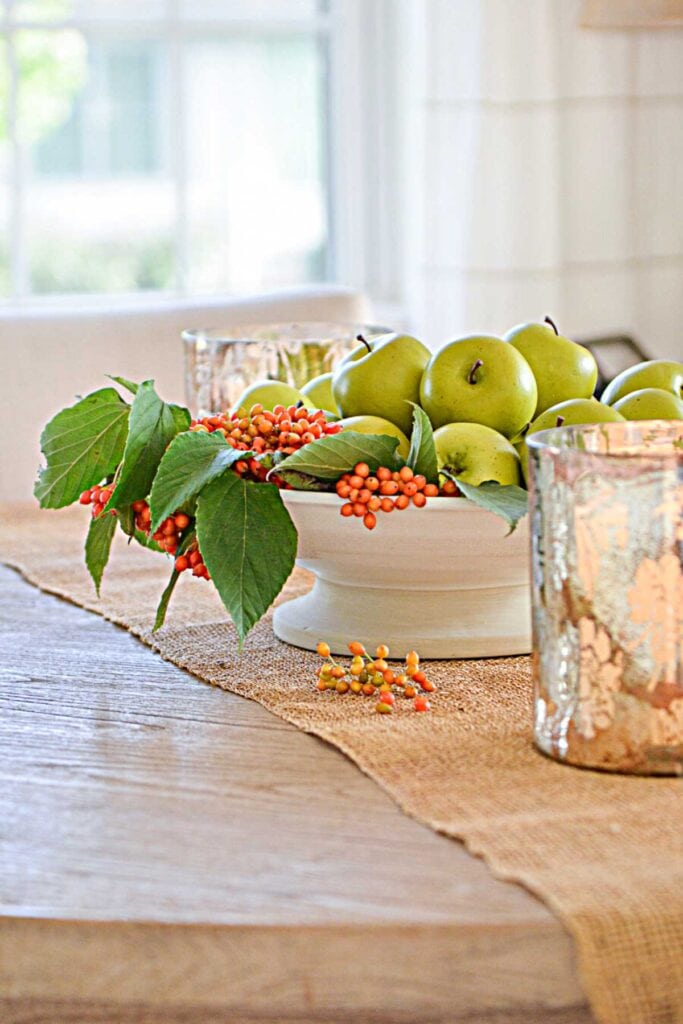
You likely already have everything you need for this one sitting right in your kitchen.
How To Make This Arrangement
- Start by filling the bowl with apples.
- Add a bit of greenery or berries to one side so it spills over slightly.
- Choose chunky, showy candleholders to balance out the arrangement’s simplicity, and keep them low so the whole centerpiece stays easy to see over.
🌿 TIP BOX: Because this centerpiece is so simple, the candleholders do a lot of the visual work. Look for something with a bit of presence, gold hurricanes or textured glass, to keep the look from feeling too plain.
This one works just as well on a buffet or countertop as it does on a dining table, another reason it’s one of my go-to fall centerpieces.
Dried Hydrangeas In A Basket
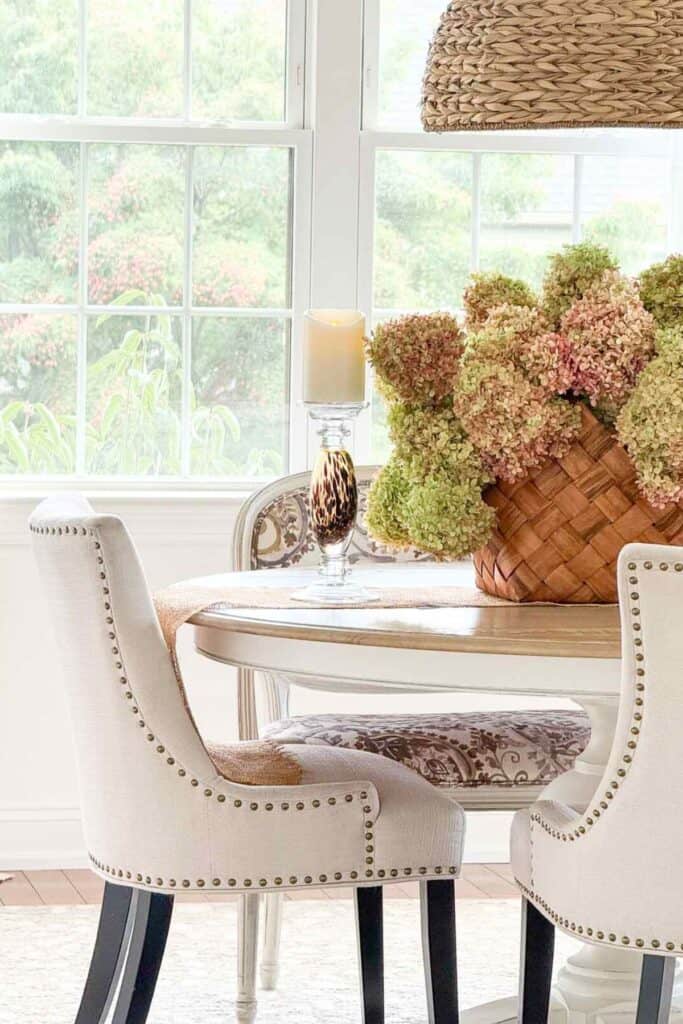
Dried hydrangeas are my go-to fall element year after year. I’m lucky enough to have quite a few hydrangea bushes growing around our home, so once they dry on the stem in late summer, I clip them and put them right to work in centerpieces like this one.
If you don’t have hydrangeas of your own, it’s worth investing in a few good faux stems. They photograph beautifully, they never wilt, and you’ll reach for them every single fall.
What You Will Need
- a woven basket
- dried or faux hydrangea stems
- a candlestick and candle
- florist foam, optional, if you’d like extra support for the stems
- a cheap hairspray or floral fixative, optional, to help preserve real hydrangeas
I don’t personally use the floral foam or a fixative spray. My hydrangeas dry naturally and hold up beautifully in the basket without extra help, but both are nice options if you’d like more control over the arrangement.
How To Make This Centerpiece
- Gather your hydrangea stems and trim them so they sit nicely above the rim of the basket once arranged.
- Fill the basket generously with the stems, letting the blooms spill slightly over the sides for a full, natural look.
- Set the basket on your table with a simple candlestick and candle beside it for a bit of height and warmth.
🌿 TIP BOX: If you’re drying your own hydrangeas, clip them once the blooms begin to feel papery to the touch and the color has started to shift. They’ll hold that faded, muted color for months.
Here’s another version of this same centerpiece, styled on a console instead of a dining table.
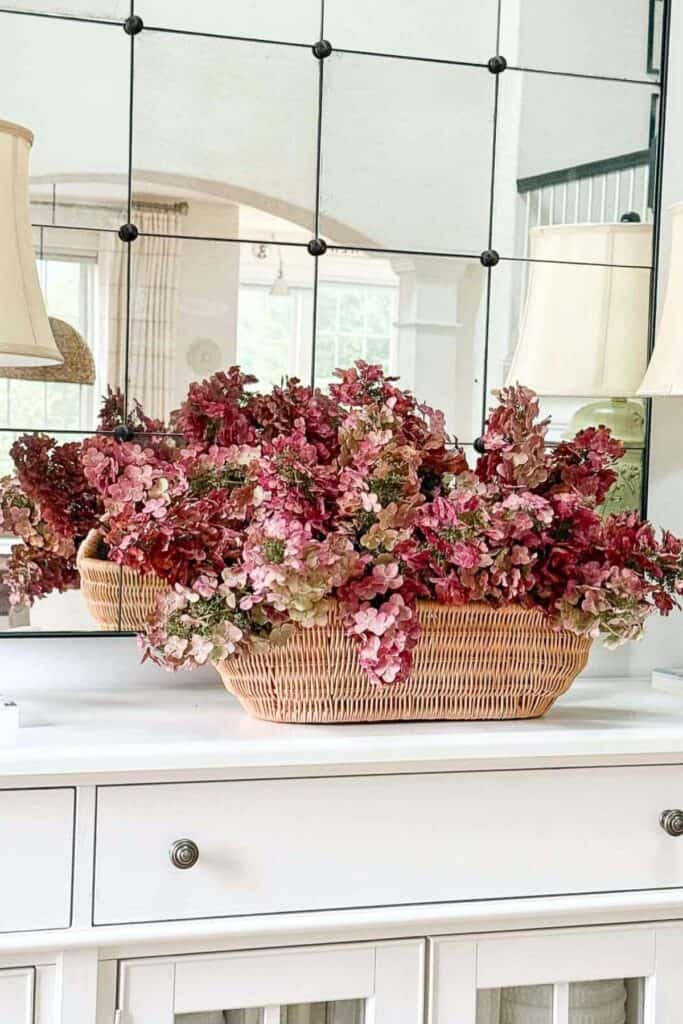
Put dried hydrangeas in a pretty vase or container instead of a basket.
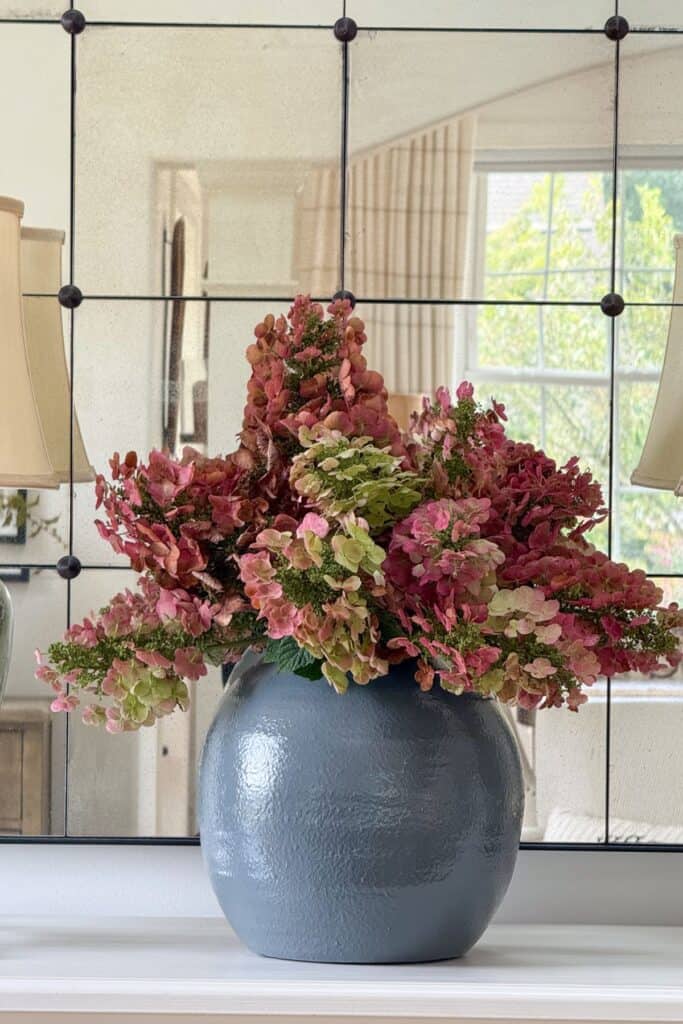
This one could not be simpler: a full basket or vase of blooms does nearly all the work, and it looks just as pretty on a dining table as it does on a console or buffet.
Simple Fall Trio
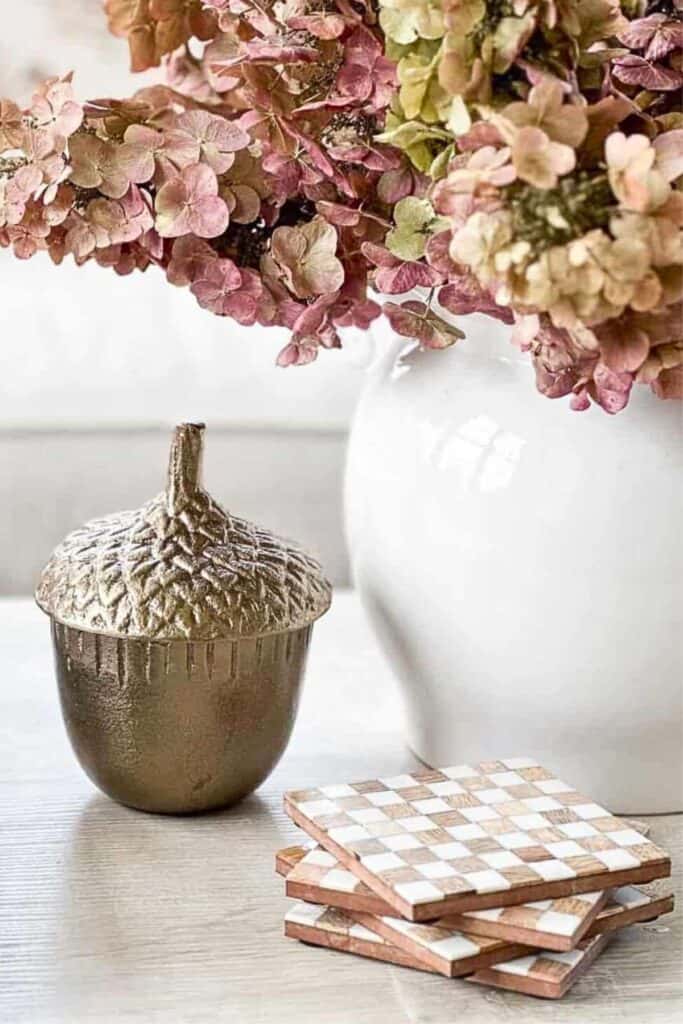
This could not be easier. A simple trio is one of my favorite ways to dress a small surface, and it takes only minutes to put together, no real design skill required, just an eye for pairing pieces you already love.
What You Will Need
- a vase with dried hydrangeas, blooms, grasses, or fall leaf stems
- a small fall accent piece, like an acorn
- one more small piece of decor, a stack of coasters, a candle, or a small dish
How To Make This Trio
- Start with your vase of hydrangeas, blooms, or stems as the anchor piece.
- Add your fall accent beside it, something with a bit of personality or whimsy.
- Finish the grouping with one more small piece of decor to round out the trio.
🌿 TIP BOX: Have a few interesting fall accents on hand to add to your decor throughout the season; small pieces like this acorn make it easy to refresh a trio without starting from scratch.
Mums And Ornamental Cabbage Centerpiece
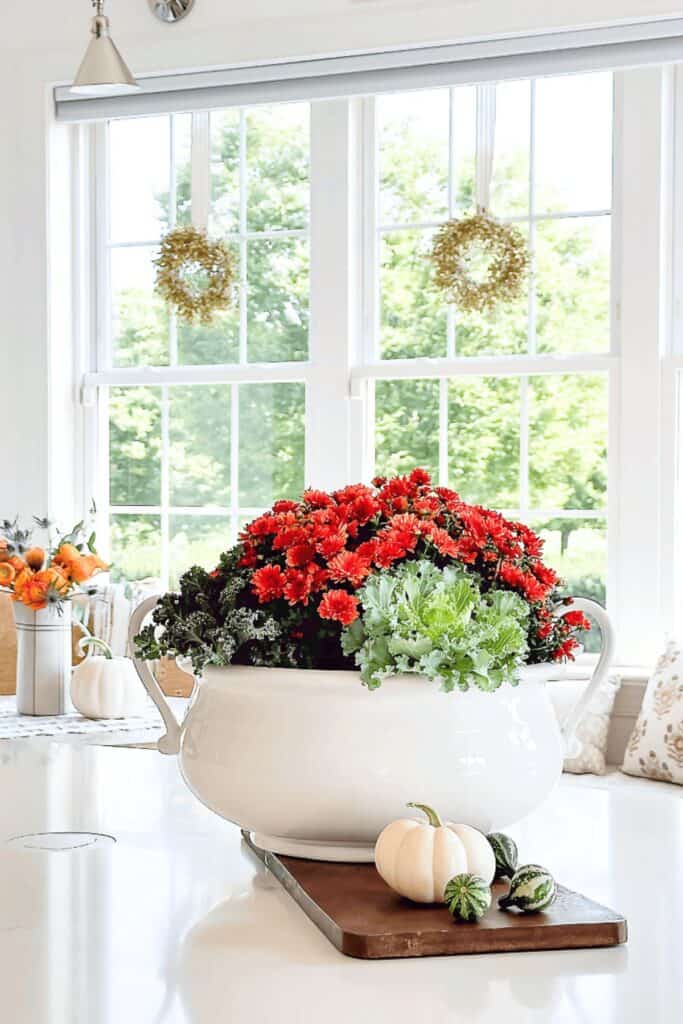
One of my favorite things to do is bring the beauty of the outdoors right inside. This combination stays beautiful for weeks, and everyone who comes to our home always comments on it.
What You Will Need
- mini pumpkins and gourds for styling nearby
- a large container; a tureen or urn works beautifully
- red or your favorite color mums, potted
- ornamental cabbage or kale, potted
- soil
How To Make This Centerpiece
- Choose a large container with enough room for both plants together. Really any pot that will hold them will do. The white pot above is actually a beverage container.
- Nestle the potted mums and ornamental cabbage or kale into the container side by side, turning them so the fullest sides face outward. Add extra soil around the base if needed to fill gaps and help everything sit securely.
- Set a few mini pumpkins and gourds around the base of the container to finish the look.
🌿 TIP BOX: Because the mums and cabbage are alive, this centerpiece needs a little water every few days to stay full and vibrant for weeks. Check the soil often; potted plants dry out faster indoors than you might expect.
This one is a true showpiece and proof that a single centerpiece with real color can carry an entire room through the whole season.
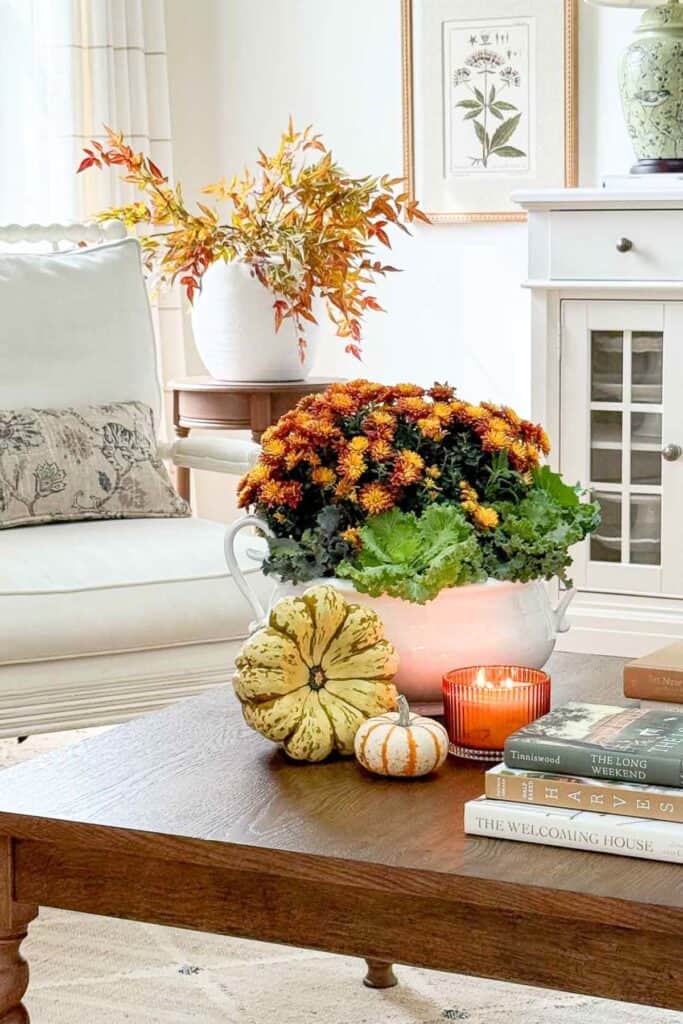
Here’s another similar mum centerpiece with more pumpkins, gourds, and a candle in front of it. Super easy!
Fall Kitchen Centerpiece
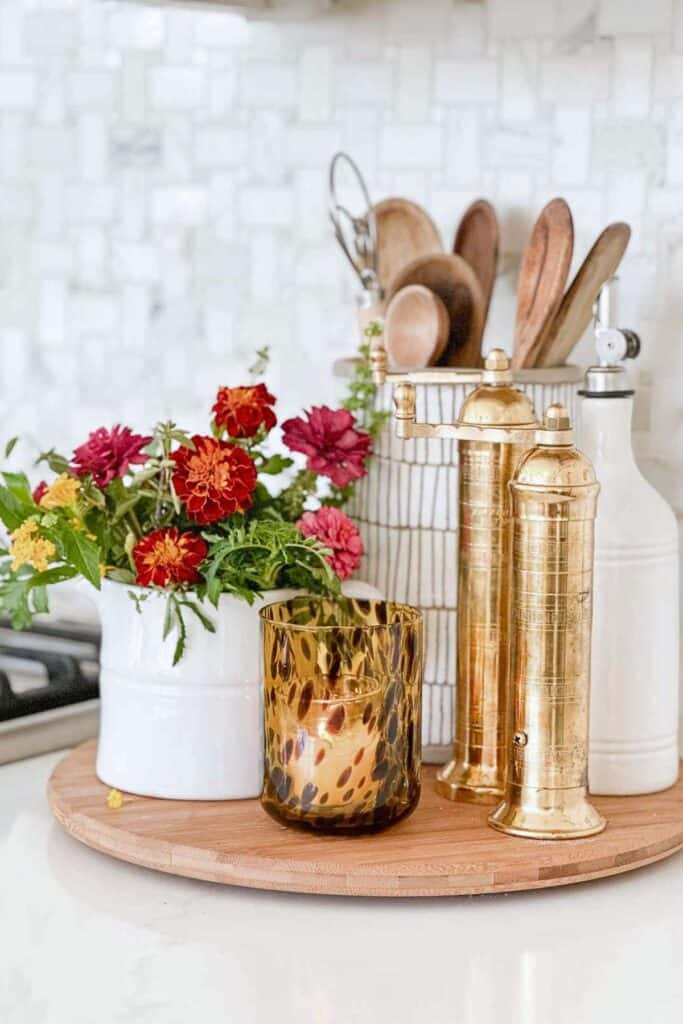
This one is so easy, and it does double duty as part of a working kitchen station. Centerpieces don’t have to be big and showy to make an impact, even the simplest arrangement added to a work station can bring a big dose of fall into a space you use every single day.
My marigolds, lantana, and a couple zinnias came straight from our raised cutting bed, but even store bought flowers from the grocery store work just as well.
What You Will Need
- a lazy susan or wooden tray
- wooden utensils, a few
- something brass, like pepper mills or an olive oil bottle
- a vase of fresh cut fall flowers
- a candle in a warm seasonal color
How To Make This Centerpiece
- Place your lazy susan or tray on the counter, then add the wooden utensils in a crock or holder toward the back for height.
- Add your brass pieces beside the utensils, letting them catch the light.
- Set the vase of fall flowers in front, followed by the candle to complete the grouping.
🌿 TIP BOX: Grocery store bouquets work wonderfully here. Just pull out the stems in fall colors, reds, oranges, golds, and skip anything that reads more spring or summer.
This is one of the easiest ways to bring fall right into your everyday kitchen routine, no special occasion needed.
Plant, Pumpkin And Gourd Grouping
Think of a simple grouping of pumpkins and gourds as a centerpiece in its own right. It doesn’t need a container at all, just a little time spent arranging the squash in an intentional color palette so everything looks pleasing together.
What You Will Need
- a runner or tray, optional, for a more polished look
- a few pumpkins and gourds in complementary colors
- a potted plant that complements the color palette
How To Make This Grouping
- Choose your pumpkins and gourds first, looking for colors that work together, whether that’s a tight neutral palette or a mix of green and gold like this one.
- Arrange them together on your table, turning each one so its best side and color face outward.
- Add a potted plant nearby that echoes one of the colors in your grouping to tie everything together.
- If desired, set the whole grouping on a runner or tray to define the space and keep the table underneath protected.
🌿 TIP BOX: Choosing gourds and a plant in the same color family, like these green tinged gourds with a variegated plant, makes even a completely unstyled grouping look intentional and pulled together.
This might be the simplest centerpiece in the whole post, proof that sometimes the season’s own bounty is all the decorating you need.
Velvet Pumpkin Centerpiece
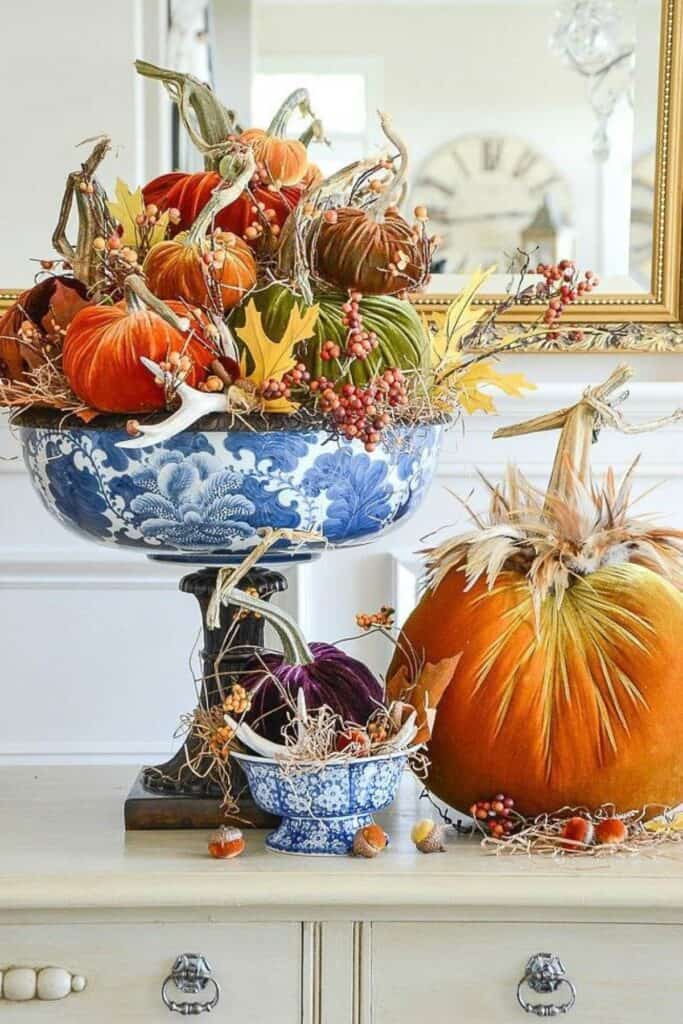
This one is fancier. I’ve collected velvet pumpkins for years, they’re little and big works of art in their own right. I put them together in a vintage footed chinoiserie compote. Even though this looks impressive, it came together so easily. If you don’t have velvet pumpkins of your own, real ones work beautifully too.
What You Will Need
- a small antler or twig accent, optional
- a footed compote or pedestal bowl
- velvet pumpkins in varying sizes and colors, or real pumpkins
- moss, straw or other fluff
- berry stems or sprigs
- a few oak leaves or fall foliage stems
How To Make This Centerpiece
- Set your footed compote or pedestal bowl in place, this height gives the whole arrangement a more formal, collected presence.
- Pile the velvet pumpkins into the bowl, turning them so the stems face different directions for a natural, tumbled look.
- Tuck berry stems, foliage, and any accent pieces like antlers or twigs into the gaps between the pumpkins.
🌿 TIP BOX: Mixing pumpkin sizes and jewel tone colors, rust, olive, plum, is what makes this arrangement feel collected rather than matchy. Don’t be afraid to let a few berry stems spill over the edge.
This is a lovely one to bring out once your collection starts to grow, and it proves that even a more elevated look can come together in minutes.
Basket Of Ornamental Cabbage And Kale
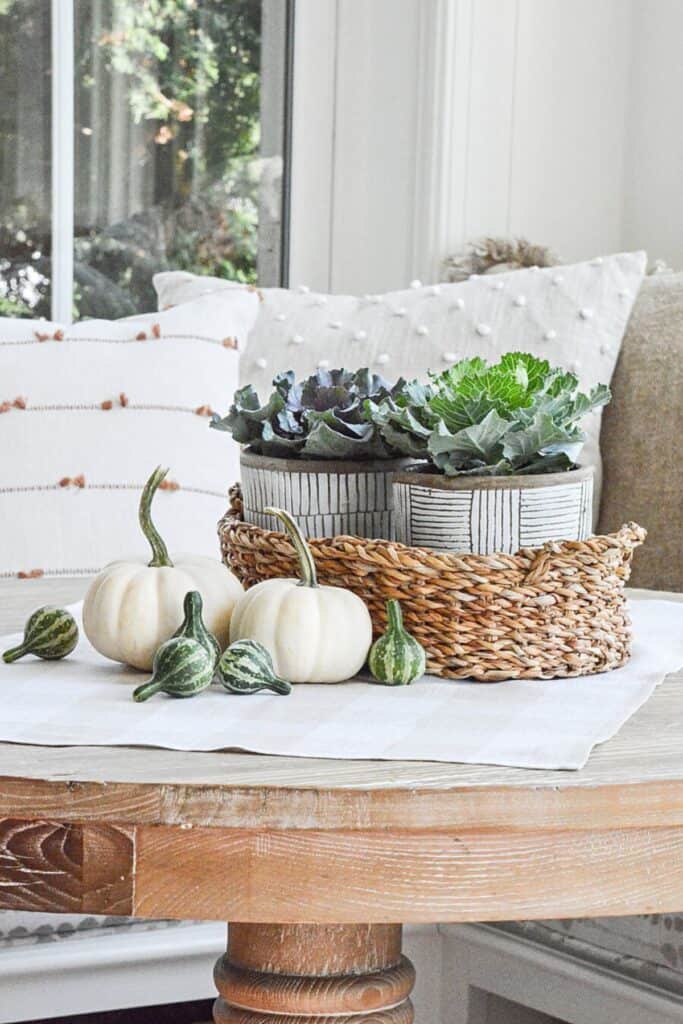
There is so much to love about this sweet, little potted centerpiece. It’s textural and organic, and perfect for adding to a little kitchen table or any small surface that could use a bit of seasonal charm.
What You Will Need
- a table runner or cloth, optional
- a woven basket
- ornamental cabbage and kale, potted
- white pumpkins
- small gourds
How To Make This Centerpiece
- Set your basket in place, then nestle the potted ornamental cabbage and kale inside, keeping the pots close together so the basket feels full.
- Scatter white pumpkins around the base of the basket, letting them spill onto the table for a relaxed, natural look.
- Tuck small gourds in and around the pumpkins to fill any gaps and add a bit of texture.
🌿 TIP BOX: Potted cabbage and kale hold up beautifully through cool fall weather, giving this centerpiece real staying power compared to cut greenery.
This is a lovely one for a smaller table, it brings all the textures of the season into a space without ever feeling like too much.
Questions You May Have About Styling A Fall Centerpiece
The best time to decorate for fall is typically in early to mid September, just as the weather starts to cool and the first signs of autumn appear. This timing lets you enjoy your fall centerpiece throughout the whole season. That said, there’s no right or wrong time, it’s really up to you.
Some of the best fall elements include pumpkins, gourds, autumn leaves, pinecones, acorns, candles, and dried or faux hydrangeas. Mixing a few of these together, along with something you already own like a favorite bowl or vase, is really all it takes.
Mums, sunflowers, dahlias, asters, and marigolds are some of the best flowers for a fall centerpiece. Dried hydrangeas are another favorite of mine, they hold their color for months and never need water.
A potted mum centerpiece can stay full and colorful for several weeks with just a little water every few days. Check the soil often, since potted plants tend to dry out faster indoors than outdoors.
I hope this collection of fall centerpiece ideas has inspired you to bring a little seasonal beauty into your own home. Whether you go with something as simple as a bowl of apples or as collected as a compote of velvet pumpkins, remember that a centerpiece doesn’t need to be complicated to make a real impact. Choose the pieces that feel like you, add a few natural touches, and let the season do the rest.
Happy Fall Decorating, Friends!


Beautiful arrangements for sure! Honest question- do you remove the various items on the runners to accommodate the place sittings for 4?
When I set the table for company I take everything off and set a fresh table and rearrange what I have on the table to accommodate dinner conversation. Hope this helps.
you are always the best at inspiring me to get busy! and you know neutrals ! nobody does it better! which is great for someone who fears ORANGE! thank you! HAPPY SEPTEMBER!
Happy September, June!
These are lovely but how embarrassed you must have been by the too-tall centerpiece! Surprised the guest didn’t ask you to move it—just doing so seems rude even if she couldn’t see around it. (Sounds like something my evil sister would do!)
I have a small collection of ironstone and other old gravy boats and cream pitchers that I often use. Gravy boats work especially well when I open out the table. A little oasis or a wire frog and it’s surprising how wide an arrangement you can make, right?
Always enjoy your posts.
HI Laura, I was not embarrassed at all. The arrangement was not that tall. I thought my guest was a bit presumptuous! The ironstone pitchers sound lovely to use in a fall centerpiece.
Stunning arrangements and great tips! I was just reminding a friend to clip some hydrangea stems to bring in and dry. They last for years.
Our hydrangeas are gorgeous this year! I’ve been clipping for a couple of weeks.
Ok – am I the only one who has problems with bringing outside items inside? I did the berry thing once, but soon realized the darn things had worms coming out of them. Yuk! just so disgusting and disappointing. I’ve never done it again. Is there something you spray on outside items before bringing them indoors?
Hi Vicki, we all have stories about a decor ‘fail’. Don’t let that discourage you! Remember, you are brings nature indoors! Try bringing pumpkins or bittersweet or mums. Give it another go!
Today’s blog post is the best of the internet! All of your ideas are easy to copy and can be achieved with things that most of us have in our fall stash! Thanks for showing me how to use the “old stuff” in new ways. 🙂
You are so welcome, Judy! Happy Fall
I love the idea of a fall floral centerpiece! Just enough without using alot of pumpkins throughout the house. I am becoming more simplistic in my seasonal decorating. Now Christmas might be a little different. But really less is more. Now where did I learn that?
LOL! I hope the post was helpful.