Beautiful Decoupage Easter Egg DIY

This is such a common title for such beautiful things! The title says nothing about how easy these pretty eggs are to make, how fun they are to create, or how stunningly beautiful they turn out. All you need to make Torn Tissue Eggs are paper napkins, regular old store-bought eggs, and ModPodge.
That’s it! I used what I had at home and in the frig and loved making these amazing eggs! I can’t wait to show you how because I think you will love making them too…
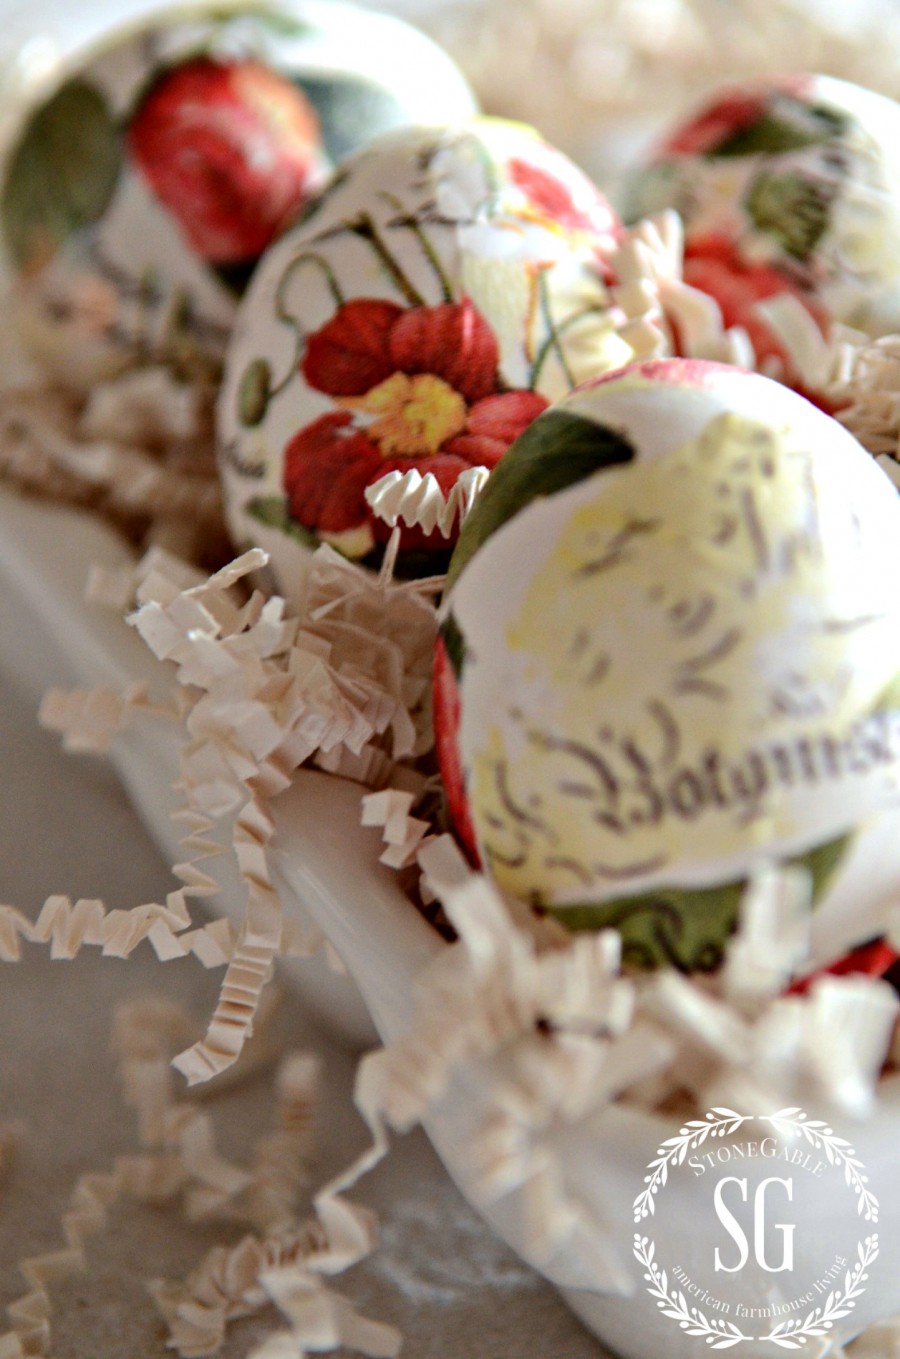
Even if you aren’t a crafter, YOU CAN DO THIS! Let’s dig right in and make some pretty eggs!
StoneGable Torn Tissue Eggs
Materials:
- blown-out eggs… I use the real deal. There is something so beautiful about the “feel” of the eggshell that cannot be duplicated. Very nice when you are not covering the entire egg. I blow the yolk and white out of the egg by tapping out a small hole in the top and bottom of the egg. I use the tip of a small sharp knife to tap an opening. Then I literally put my mouth over one of the holes and gently blow the contents of the egg into a bowl.
- napkins with designs and or great colors
- ModPodge
- wax paper to work on
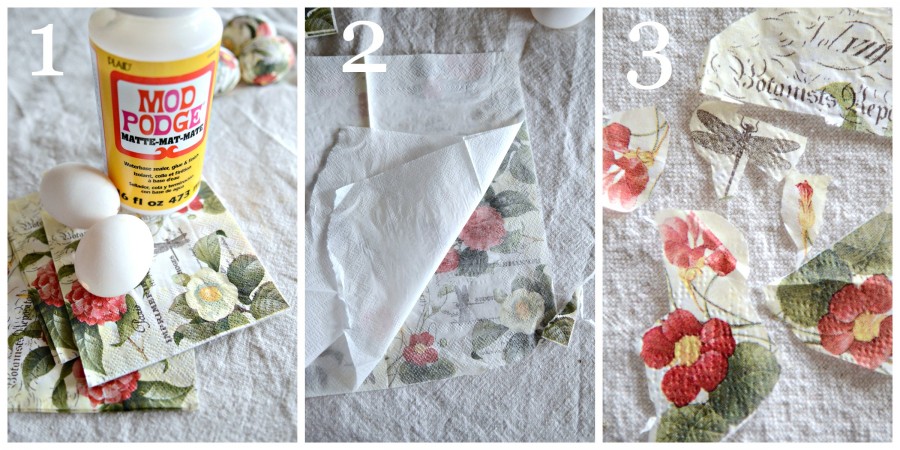
2. Separate the ply’s of the napkin and use the top designed tissue. To separate the napkin, tear the edge to expose the layers and pull apart.
3. Cut out or tear the portion of the tissue you want to put on the egg. If you are covering the whole egg tear larger sections.
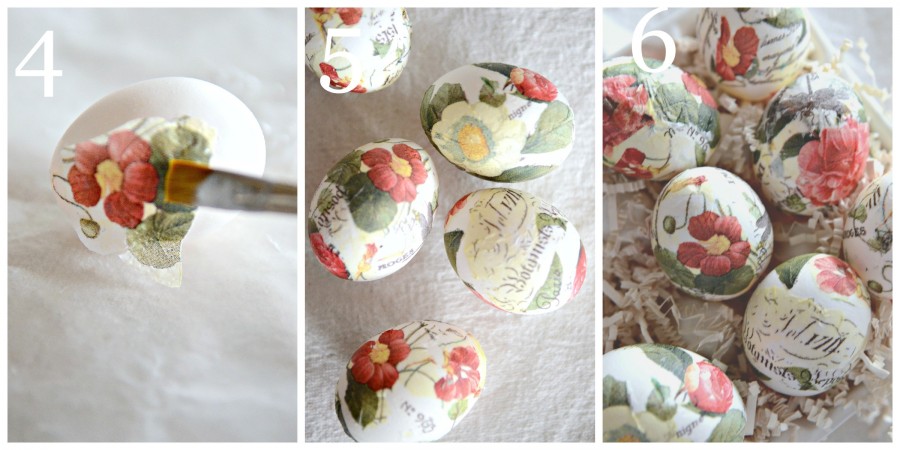
4. Put a dot of Mod Podge on the spot you want the design to go with a small flat paintbrush. Place the design over the dot and press down with the paintbrush. Put a little more glue on the brush and paint Mod Podge under the design and on to the egg. Put a little more Mod Podge on the brush and gently brush the design onto the egg starting in the center and working out to the sides.
Notice I am working on a sheet of wax paper. Very important! Your designs won’t stick to it.
I didn’t worry about the wrinkles, I just gently kept smoothing them out with the brush and my finger. If the design breaks or tears, that’s okay. It makes it look “artistic”.
5. Work on one section of the egg at a time. Give it time to dry before working on another section.
I did work on several eggs at one time. That way I could continue working, moving from egg to egg.
When you are happy with the eggs let them completely dry. Turning them so the whole egg is dry.
6. Put them in something pretty and show off your little work of arts!
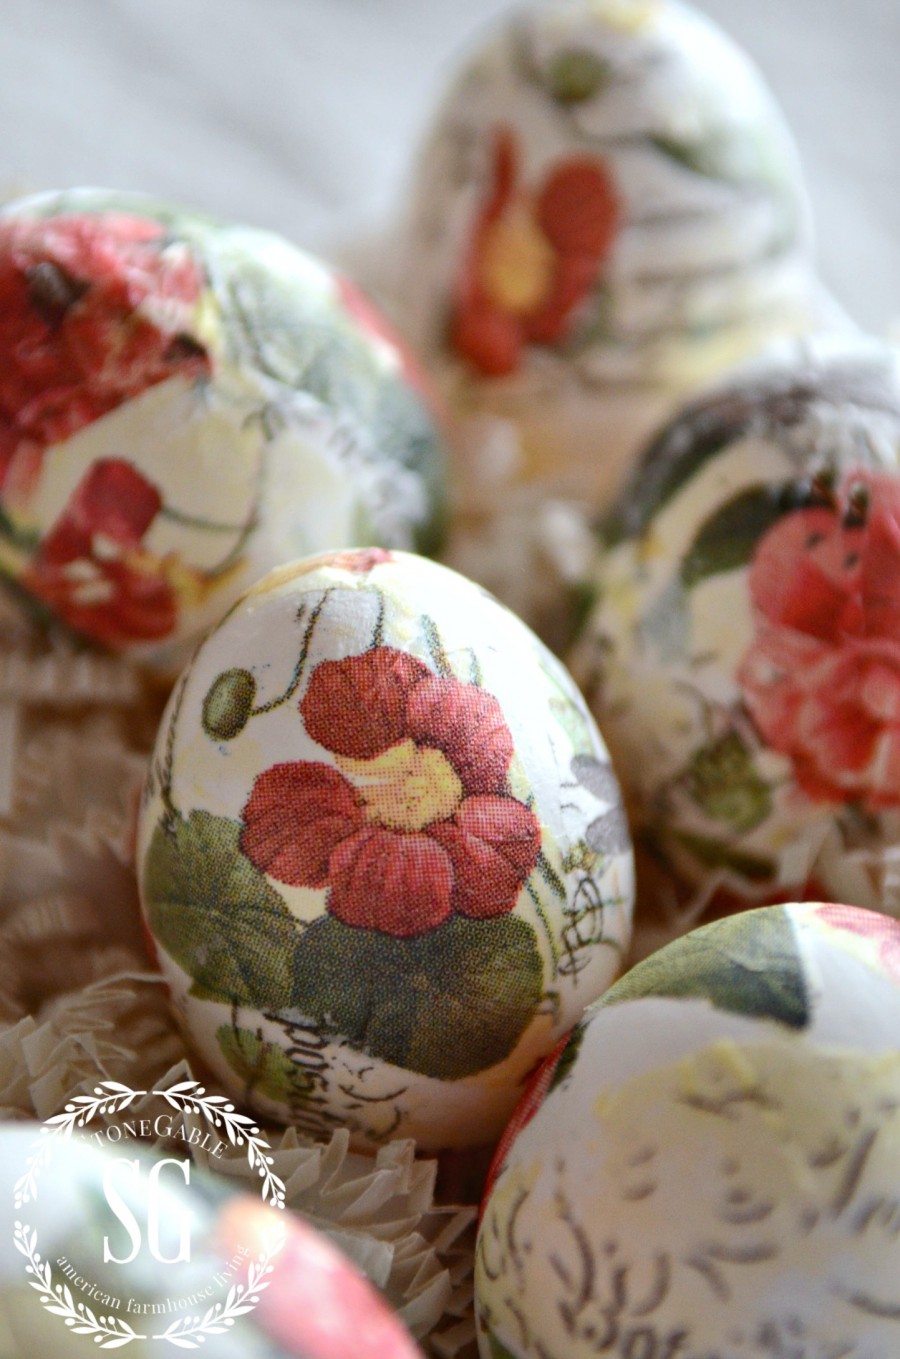
Here are some eggs that I made for a vignette on my kitchen table… a totally different vibe!!!! Sorta fun and kitschy!
See, you are only limited by your imagination!

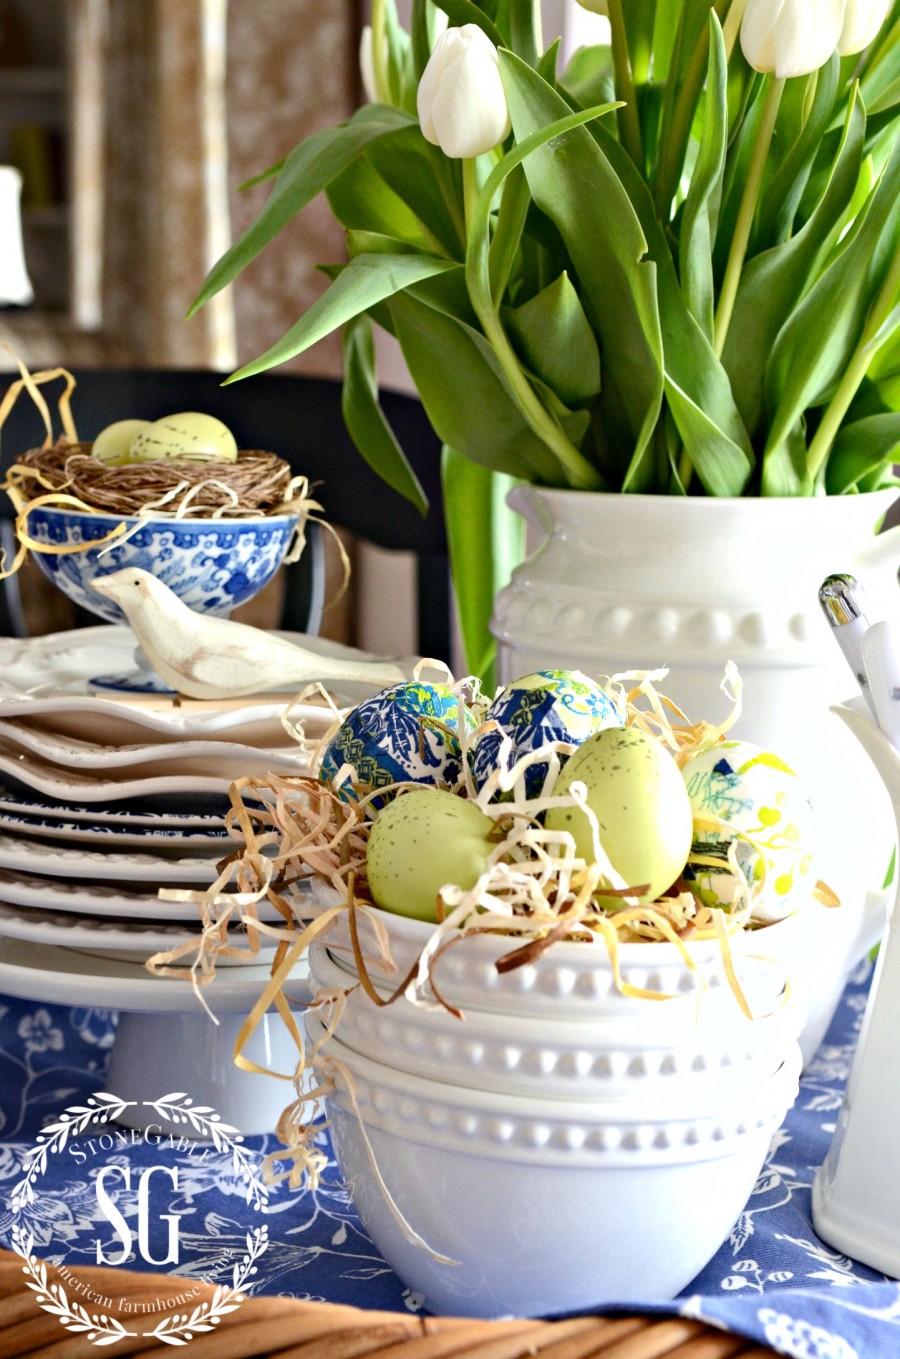
To see my Spring Kitchen Table vignette, with the fun torn tissue eggs, click HERE.
Remember to pin this to your Pinterest SPRING or DIY boards. You can follow me on Pinterest and see all the great things I’m finding to pin HERE!


Oh Yvonne these are gorgeous! I love, love, love them. Is there anything you cannot do my beautiful friend??
Hope you have a happy and blessed day!!
Beautiful, Yvonne, thanks for sharing your creativity!
These are fabulous- can’t wait to try it out!
Beautiful, Yvonne.
Yvonne, these are beautiful! Now to just find some pretty napkins:)
Simply beautiful! Would this work on plastic eggs? I have not tried mod podge believe it or not.
I think this would work on plastic eggs. I love the texture of real eggs. I think it makes a difference!
Thanks to you and everyone for your additional ideas.
Patti
Yvonne, these DIY eggs are so pretty! I think I would probably use the store-bought plain faux eggs, to avoid the extra work/time in blowing out and cleaning REAL eggs! I’m lazy ! Ha! 🙂
They are so pretty, Yvonne! Thank you for sharing!
I love the endless possibilities for these beautiful eggs! Your blog is my absolute favorite- the format, the photos- it all creates a little corner of happiness in my day-
And I can’t tell you how much I appreciate not having to chase a pop-up around my screen to explore your lovely blog ! : )
I love covering things with paper napkins and tissue paper. Rather than using real eggs though I prefer to use the inexpensive dime store variety. If I drop one it won’t break easily. Yours are gorgeous!
You inspire me ! Your eggs are just wonderful! Thank you 🙂
Gorgeous! I look forward to all of your posts! You are a favorite of mine!
Hi Yvonne ~
These eggs are so pretty ~ love them ~
You know I will have to try this one ~ Thanks for always giving me such wonderful ideas.
I’ll send you a picture when I’ve finished.
Have a wonderful day.
Rose
What a great project, it’s inexpensive and looks super easy. I will be doing this for my dining room table. Thanks for sharing your talents.
Gorgeous!! Thank you for the step by step!!!!
I made these 30+ years ago and rolled them in Diamond Dust glitter. A florist from Americas Ga purchased them for “Miss Lillian” Carter. I used rice paper and the Mod Podge too and he hung them from a Manzanita branch. Yours are lovely!
Thankyou for the inspiration… I think I will make a whole dozen and put tiny ribbons on top for hostess gifts… Oh, and a sprinkling of glitter.
You are so wonderful…thankyou Again.
I’m new to this craft. Can I use plastic eggs and colorful tissue paper with Modge Podge?
Yours look beautiful! Thanks for sharing the idea!
Happy Easter to come …
Patti
GIVE IT A TRY PATTI! I love the feel of real eggs.
I have made thees several years and I love them! They are easy and as you said a great project to use what is on hand!
Your eggs, as everything else you do look fabulous!
I’m going to do this but may buy faux eggs , I have never blown eggs before , but thease are so pretty ,may do some for my co workers .
Thanks
thanks for sharing your technique, Yvonne, i LOVE these!!!
Gorgeous!
I am on my way to Hobby lobby for Hodge Podge and a small brush. I hope I can make a few pretty eggs. Your Spring Kitchen Island is so lovely and simple too. I am on the computer so hope this will get to you. Much Love, Mother
LOVE to hear from you Mom! xoxoxoxoxoox
So clever Yvonne and lovely. Thanks
How do you blow out eggs? I have never done that! We need a DIY tutorial please on that technique. Love the way they look!
Great question Judy. This is so so easy to do! Tap a little hole in the very top and bottom of an egg with the point of a very sharp little knife. The hole should be about half the size of the top of a pencil eraser. Then take a toothpick and poke the membrane of the egg inside. Blow on one of the holes with your lips on the egg. Make sure you have it over a bowl… and the egg (yolk and whites) will come out through the hole leaving the empty shell intact. I run water into one of the holes and then blow out the excess water into the sink. I save my eggs for a big fritata or omelet. YUMMY!
Hope this helps!
I ADORE all things you do including this. I am on my way to make some today, actually.
I have a small tip that might help bring several steps together.
What I use to blow out eggs is a metal skewer. I tap it into the top and then straight into the bottom. I can pull it back in a bit, swirl it around to break the yoke and then pull it back out. I then blow.
The first time kind of gagged me since it reminded me of throwing up as the yoke and stuff came out. GROSS. I’m sure it’s just me.
Anyway, hope that helps.
My question: where do you buy your napkins? They seem rather hard for me to find anywhere else but Tuesday Morning.
I am sure I will go overboard but hey, all fair in love and crafts!
Blessings,
Rita (I’m the one longing for you to paint your Rice Poster Bed)
So pretty. I thought about using the plastic eggs too, but realized they won’t have the same affect. The thin one-ply of the napkin will be lost on the colored plastic egg. And the colored background around the cutouts will be shiny. The eggs will not have the delicate look of Yvonne’s eggs. Maybe the plastic eggs could be sprayed a flat white to look like real eggs?
I thought I was finished with Easter decorations. Now that I saw yours, I’ll have to use some of my pretty napkins and do some. Thanks for the inspiration.
What a great idea and an ideal way to use up the those one or two napkins that are left after the company goes home! I am going to buy Mod Podge tomorrow!
What fun!
You are right Fran! ps. you are the best!
Dear Yvonne: I love your blog. I look forward to it everyday. Your Easter eggs are beautiful. I made similar ones, but I used egg shaped Styrofoam. I used thinned out white glue to adhere the napkin and sprinkled crystal glitter on them and finished them off with pretty ribbon. With no exaggeration I have the eggs that I made 35 years ago and they still look beautiful. Wishing you and your family a blessed Easter.
These are gorgeous eggs Yvonne! I just LOVE them!!!
Once again, Yvonne, I love your style! The eggs are beautiful and I love the patterns on yours! I have made these, too, but I add clear glitter to them. They look so rich! Here’s a link to see the eggs with glitter on my site http://www.myhumblehomeandgarden.com/#!easter/c1dhh, I am not sure the pictures do them justice.
Love this idea!! They look amazing!
Hi Yvonne, I am so glad you made these eggs and shared. You see, I bought several dozen eggs at Wal-Mart a few weeks ago. For those who don’t want to deal with real eggs I found Easter decorating eggs that feel like the real thing and have weight to them like an egg for just $1.98 per dozen! The first dozen I painted soft blues but have not been inspired as what to do with the second. I spent an hour working on beautiful napkins with a french theme with mod podge to my eggs. Just love! Thank you for the inspiration!
These eggs are gorgeous. Over the years my daughters and I have blown out eggs and dyed them. My girls feel they are too old for egg dyeing now, but I still have cartons of them in the basement. We plan to “fancy” them up using your napkin tutorial! Can’t wait to see how they turn out. Happy Easter!
This is a great quick and easy project. I really like that type of project. Even though my daugher is older, I think this is one that she would even like to do. Thank you for the tutorial.
These are so pretty (and easy) they are just the thing to get me crafting again! Thanks for sharing.
I am new to your blog but I do love everything you do! I want to use all you ideas.. The covered eggs are so sweet. I do have a question. How do you store all your beautiful items? Often I see things rotated throughout the house but with so many seasonal items you must have a great way to keep them all looking fresh and new. Maybe you have coveted this before and direct me to it? Blessing to you this Easter Season! Annette
How cute is that! So excited to try it out!!
You are definitely the Queen of Inspiration. I have been looking EVERYWHERE for ideas like yours and now that I have found your blog, I will be busy creating for a long time. Your egg idea and tutorial are the perfect compliment for my Easter table and I actually think I will make more tissue eggs for other seasons as well. Combine this with your “nest tutorial” and you have brought joy to my day. Thanks so muchYvonne.
Yvonne, thank you for this idea. Love, love, love it! And, especially love that it’s easy, doesn’t cost a lot and fun.
Ok, Yvonne, now you have me wanting to make these beautiful eggs. I have a question. Would making these torn tissue eggs be safe and edible if done on hard-boiled eggs a day or so before consuming them?
These are absolutely stunning! Thank you for all your hard work and creative ideas! You are so talented and I’m so happy you share your inspirations with all of us! You are the best!
Oh Yvonne these brought back fond memories for me! My mom had a very creative friend that would give her a couple of eggs like this every year. She displayed them on the mantel in our living room. Just beautiful! Thanks for your wonderful blog!!!
Hi, how do you blow out the egg?
Hi Ricie, Poke a hole in the top and the bottom of a raw egg with the tip of a thin sharp knife. Make sure to break the little membrane so the egg “guts” can squirt out. Blow in the one end while holding the egg over a bowl. The inside of the egg will come squirting out. Rinse out the egg and let dry. I hope this helps.
Where did you get the napkins to make these?
I found them at Tuesday Mornings. Any store that carries home decor and gifts should carry these kind of napkins. Hope this helps Amy.
Pode-se usar ovos cozidos para fazer este trabalho?
I have dishes similar to yours, but I don’t have a pitcher. Where did you get yours, what brand are they. Everything looks so lovely and Spring-like.
Hi Cathy. I find my pitchers at HomeGoods. Hope this helps!
This is such a great DIY project. Thank you for posting. I have the eggs ready to be covered, but I can’t find any pretty tissue paper or napkins. I did pick up some polka dot tissue paper from Target, just because it’s all I could find that is even close to being nice. Any suggestions would be appreciated . Thanks You!
What a great idea! Gorgeous twist for egg decor, I love it! I featured these on my friday favorites {easter diy}. 🙂 You are welcome to come check it out: https://www.stonegableblog.com/torn-tissue-eggs/
Thanks for sharing!
Jennifer Mae
Thanks Jennifer Mae!
I cannot wait to make these. I still have time to hunt for beautiful napkins.
These eggs do look beautiful. I need to make them with my grandkids.
I absolutely love the torn tissue eggs! Can’t wait to try this for Easter!
Perfect for a quick “spring pick me up” project! I used colored foam eggs ( from my stash) that complemented dollar tree napkins. Fun! I enjoy your blog!
Wow! These are beautiful. I am not a crafter but I am going to try it. Thank you Yvonne for all of your inspiration.
I love the beautiful eggs that you made using paper napkins. I hope to give it a try.
Love the eggs!
Another project your inspired me to do this year for Easter. I spent a little time yesterday making the decoupage eggs with some pretty napkins I found. They turned out so beautiful that I can’t wait to go find other napkins to make some more!!! Love your blog and design ideas!
These are real charmers deserving all the compliments received. Love the bold happy colors you’ve chosen…Perfect!
The eggs are absolutely gorgeous! Can’t wait to try them.
Thanks for the neat idea
What a beautiful, charming idea~ Would love to try this. Wondering how you dried eggs? Did you leave them out on wax paper? Would taking a hair dryer to them help speed up the process without ruining the effect? Thanks for sharing!!
Hi Penelope, I did leave them out on waxed paper. I bet a hair dryer on a cool setting would help, but might blow them around a bit.
These eggs re beautiful! I was wondering if you could do the same to hard-boiled eggs?
You probably can, but then they would eventually spoil and smell very bad.
These are so pretty, Yvonne. How big does the hole in the egg need to be in order to get enough water in to wash out the inside? Also, do these keep for a good while? Or should they be thrown away at the end of the season?
Just a tiny one. The size of a pencil point
These eggs are so pretty!! I even think I can do it!! Thanks Yvonne! The vignette is so pretty too! Have a great weekend!
GORGEOUS!
Yvonne, love your designs. Thanks for sharing your beautiful eggs and the procedure on how to do your design! Happy Easter to you and your family. Keep your wonderful decor ideas coming our way!
Happy Easter to you and yours too, Terri!
Thanks for the inspiration Yvonne. I’m going to try doing some eggs with the grandchildren this weekend. Have a great St. Paddy’s Day.
Quick, easy & beautiful!!! Thank you so much for sharing!
SO SO pretty. I told myself I would do this from a post you did last year, and I need to do this –
it is just gorgeous! Love love love it!
I just love your post. The variety of egg creations are absolutely beautiful. I also appreciate your Inspirational comments. So glad I found your site. Thank you for using your valuable time to share.
Shirley, I’m thrilled you found us too!
Yvonne, every creation you share with us is more beautiful than the last! Your eggs are the most lovely essence of Spring! Thank you!
These Easter eggs are amazing! I’m making plans to decorate our home with them. Thank you for your inspiration and instructions, Yvonne!
I have a question about MOD PODGE. Seems that when I used it, it felt sticky even after it should have been dry. Is it just me? Are there more than one type of it? I want to cover photo boxes with fabrics or paper, but don’t want them to be sticky. Any advice would be appreciated.
I’m not sure about other types of Mod Podge Barb. It is rather sticky until it cures. I think less is best when using this product. Do some sample items using less and see how it turns out.
These are truly beautiful and a real asset to a room. I did some good ones a few years back with cats and stripes. Wow the stripes were tricky. We got some interesting results
I would use matte medium instead of Mod Podge
Great question, Matte. I’ll add that to the post.
These are so pretty! I am always looking for adult program crafts for my library customers.
About how long does it take to make it and dry it? It it work ok on ceramic eggs too?
Yvonne,
Thank you for sharing your creative blogs each week. I always look forward to reading them as you are so creative. These Easter eggs are so beautiful and I will look forward to trying to make them myself.
I like this idea.I will try and nice way to share a basket of eggs and other goodies with Olivia adults that are special in your life.
Your paper napkin artwork is so professional and so beautiful that it took my breath away. I am now a follower of yours. Thank you for sharing your lovely Talent with us.
Barbara in Dallas
Hi Barb! Thanks for following and now becoming a part of our StoneGable family
I made these eggs a couple years ago and loved them so I decided to make some for a friend and finished them last night and this popped up this morning! Thank you for idea… I love them!
So glad you are creating your own beautiful eggs, Sharon!
These are so lovely Yvonne! I keep forgetting about this technique – thanks for the reminder and the wonderful inspiration. I’m going to run out and grab me some pretty napkins asap! Happy Almost Spring!
Now you’ve inspired me to go buy WHITE eggs next time I’m at the store. Though the brown eggs I normally get would certainly be pretty with the right tissue – might give a real farmhouse look!
Yvonne, I made five of these beautiful eggs last week (there would have been six but the dog ate one of them). Gave them to my daughter-in-law and now I need to make more for myself. Gorgeous
spring DIY. Thank you for the idea and the tutorial.
Yay! So glad you are making these. So easy and so pretty, right?
I just found your website and it is fabulous!!!! I will spend many hours perusing it. I love your torn tissue eggs and have been making some the last few years. But where did you get those napkins??!! The French script red & yellow floral ones? I keep searching for them. I am obsessed with finding one like those!
Thanks for the great ideas,
Peggy Etheridge
Hi Peggy, I did those eggs years ago. Look on Amazon for interesting napkins. Hope this is helpful.
Be still my heart! Yvonne – the oh-so Victorian eggs are to die for! I LOVE the napkins you chose – the colors and pattern. I was not planning on doing a DIY project for Easter, but now I’m compelled to make these.
I’m so glad you are Joie! This is such a pretty, festive Diy!
Thank you for the napkin modpodge eggs!
Instead of wax paper, I have been saving the inner cereal bags to use when I glue or paint. I open them up and r wash them in the sink. They are very sturdy and I can wash them off and reuse multiple times. I first saw this tip on a junk journal blog and have not purchased wax paper for crafting in years.
What a great tip, Dawn! So clever and money saving too.