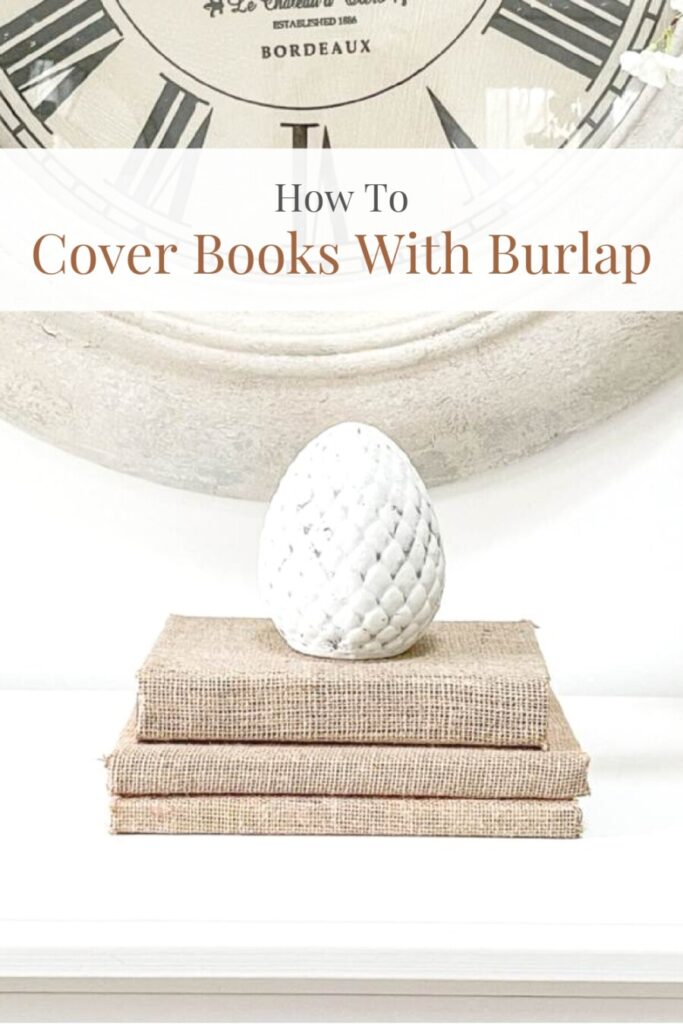
How To Cover Books With Burlap
I have a love for books! And I have way too many! Today’s post is all about using unwanted books to create fabulous, permanent, burlap-covered books!
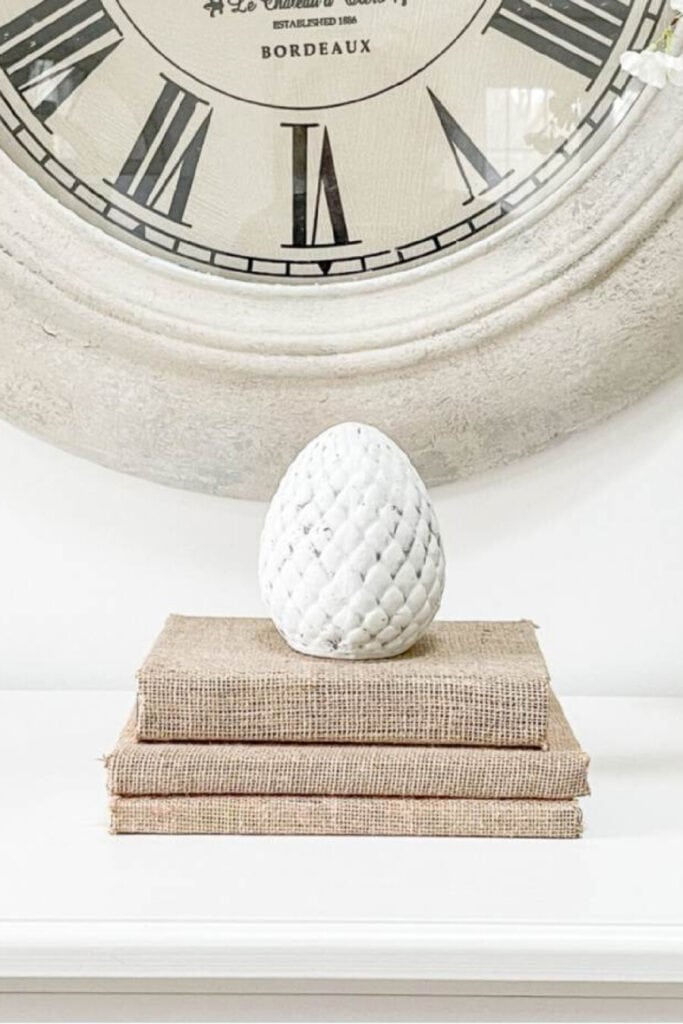
These books are so upscale and work wonderfully to enhance everyday decor!
Books can now look uniform and neat and very very chic! Once you cover a book or two you will be hooked! It does get quite addictive.
I’m now covering books I use because after making a couple of these burlap-y books, I can cover them without messing up the book itself! Let’s get crafty and create burlap book covers!
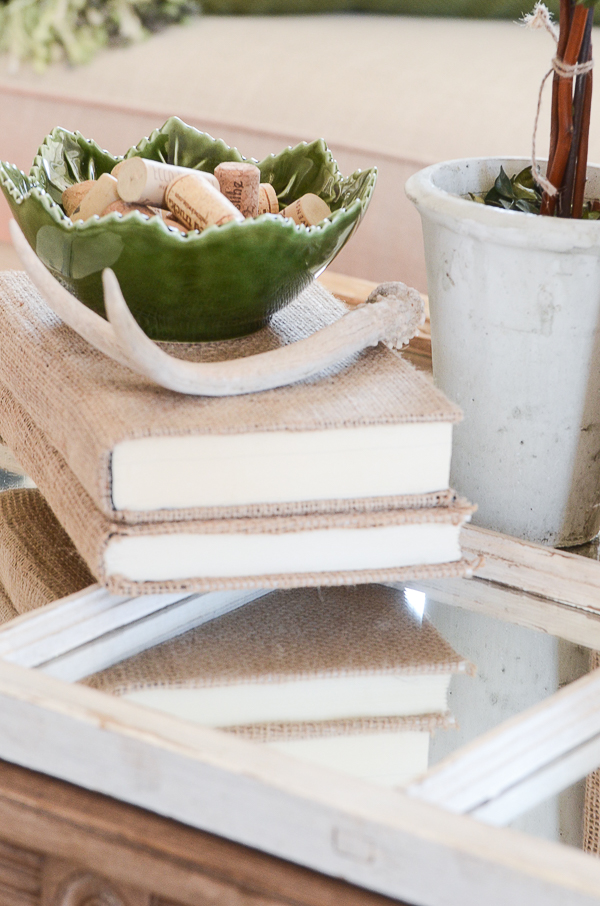
Burlap covered books literally litter my home! I use them as risers in vignettes and as a neutral, textural background for my decor. If burlap is not your “thing” try linen or other decorator fabric that works with your decor.
Just think how incredible your books could look!!! Let’s get started!
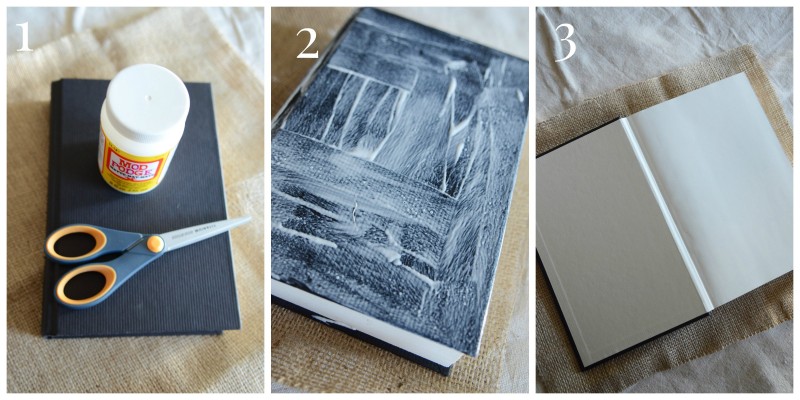
1. SUPPLIES:
- BURLAP- cut 2 inches longer than the book on all sides
- BOOK
- MOD PODGE
- SCISSORS
- FOAM ROLLER OR FOAM BRUSH
2. Pour a tiny, small pool of Mod Podge (not too much… you can always add more) onto the cover of a book. Cover the book with Mod Podge using a foam roller or brush.
3. Put the Mod Podged side of the book down on the burlap making sure there are 2 inches of extra burlap on all sides of the book. Press firmly.
Mod Podge the book’s spine and the book cover’s back side using # 2 instructions. Fold the burlap over the book pressing firmly. The outside of the book is now covered with burlap.
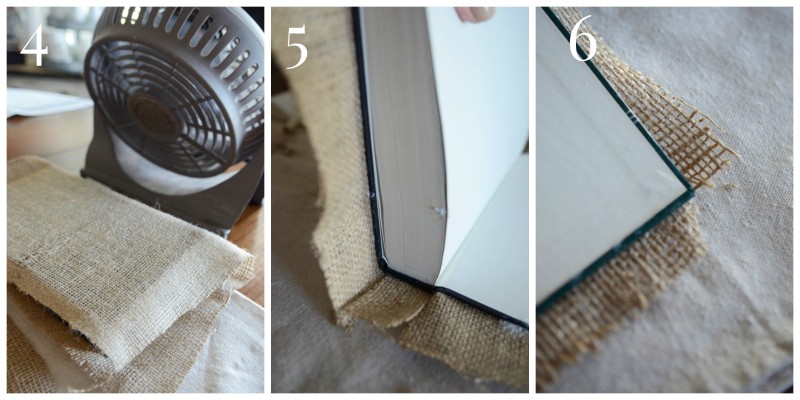
4. I use a small fan to dry the Mod Podge faster. This is optional but really cut down on drying time.
5. Cut two slits in the excess burlap on either side of the book’s spine
6. Cut the burlap on the diagonal at the points of each book corner as shown above.
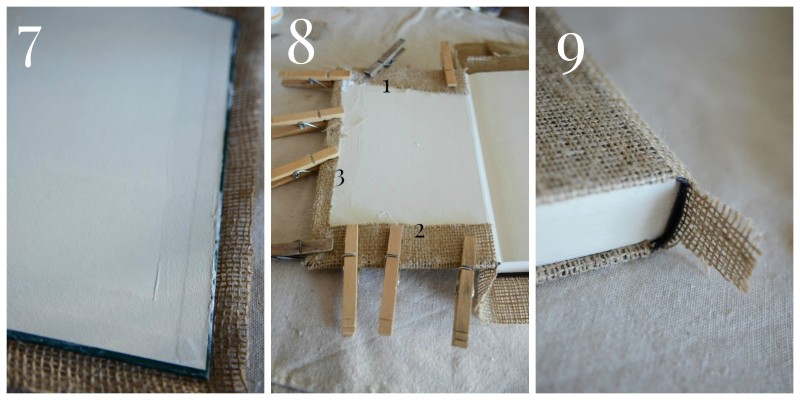
7. Roll Mod Podge along the inside edges of the book cover, about the width of the excess burlap.
8. Fold the burlap over the top and bottom edges of the book, as shown (#1 and 2), and press the burlap to adhere to the inside of the book. I used clothespins to hold the burlap down until everything is dried enough to stick together. You can turn the book over to work on the other cover if you use clothespins.
Fold the burlap over the remaining edge of the book, as shown (#3), and adhere it to the inside of the book, following directions #8.
9. The spine tail of the burlap should be sticking out.
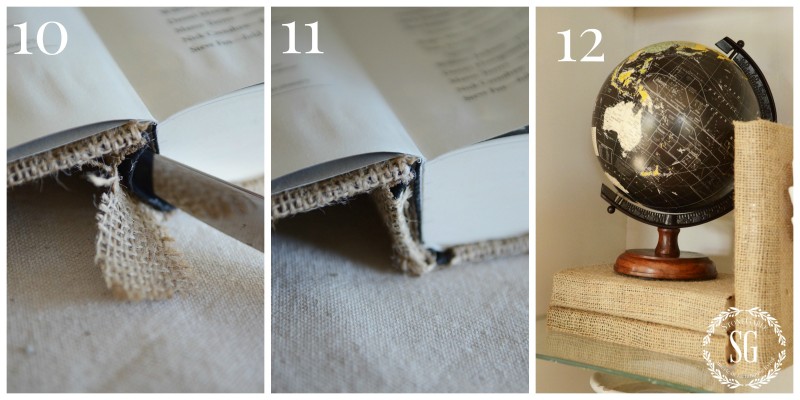
10. Widen the opening of the spine by inserting a dinner knife into it.
11. Use the dinner knife to push the burlap tail down into the hole in the spine. Brush Mod Podge down into the hole and tame any stray burlap threads with Mod Podge.
12. Dry completely and decorate!!!!
Here are a few tips to help:
- books that are all one color work best. If the hardcover of the book is colorful it will show through most burlaps. You might want to paint the book first and then cover it.
- If the title on the spine of the book is colorful or metallic and you don’t want it to show through Mod Podge an additional strip of burlap to the spine before covering the whole book with burlap
- I like the look of gold lettering on the spine showing through burlap on my books. Give it a try! Sorta classy!
- Burlap responds very well to Mod Podge. If there are any stray burlap threads, glue them with Mod Podge and clothespin them down until they stick to the book on their own.
- You can adhere the book’s endpaper to the cover with Mod Podge to hide the raw ends of the burlap
- there are so many decorative burlap patterns to choose from… get creative!

Love the burlap covered books. As a child we used to have to cover our school books in plain brown paper to protect them so this brings back memories. The burlap is much nicer than the brown paper 🙂
Thanks for the great tutorial – love the burlap covered books.
What a great idea. Thank you…
I have burlap covered books in my home and just love them. Your tutorial is very helpful.
Another thank you for another great tutorial.
Great tip on the Burlap Books, they look great!! Di
I also covered my school books with brown paper and agree that burlap is so much nicer!
Great detailed tutorial! The books look great and add such texture
Thanks for sharing. You always have the best ideas. Enjoy the weekend.
This was such a great idea. I went to our local charity shop and bought some books for $.50 each. I plan to cover them with burlap and use them for decor in my husbands office. Thank you for a great idea that can work in a masculine space too.
Hi Yvonne, I love books too and use them for décor pieces often. I am sad when the covers of books are messed up, but this is a great way to “fix” them and make them pretty again to use in our home as display items. Great tutorial on using burlap, or really any fabric or even nice paper to cover up the icky parts and make a useful pretty thing. Thanks so much for your inspirational blog; please keep those great ideas coming!
I love the burlap.I think all of us covered books in
brown paper bags,I also have used wall paper.Another
easy project.
What a neat idea. I remember doing this with brown paper bags for my school books.
A great idea!
LOVE burlap…great idea..maybe I will add some stenciled numbers to the edges…
Pamela, I love that idea!
This is the closest I’ve come to ALMOST getting the cover your books trend…only you! Thanks for sharing.
Love this! I just happen to have a large bag of books that I was getting rid of and now I’m going to take a few and cover them in burlap! Great timing! Thanks!
I covered books with burlap for my daughters wedding last year-as per your instructions. We had a different vignette on each of the tables at the reception, and the books added a lot of charm!
Love the memories your tutorial brings back. Your ideas are again brilliant! Thanks.
Karen, I’m so glad you are enjoying them.
Oh my! You made covering a book sound so easy!!! I love the idea and hope to try it!
LOVE the green pillows with the flowered ones. Where did you get the flowered pillows?
Love they idea of covering books, but before i tackle that ,I ‘m going to redo the bottom of a tray. 🙂
I love the burlap covers, it gives me sooo many ideas too on other covers!! Thank you Yvonne! I LOVE it
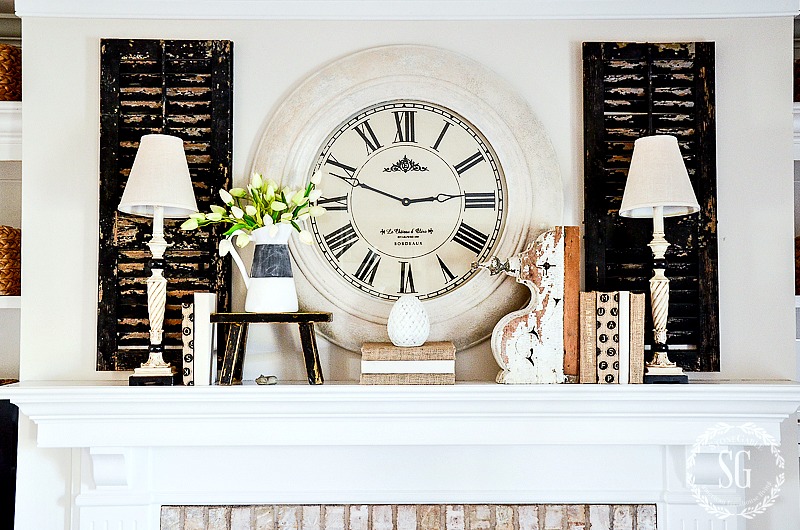
What a great idea. I love the vignette you created for post picture. That clock is awesome and the shutters and the….oh well..everything! I wish i had that talent. .
Thats pretty and easy to do !
I like the idea of burlap covered books. It does add an element of sophistication to any decor. Another thing I’ll have to try!
Actually is easier than I though so I will try a couple of them. Thank you!!
Fun idea to try out!
Thanks for the burlap book cover DIY. Very helpful.
I use books around my home, as well. I have a collection if old books that I bought at auction. I pick the spine colors and/or title of books needed for a particular display from my stash. I prefer to not cover them but have the interesting titles show.
I’ve always admired your burlap-covered book collection, Yvonne! I’ll give it a try soon.
Love the look. I plan to try some very soon!
Thanks, Yvonne. This was a great ‘refresher’ tutorial for me. I used this method for a guestbook for a rustic wedding that I coordinated. It’s fun to add classic/rustic embellishments, too. 🙂 I’m going to incorporate some into my decor, as you suggest!
Love this DIY project Yvonne -can’t wait to try it !! Hugs, Dorinda
Thank you for sharing the tutorial on covering books with burlap.
Yvonne, I’ve been looking for a quick project that uses burlap and fell in love with these covered books as well as your No Sew Burlap Covered Balls. Thank you another great tutorial!
Both of those projects are quite addictive!
Gracias por esta genial idea!!! Ya mismo salgo a comprar arpillera! Espero que queden tan lindos como los tuyos. kisses from Argentina!!
I can’t wait to try this burlap project. Where do you purchase the different types and designs of burlap? Very nice look. Jean
Does this ruin the book cover? That you so much for adding some class and sunshine into my life.
THANKS Paula!!! The book covers are glued so the burlap cannot be removed but the books can still be read.
When I was in grade school we used to cover all of our books with brown paper bags… This project is much prettier…. I’m going to do some books soon. Love this idea. Thank you
Thank you again, for your wonderful inspiration!
So sweet Laura!
Can you tell me approximately how much burlap you needed to cover one of your books please?
It depends on the book. Measure the front and the back and add about 1 1/2. And do the same for the length of the book. Hope this helps.
Fabulous and classy. I will be doing a few of tge many books I have, in burlaps. Thanks for sharing
You are so welcome, Ivory
Hello Yvonne. I’m relatively new to your blog. Can I tell you that you have certainly lit a fire under me?! I’d been feeling quite stuck when it came to our home. Your articles, pictures, and videos have been tremendously helpful and inspiring. A girl just needed some direction! Thank you!
How sweet of you to let me know Angela! Did you sign up for our daily newsletter. It is full of featured posts and more! Go here and get my Summer E-magazine and subscribe: https://www.stonegableblog.com/summer-e-magazine/
Such a great idea. I love this.
Thanks, Renae!
I’ve done this before but my clothespins stuck to the modgepodge coming through the burlap. I started putting in a sheet of wax paper and closing the book, doing the back side and doing the same thing, then closing the book and putting a weight on top!
What a smart idea Jennifer! Thanks for sharing.