GILDED PUMPKIN DIY
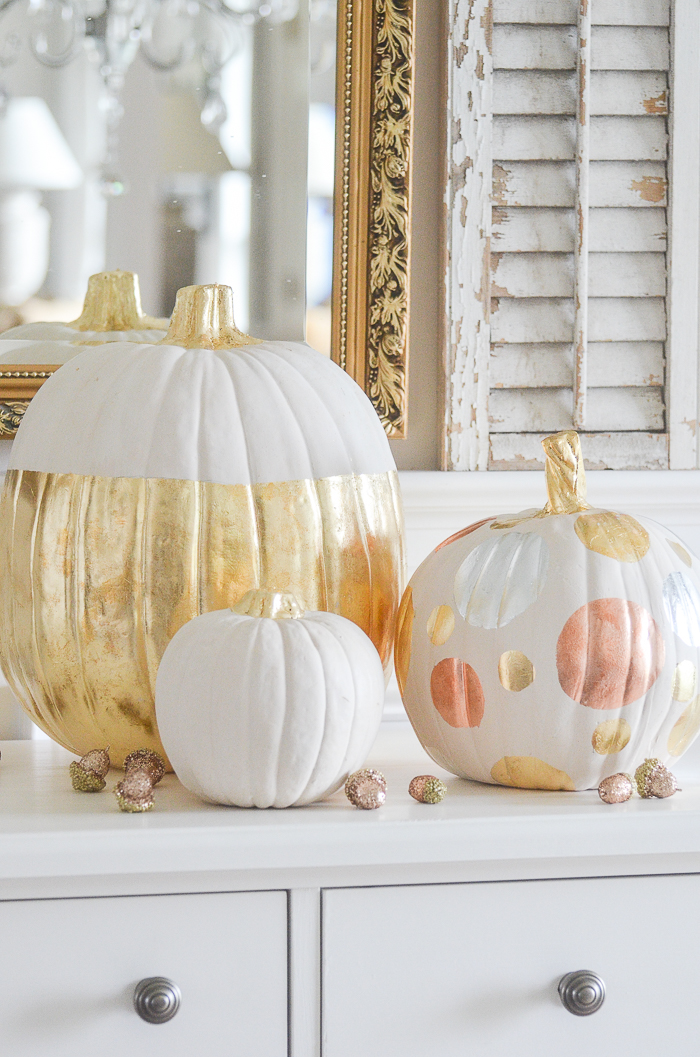
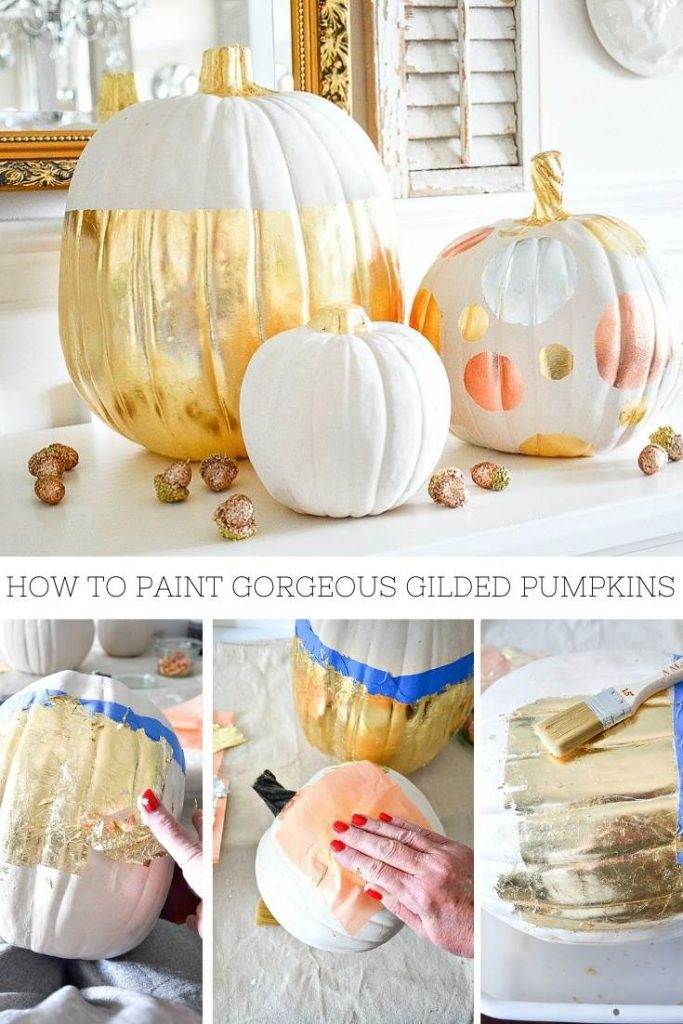
I LOVE gilded pumpkins! They are the belle of the fall pumpkin ball! This fall diy is addictive! The gilding process is easy to do and the results are more than beautiful! Let’s make these dressed up gilded pumpkins!
GILDING PUMPKINS STARTED WITH AN IDEA!
Have you ever had an idea in your head and when you made it the thing in your head came out so much better than in real life than you ever dreamed?
Well, that is how I felt with this gilded pumpkin project.
Let’s make these beauties!
WHAT YOU WILL NEED…
Here’s what you will need:
- Pumpkins (white)
- A Maker’s Studio Rescue And Restore Paint in Biscuits And Gravy
- Two books of Gold Leaf, One book of Silver Leaf and One book of Copper Leaf
- Synthetic Paint Brush, 2
- Sponge Brush
- Artist’s Brush
- Painter’s Tape
- Something to make different size circles. I use the inside of the roll of Painter’s tape, a cap from a baby bottle, and a quarter
- Water
- Lint Free Paper Towels
- Pencil
- Q-tips
- Something to cover your workspace
PREPPING THE PUMPKIN
The process was the same for all three pumpkins. I worked on these pumpkins over a 2 day period. This is a great diy to leave and come back to. Easy-peasy!
I painted a very thin coat of Rescue And Restore Biscuits And Gravy over the body of all the pumpkins.
I watered the paint down by loading my brush and then dipping it back into the water. As I spread it over the pumpkin with the water mixed with the paint and it gave the pumpkin a nice washed look.
This is not rocket science so I was not worried if some areas of the pumpkin were more covered than others.
Then I let the pumpkins completely dry.
THE PROCESS- CREATING THE DESIGN
I worked with the largest pumpkin first.
Before gilding the painted pumpkin I created the design on it.
I chose to create a two-toned pumpkin. About a third left white and the bottom two-thirds gilded gold.
I decided how far up from the bottom I wanted the gilding to go on the large pumpkin.
On my pumpkin, 9″ seemed like a good height.
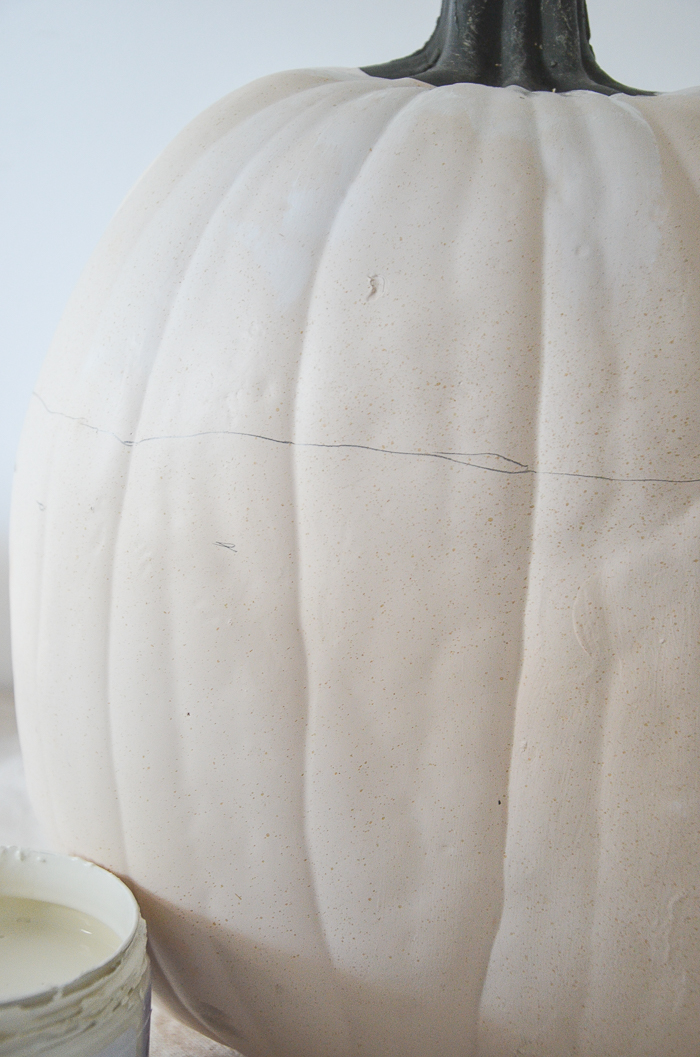
So I measured from the table 9″ up the pumpkin all the way around and connected the dots to form a line. See the image below.
Then I secured the masking tape a just above the pencil line all the way around the pumpkin.
GILDING
I love love love to gild things! It has become a bit of an obsession! Right now I’m working on gilded and burnished Christmas ornaments.
Don’t let gilding scare you! You really can’t mess it up. Remember to watch the video at the end of this post.
USING SIZING
Sizing is water-soluble type glue you paint on what you are gilding so the gold leaf sticks to it!
It is important to keep your hands free of sizing so the leaf does not stick to them.
So make sure to wash your hands with soap and water if they get sticky.
Starting at the masking tape, I painted a thin 8″ x 8″ swath of sizing on my pumpkin with a foam brush. I wet the brush first and squeezed it out in a paper towel before dipping it into the sizing. You want just enough sizing to cover the area.
In between sizing each section, I wrapped the brush in a wet paper towel so it would not dry out. And remember to put the lid on the sizing too!
The sizing will take about 10 minutes to “come to tack” or go from wet to dry but a little sticky.
Only put sizing on a section at a time.
USING THE LEAF
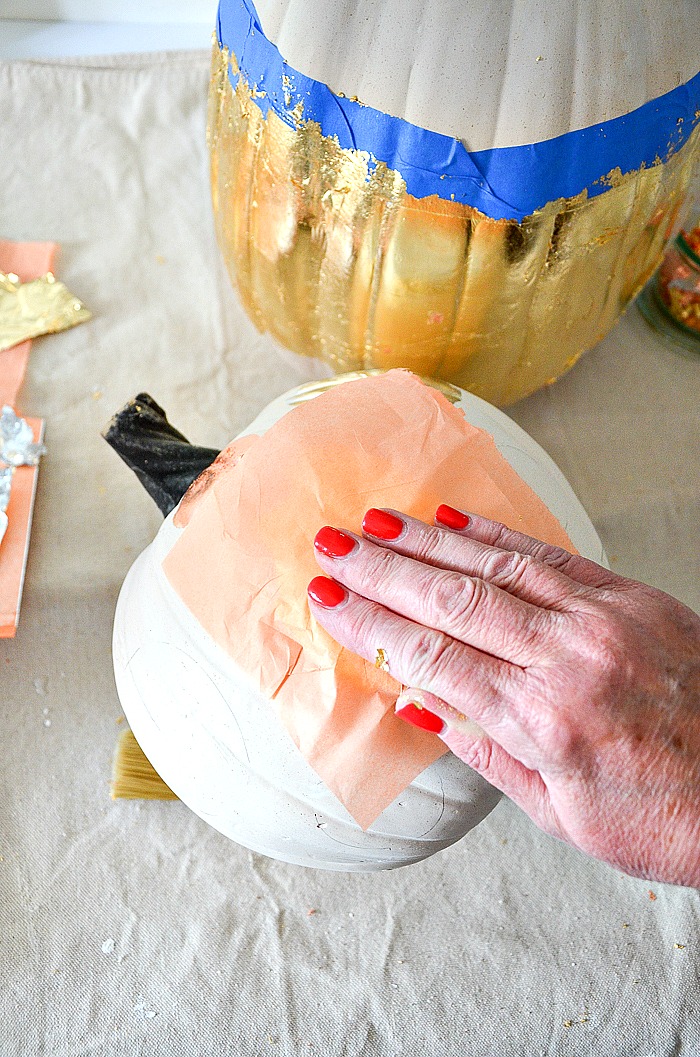
When a section “came to tack” I then laid a leaf of gold down on it the sized area and burnished it with a piece of the orange paper in the book. Please see the video below for the correct technique.
It’s not hard at all once you get used to it. And did I say it was addictive?
You can see how a section of the leaf tore in the image below, but that is no problem at all.
I just stuck it back into place.
BURNISHING THE GOLD LEAF
Burnishing means to rub! Once the gold leaf is on the pumpkin I took an orange paper from the leaf book placed it over the gold-leafed section, keeping the paper STILL. Then I rubbed the paper with my fingers.
DO NO RUB THE PAPER OVER THE GOLD LEAF!
Keep the paper stationary and use your fingers to gently and firmly rub THE PAPER.
This not only sticks the gold leaf to the pumpkin but also give it that gorgeous shine you could never get from paint! OH, it is beautiful!
WHAT TO DO WITH CRACKS OR BARE SPOTS ON THE PUMPKIN
There will be cracks and places the leaf does not immediately stick (just here and there) but no need to go back over it with sizing again. Just put a piece of discarded leaf over the area and burnish it.
ABOUT SAVING LEAF
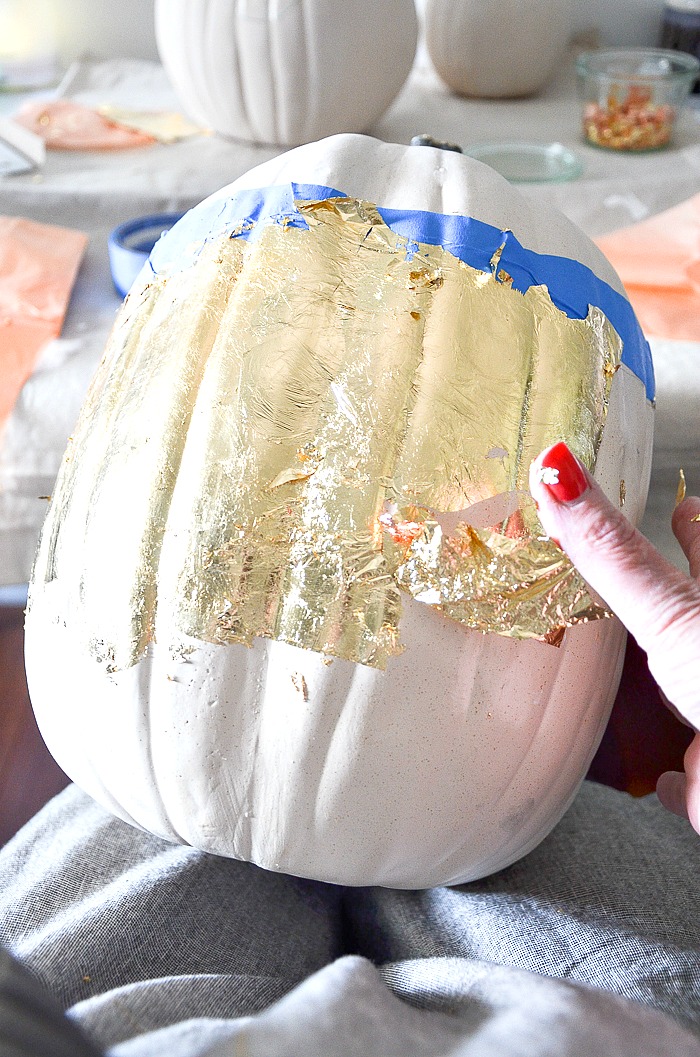
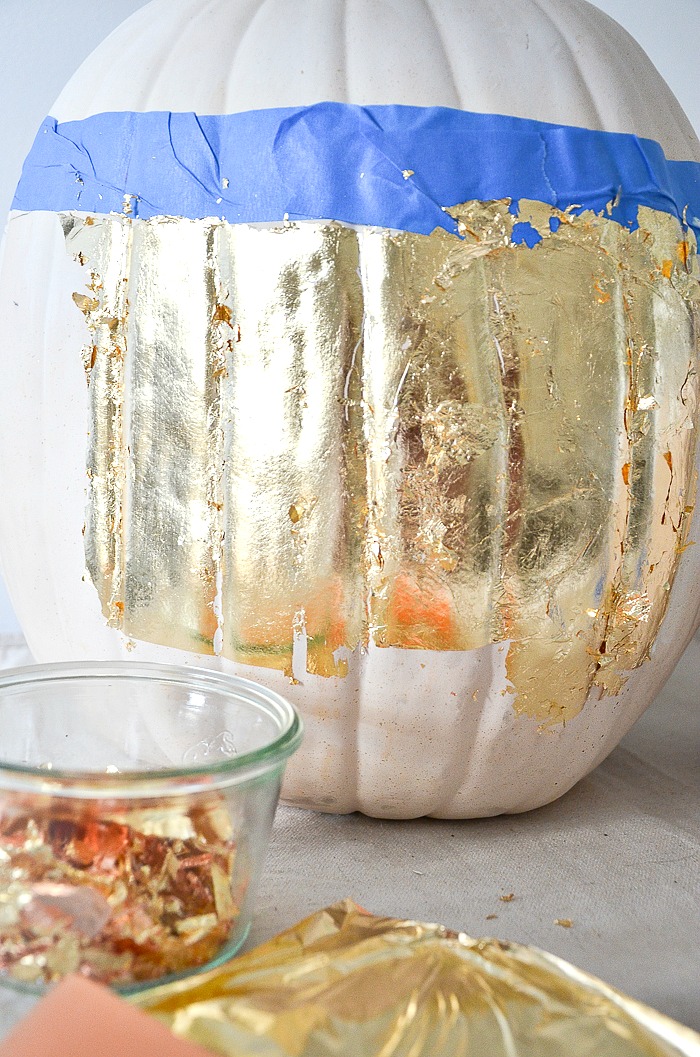
Here’s an example of the gold leaf on the pumpkin before it is cleaned up.
The book of gold leaf is in the foreground and a little glass container holds the odds and ends of gold, silver, and copper leaf from other projects.
To me, leaf is precious so I collect the leftovers and keep them together for future projects.
CLEANING UP THE GOLD LEAF
Next came cleaning off all the excess leaf.
I used a chip brush and put the pumpkin over a clean dishpan (remember I like to keep the extra leaf) and gently brushed it.
This allows the excess gold leaf to fall away leaving beautiful burnished gold on the pumpkin! You can always clean off the leaf over a trash can if you don’t care to save any leaf.
FIXING CRACKS IN THE GILDED PUMPKIN
Can you see a few hairline areas that the leaf did not adhere? Don’t worry! Just add you leaf over it and burnish it again.
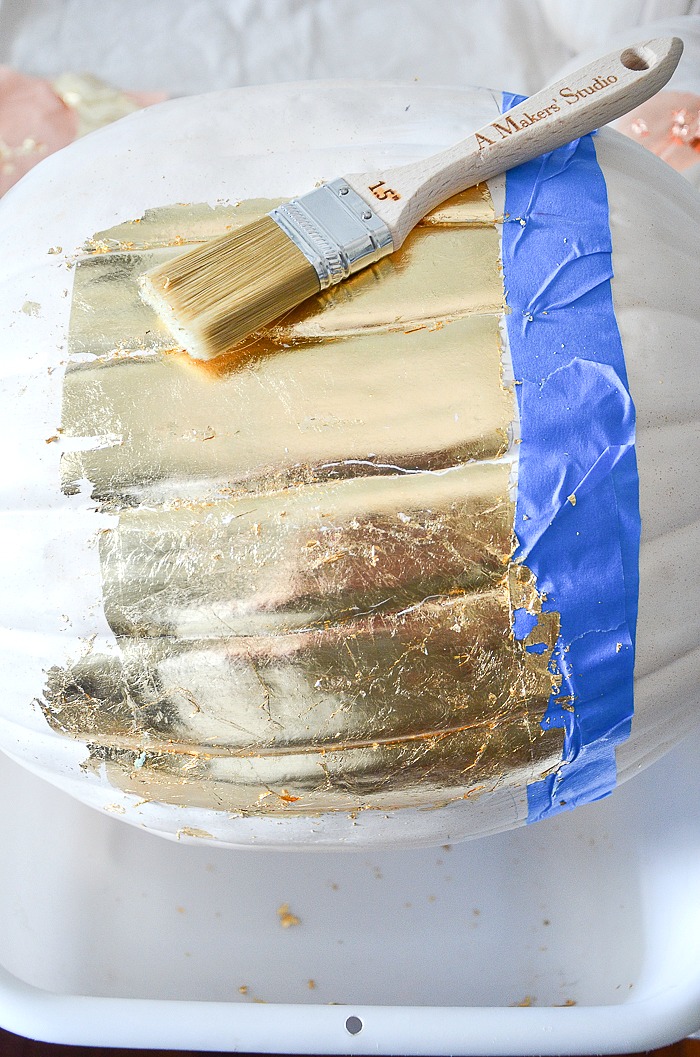
Continue this process all over the pumpkin in the areas you want to be gold.
Remove the painter’s tape.
VOILA!
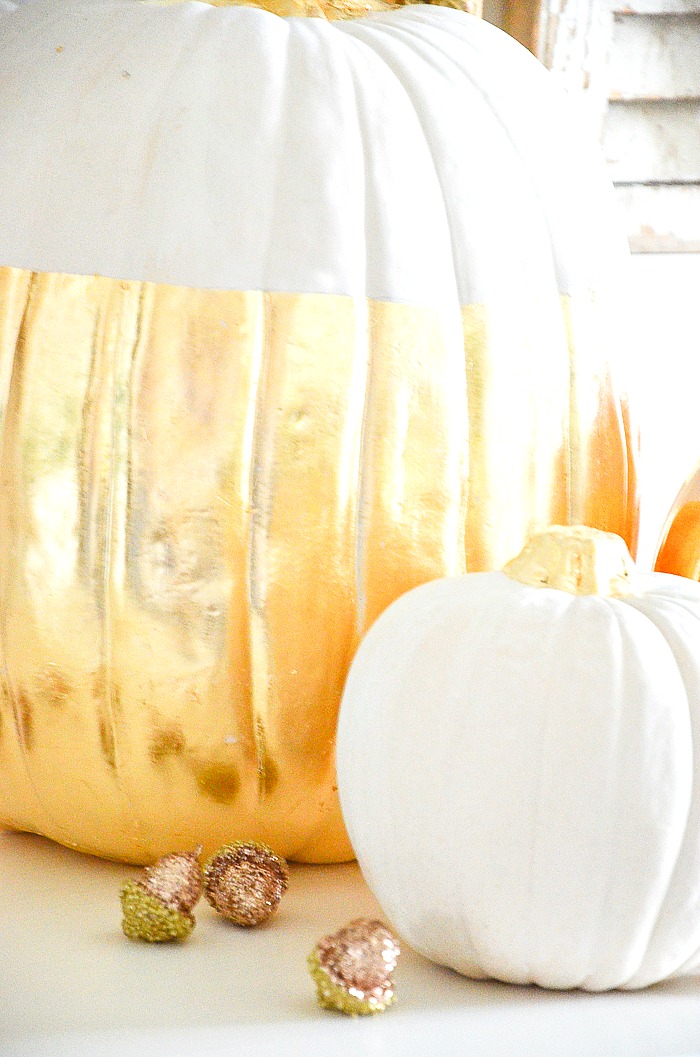
Voila, gorgeous gold leaf you could not get out of any can!
Gold leaf or any other metallic leaf is rich and reflective and swoon-worthy!
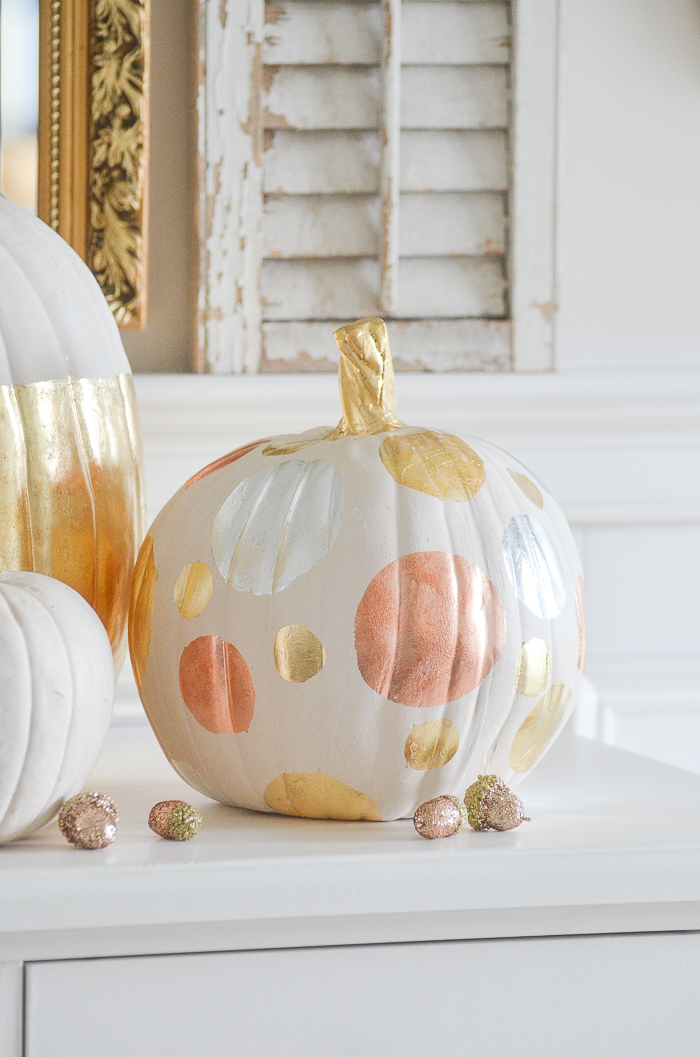
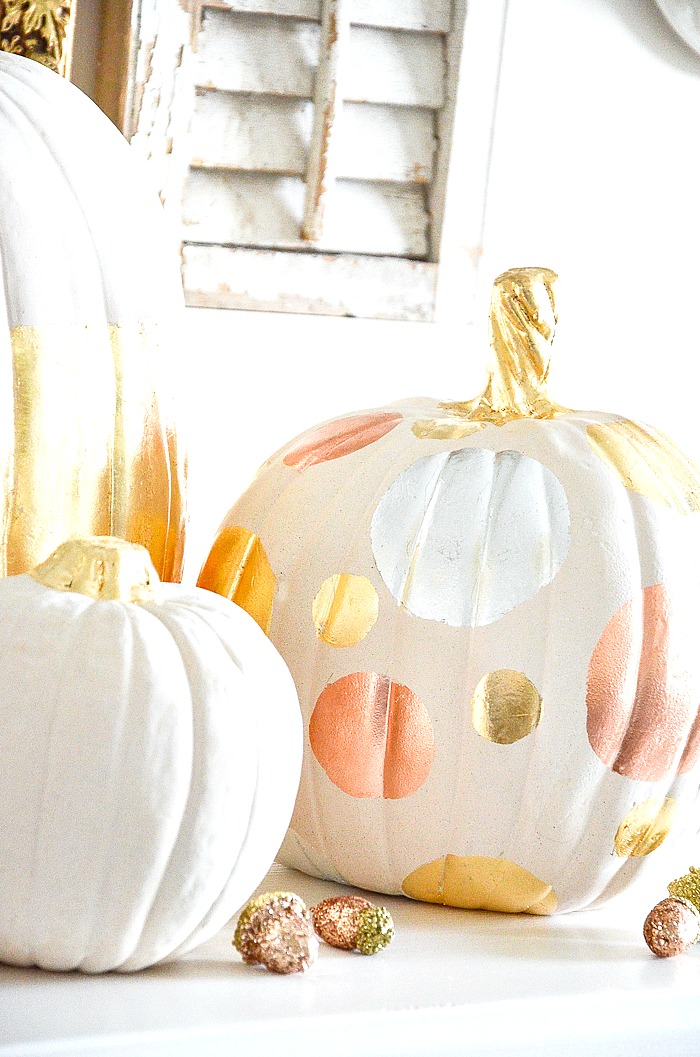
GOLD, SILVER, AND COPPER LEAF POLKA DOT PUMPKIN
To make the pumpkin with the gold, copper and silver leaf polka dots I first drew the circles using the inside of a painter’s tape roll, a baby bottle cap and a quarter.
I drew the two largest size circles first and then filled in with the smaller circles.
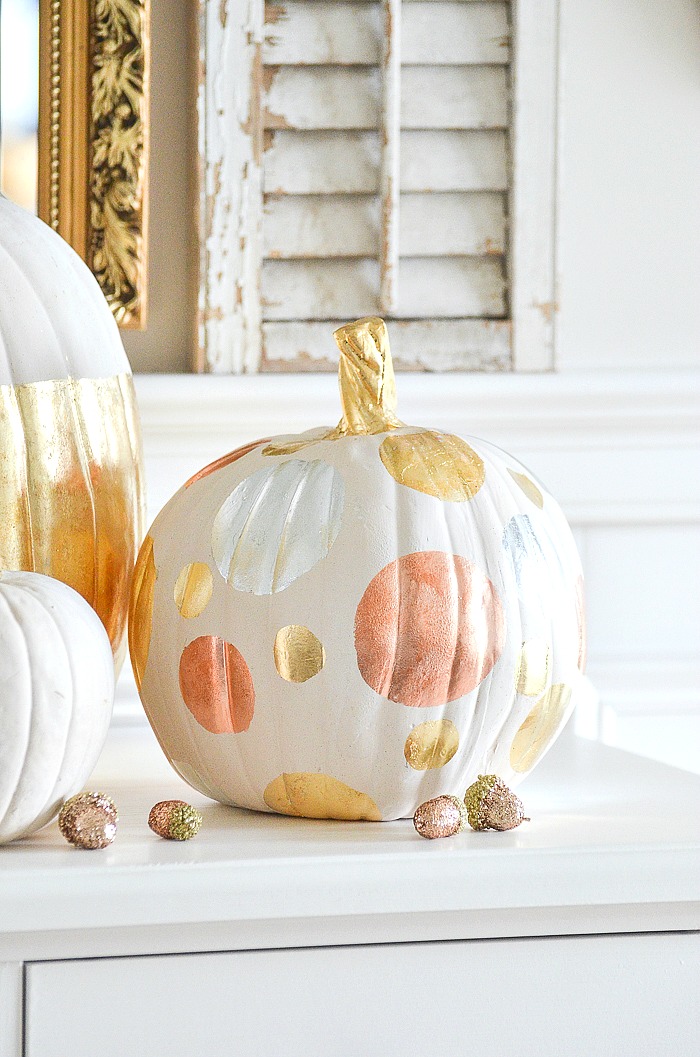
The basic process was the same as the large pumpkin.
I used a painter’s brush to paint on the sizing being careful to paint it just on the outside of the pencil marks and not to let it drip. Use only enough for a thin coat of sizing.
I sized and leaf one circle at a time. This insured that I would not get stay leaf onto another circle.
If a little sizing gets out of the circle and leaf is applied to it and sticks, don’t worry! Take a wet Q-tip and rub the leaf and sizing off.
Here’s a picture of burnishing the leaf on a circle.
REMEMBER do not rub the paper on the pumpkin but hold the orange paper down keeping it from moving and rub your fingers over the orange paper.
In the picture, I’m positioning the paper over the gold leaf circle.
See the gilding video below.
GILDING THE PUMPKIN STEMS
Lastly, I gilded the stem of the smallest pumpkin.
I sized the entire stem with the sizing on an artist’s brush and when it came to tack used a leaf to cover the top. I
did have to back over it to fill in the crevices.
I liked the way the stem on the little pumpkin turned out so much I gilded the other two pumpkin stems too.
TRIO OF GILDED PUMPKINS
These pretty pumpkins make quite a statement!
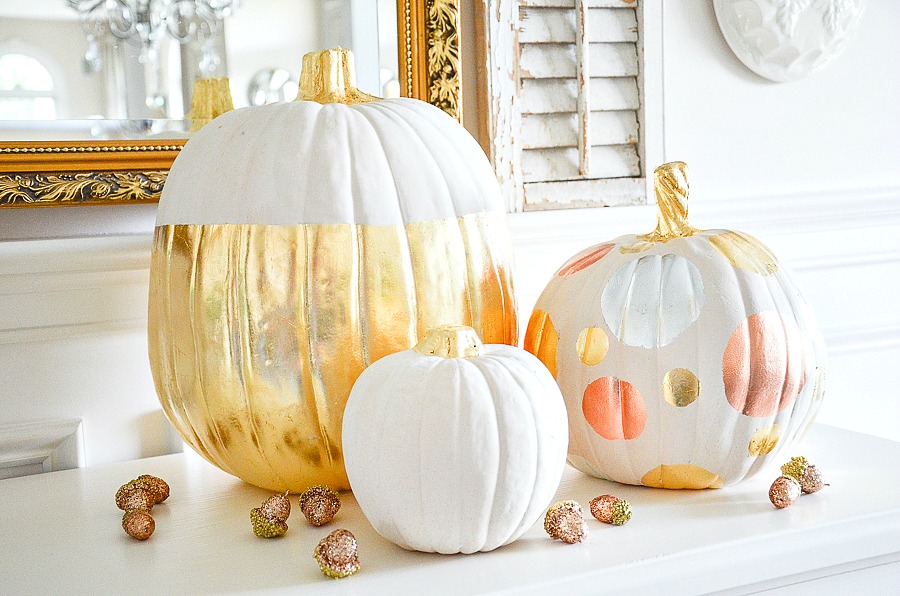
Just think of the option!!!
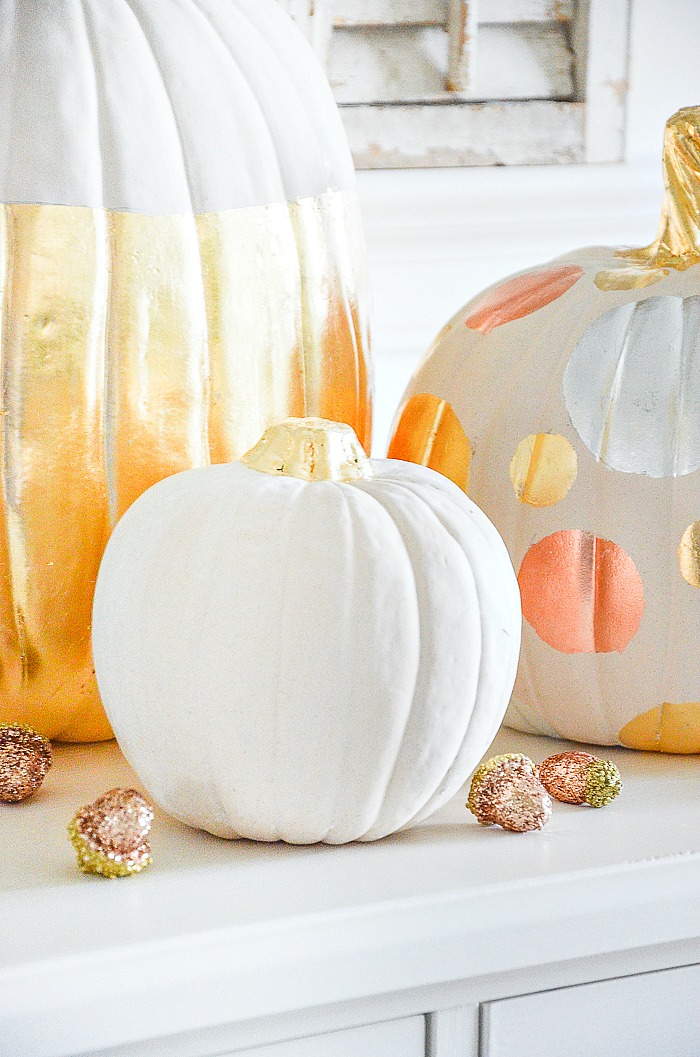
I hope you will try your hand at gilding.
It’s fun and can help you to create something beautiful and unique. Who knew pumpkins could be so glamorous!
You can see a gold leaf video below…

What a great idea Yvonne! I love the touch of bling on your pumpkins and acorns, especially the pumpkin with the copper, gold and silver dots. Have a great day!
Your gilded pumpkins are gorgeous, Yvonne! I love the color palette you used and how pretty they looks as a group.
Would this work when applying gilded shapes? Cut the shape or letter out of a sheet of double sided tape, pull off backing in 1 side and apply to pumpkin. Then pull top backing off and apply leaf.
I’ sure it would! And please send pictures of your finished product!
Yvonne, these are so pretty and glamorous. I love the gold, and the extra bit of copper color gives the whole project an added warmth, perfect for fall. I haven’t done anything with gold leaf in a while, but now you’ve got me thinking about how I can use it for Christmas. So inspiring!
I know I’m going to use it on a few projects for Christmas. Gilding is soooooo addictive!
Those are stunning! I love that you added gold to the stems … and I LOVE the polka dot one!
Your pumpkins turned out so cute!
simply gorgeous, you can’t beat gold leaf!!! love these Yvonne!
Yvonne, I love gold and these are so pretty. I haven’t used the gold leaf yet, it’s next on my agenda. I
ve made circles for polka~dots with punches and vinyl or for biggers ones, I’ve made them with my Cricut. Works great.
lovely! and, the gold stems look so pretty too! 🙂
Your pumpkins turned out very cute.The gilding brought back memories,I used to use sheets of gold leaf on projects back in the day !!
I love anything with a little bling. I love this idea!
Yvonne for some reason I am not receiving The Scoop. I look forward to it so whats up??
Not sure Debbie. You can go there directly. Just go to stonegableblog.com and find THE SCOOP. Are you getting all the other newsletters?
Yvonne – your gilded pumpkins are gorgeous! We love a little bit of bling and these pumpkins would look beautiful for a dinner party!
Those pumpkins are gorgeous, the gold is so pretty but the copper is perfect for fall. Great idea, I’m pinning.
Pat
I love love love anything gold leafed but have never tried it before. Your tutorial makes it look so easy I am definitely going to give it a try. I have a feeling I will be wanting to leaf everything in sight!!
They turned out so cute! Love the gold and copper!
Can we all just agree that EVERYTHING is better with gold, silver or copper leaf? I mean, really! Your pumpkins are just gorgeous! Perfect for a formal table or a fun table. Thanks for the brilliant idea.
Hugs, Lynn
Wow! These turned out absolutely stunning. LOVE.
Wow, I love those glam pumpkins! Such a fun project.
So pretty Yvonne! xo
These are so pretty, Yvonne! I gilded a black pumpkin (chalkboard) a few years back and I still use it every year but I love these white versions, and the polka dots are so cute!
Yvonne, these are stunning! I would have never thought to do gilded pumpkins but they’re so pretty! I’m so glad you joined us again for the fall ideas tour. You always have the prettiest projects.
These are so classy, what a great way to add glam to pumpkins!
These pumpkins are so pretty, I just love gold leaf and all it’s possibilities!! Gorgeous
Thank you so much for this post! The video from Amy Howard was excellent! I love the pumpkins you did with the gold leaf! Jean
Thanks for your wonderful blog. This project with the gilded pumpkins looks very appealing but I’ve run into a problem. I cannot find A Maker’s Studio Rescue And Restore Paint in Biscuits And Gravy . It does not appear as an option on their website or elsewhere. Can you recommend an alternative please? Thanks so much.
Hi Marcia, any soft white will do. I hope this helps