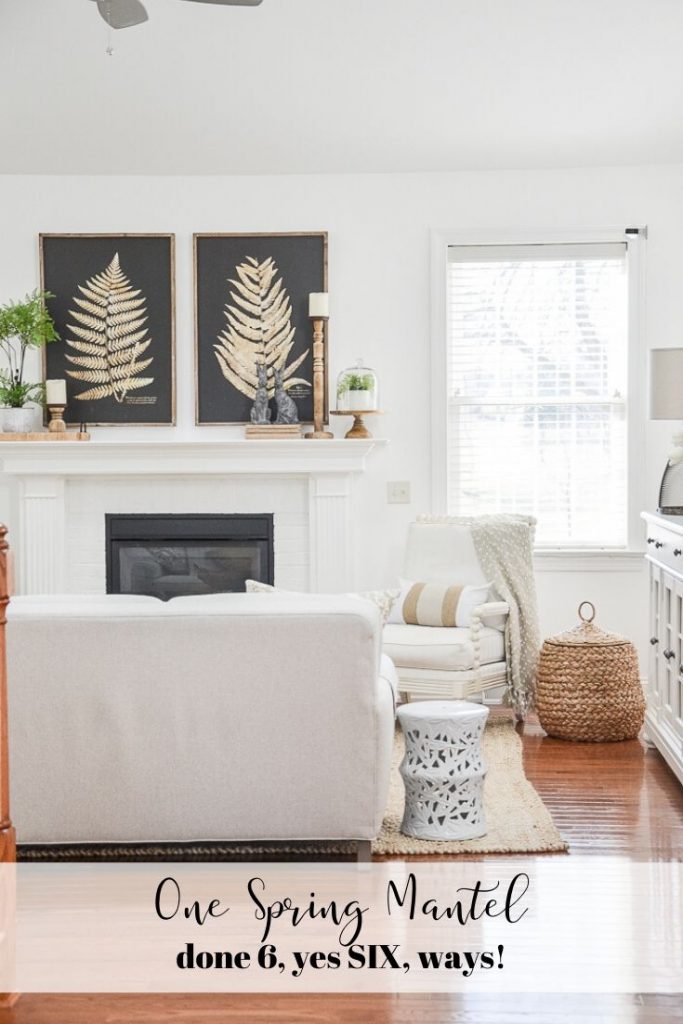
HOW TO STYLE A MANTEL SIX WAYS
Let’s style a mantel six ways! It’s not as hard as you think! I found some pretty spring elements that all worked together and got creative. So join me in the fun and see how easy it is to style a spring mantel more than one way!

Make sure you check HOW TO STYLE A SPRING MANTEL. I break down the steps to create and style a mantel you will love! And there are tons of ideas to help you too!
When I style anything in my home I start with an idea (the post above talks about how to find an inspiring idea). And then head down to the basement to ferret through my stash and to find decor that might work.
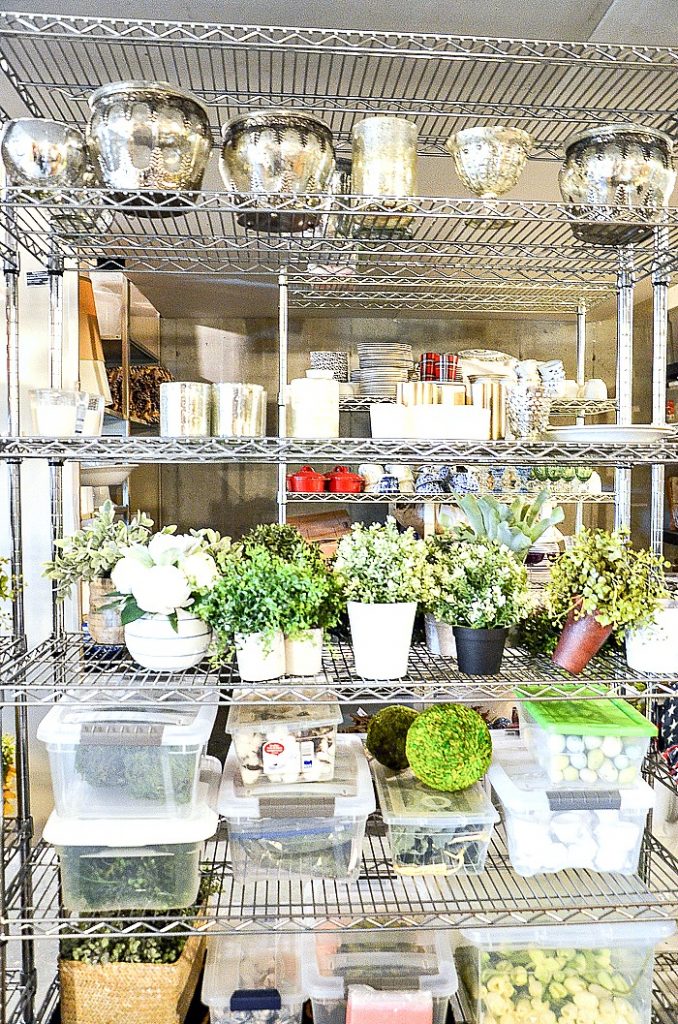
Here is what I found to style my mantel.
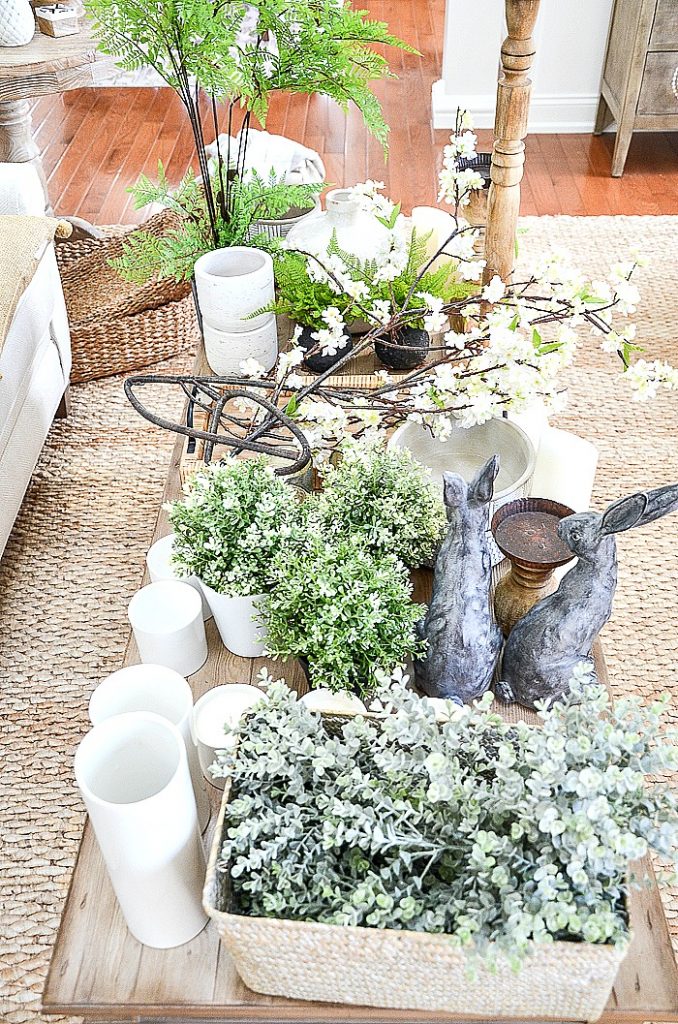
I know it’s a bit inconvenient to drag lots of stuff around to decorate but you will get the best results if you do, I promise!
So then I started to “play”. Using a few interior design guidelines that you can find HERE, I used what I had and put some decor together! I LOVE doing this! And you will too. Just make sure you have some decor options and follow the guidelines.
I’m writing this post in a style that lets you in on my thought process as I decorate.
EASY SPRING MANTEL ONE
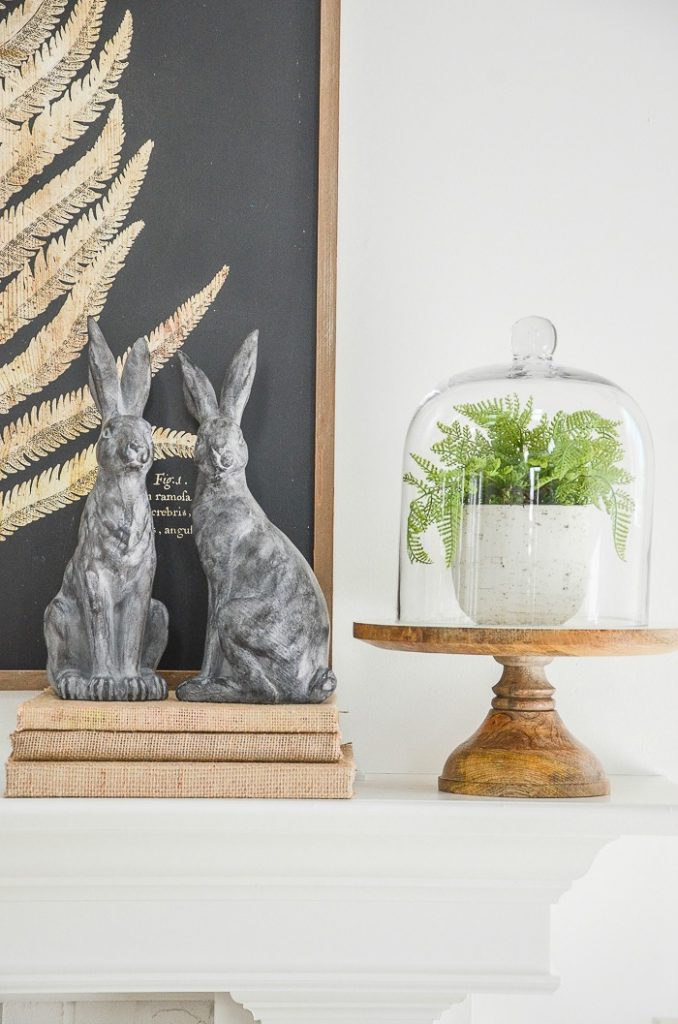
This first mantel was so super easy to style! I left the chunky candle holders on either side of the mantel and added a blond toned basket with lots of faux greens inside.
The rabbits were a must for this mantel because they celebrate spring! So I put them on the mantel first.
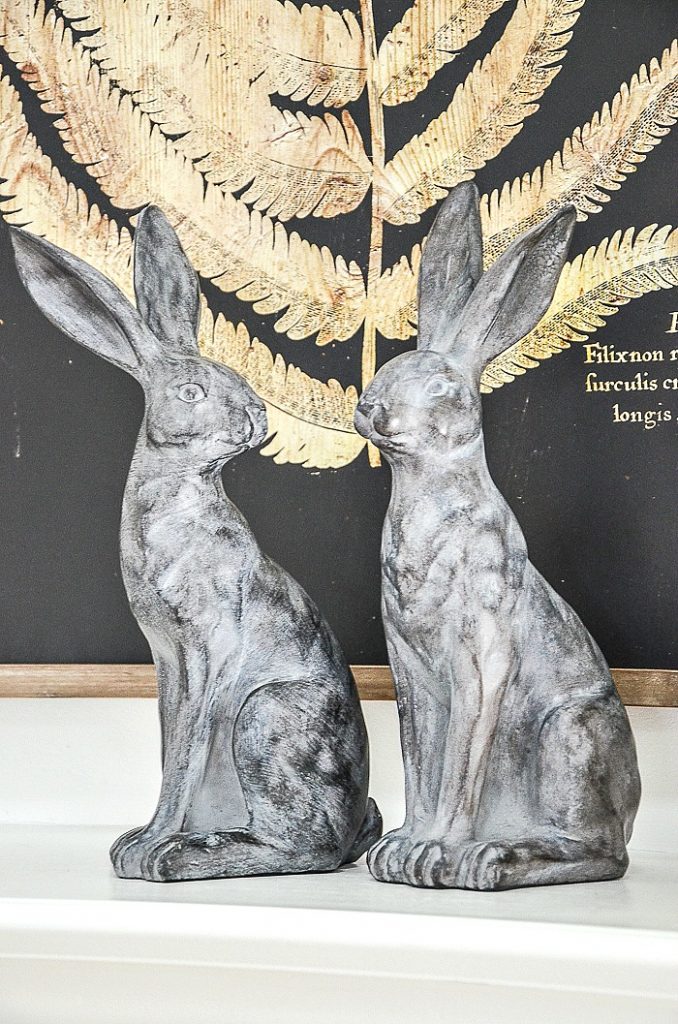
And they made an appearance on all the spring mantels I styled. I found these handsome rabbits locally but you can see some similar rabbits at the bottom of this post.
SIMPLE AND SWEET SPRING MANTEL 2
I liked the look of the blond basket on the mantel. The color was just perfect for the room. But for this sweet mantel, I exchanged the greens with faux blooming branches.
So I filled it with faux spring branches and kept it very simple.
SPRING MANTEL 3
I used simple short white candleholders on each end of the mantel for the second mantel I styled. As I looked at this mantel I decided my chunky, tall wooden candleholders would look better.
And mantel #3 was born! HOWEVER, I forgot to take a picture of it! UGH! Sorry!
Yes, I think the chunky candles worked better.
See the difference? Opps, you don’t sorry, again!
BLOOMING BRANCHES SPRING MANTEL 4
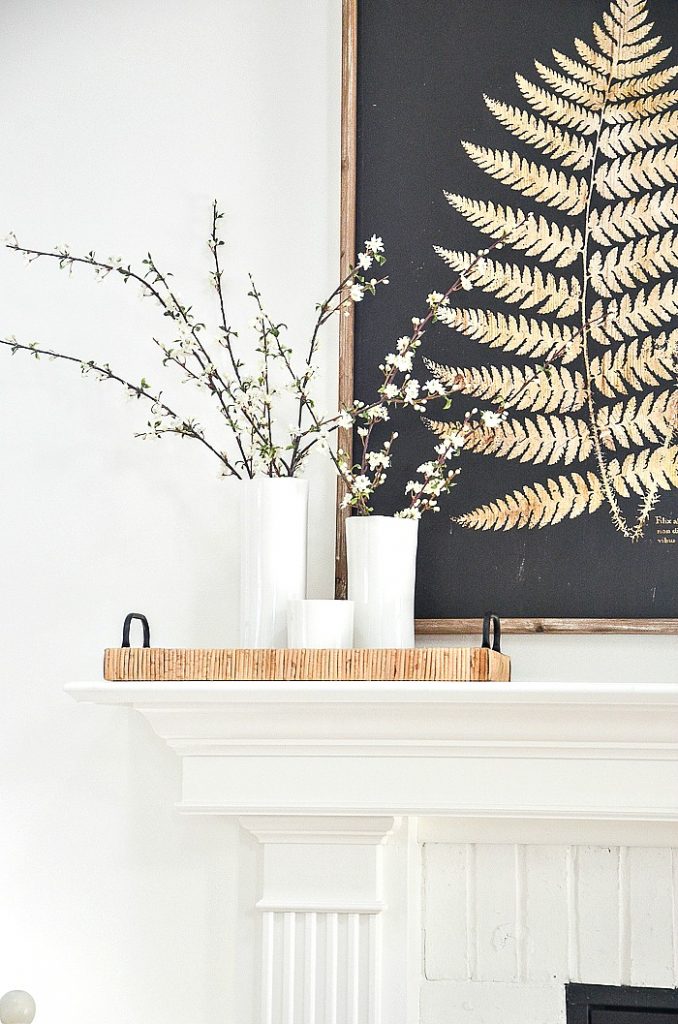
The white porcelain containers on this mantel were a recent purchase. I love their more modern and unfussy look so I wanted to try my hand at a more sleek spring mantel.
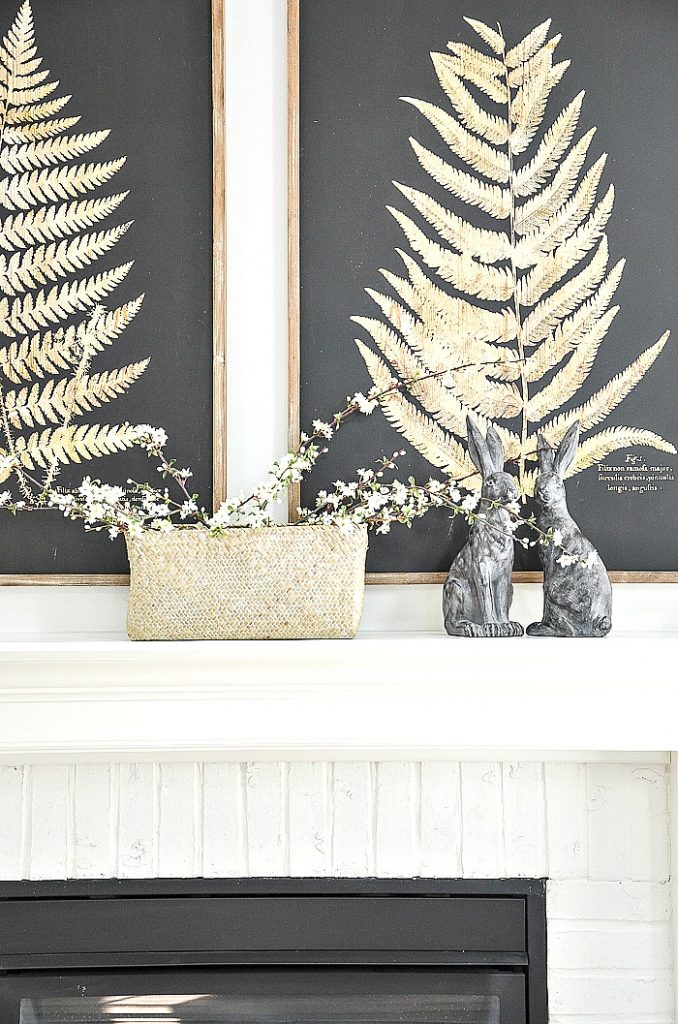
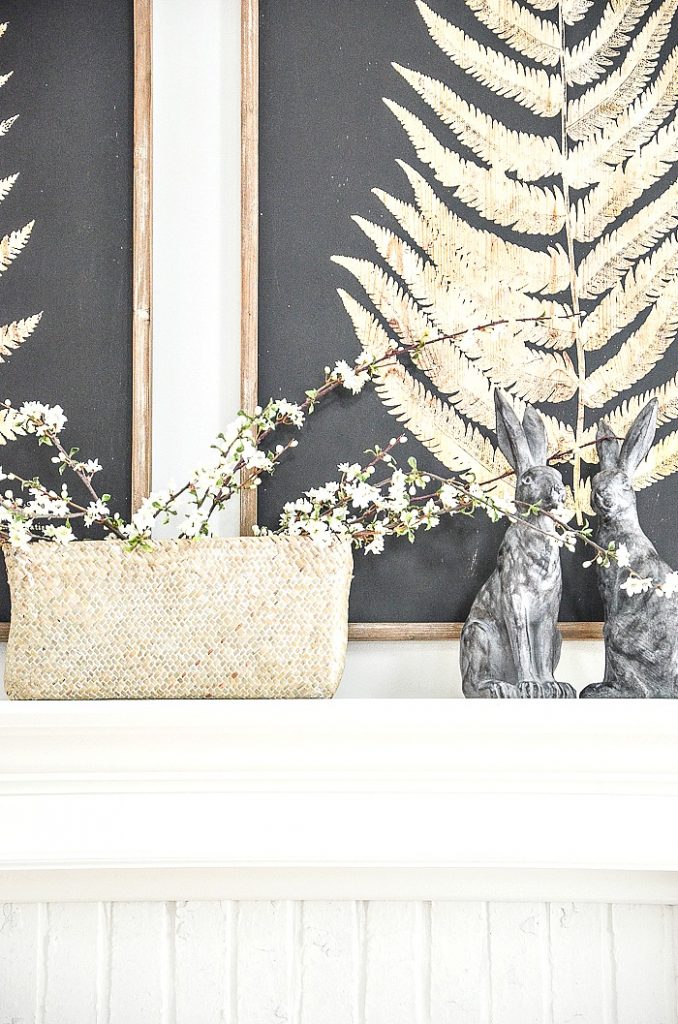
So I arranged the flowering branches from the basket into the two white round cylinder vases and use another shorter white cylinder as a candleholder.
To give these pretty cylinders a more grouped look I put them in a low basket with oil rubbed handles that gave a nod to the black background of the fern prints and the soapstone rabbits.
Here’s the other side of the mantel…
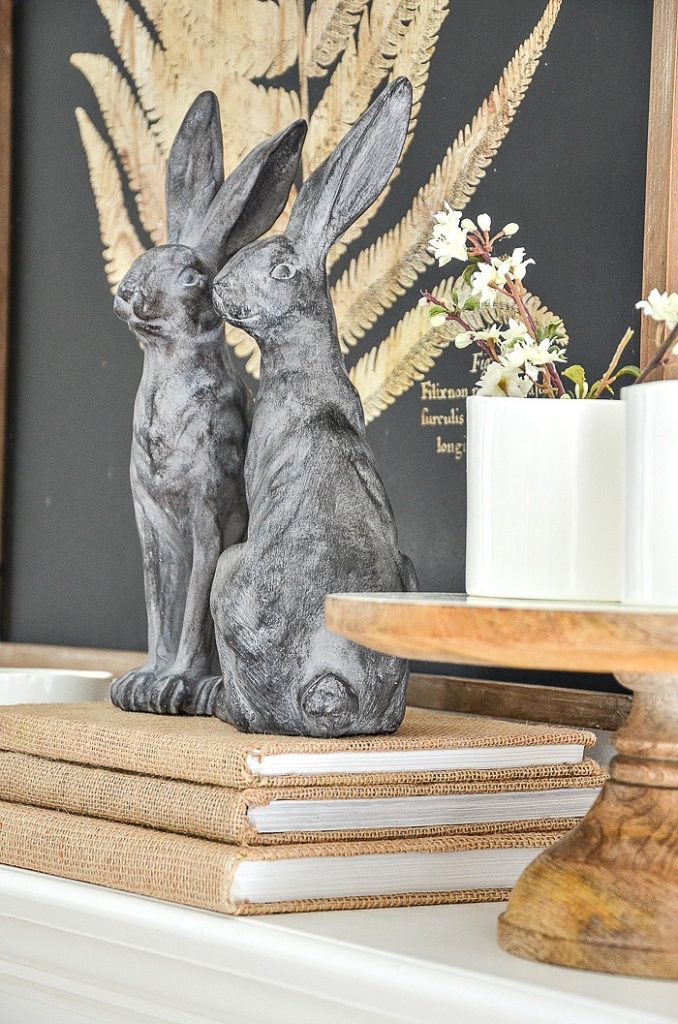
I put the handsome rabbits on a trio of burlap books and used a pedestal with a couple of little white containers on it. One held tiny branches and one a candle.
It was important to me that the left side of the mantel balanced the right. It’s all about balance my friend!
You can see my post that explains and all about how the interior design concept BALANCE works! With lots of pictures to give examples.
SEE HOW BALANCE WORKS IN DECOR
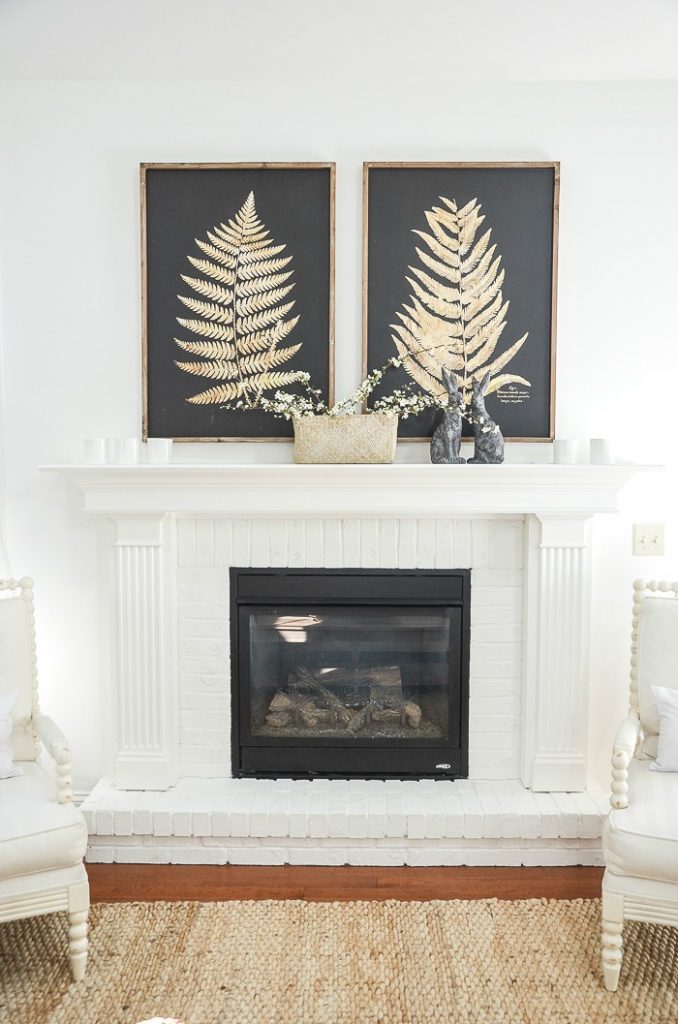
ADDING FERNS TO THE MANTEL 5
I had originally wanted this year’s spring mantel to be decorated with ferns, another harbinger of spring.
But when I bought up all the decor from the basement I started with that stash first.
Then when I had created mantels 1 through 4 I happily turned my attention to the ferns.
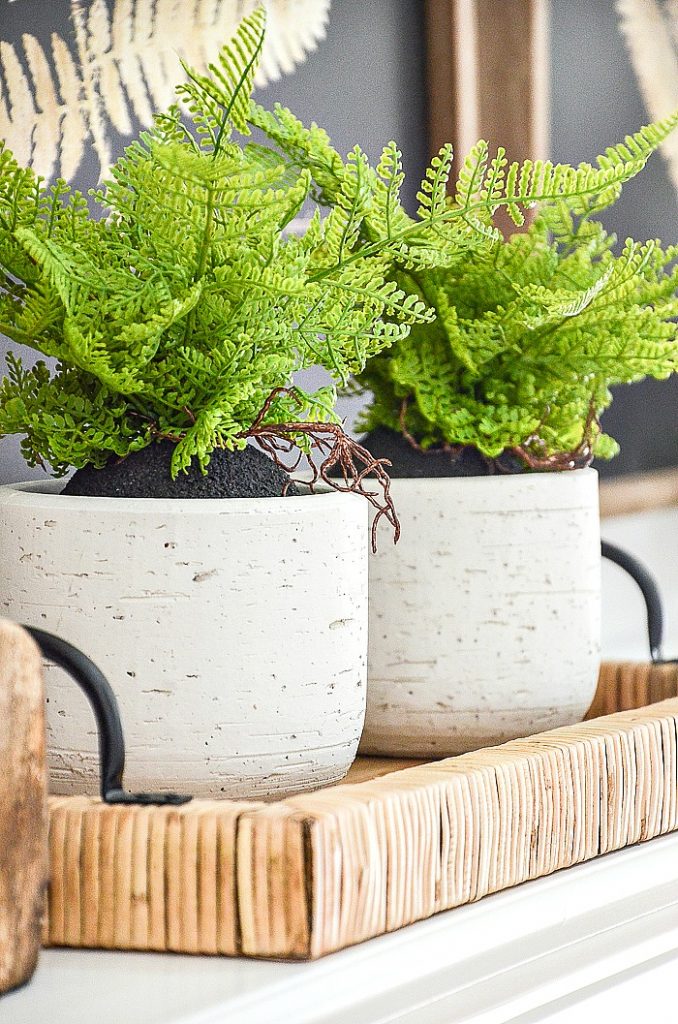
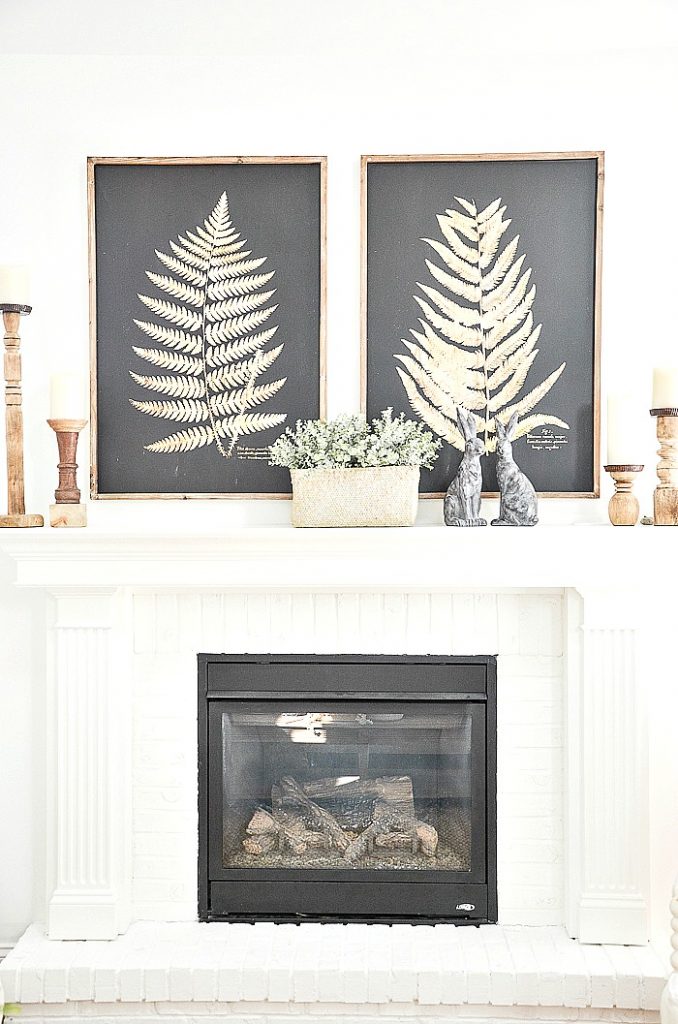
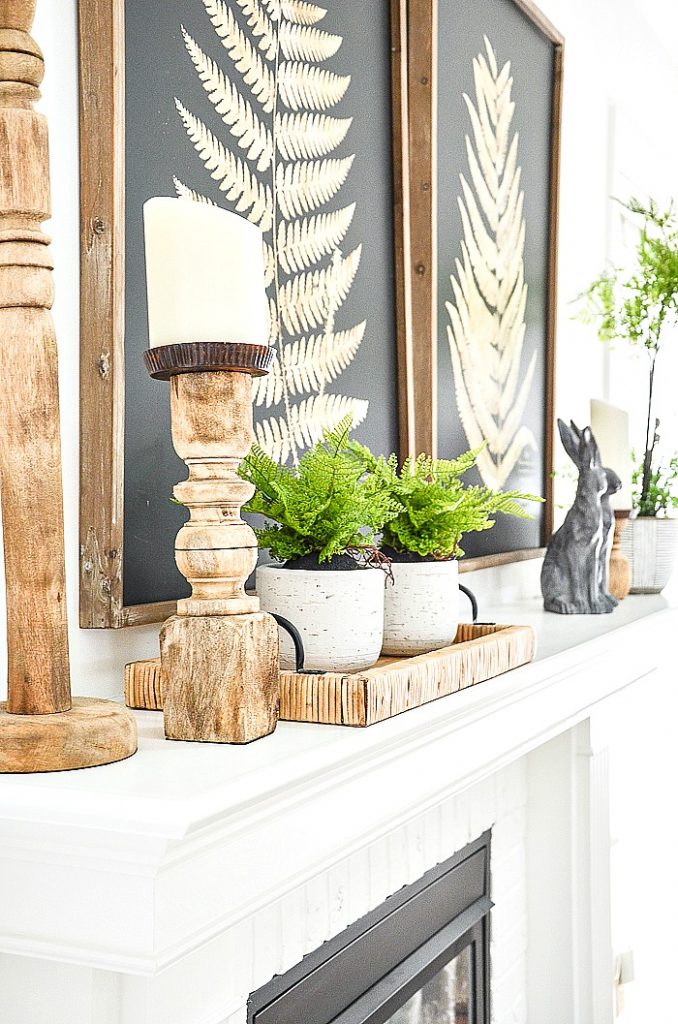
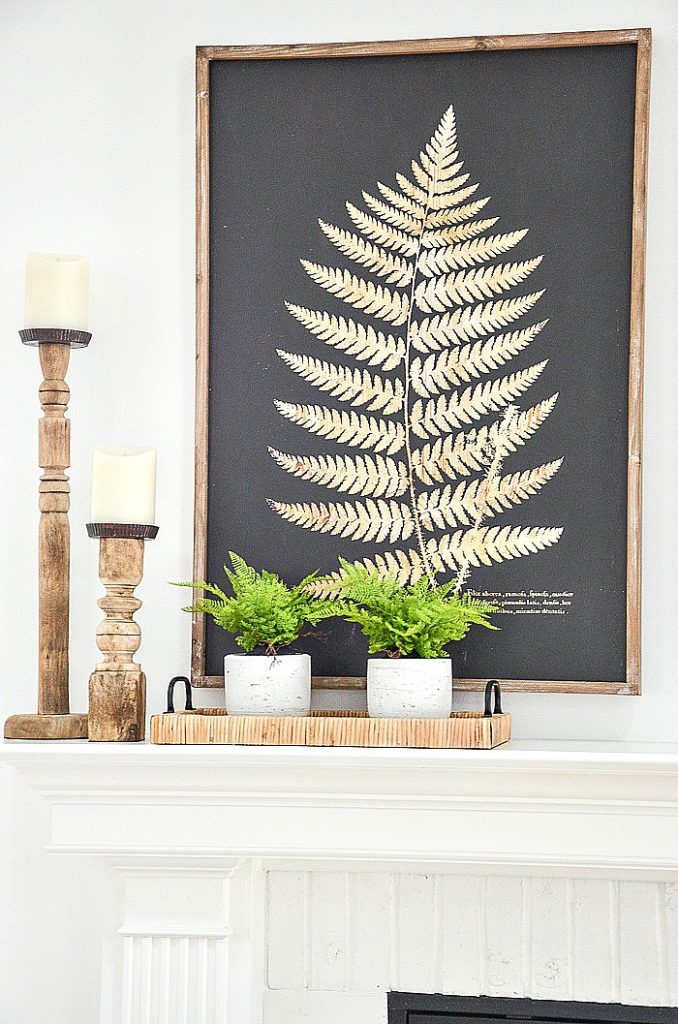
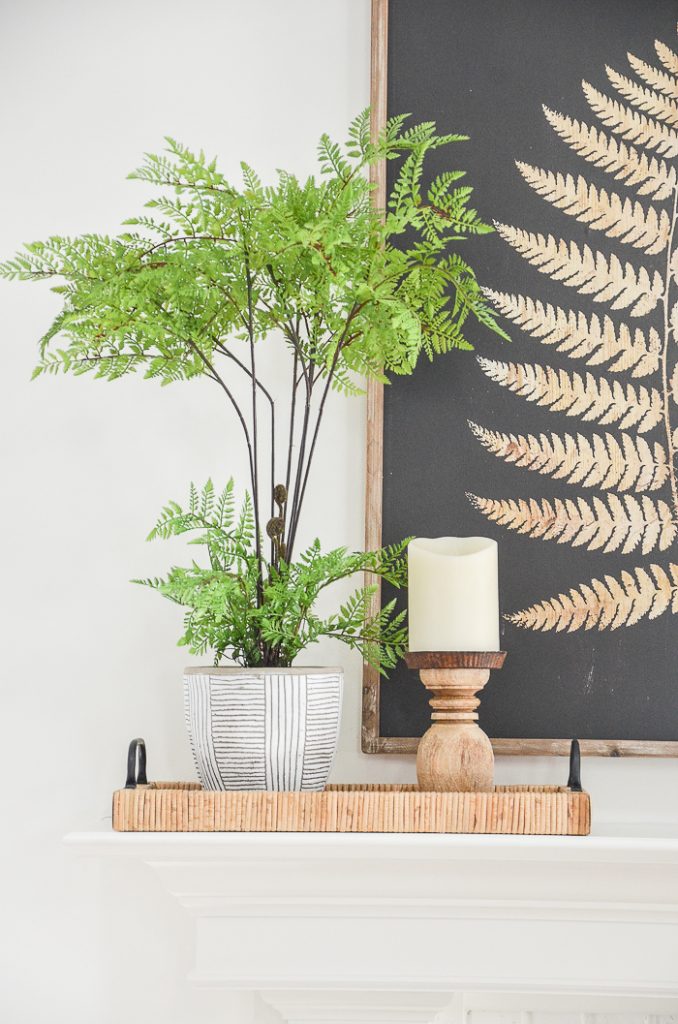
The ferns are new this year. I found a few pretty faux ferns because I wanted this spring mantel to reflect the big fern prints on the mantel.
I liked the idea of keeping the middle of the mantel free of decor so the focal point was the prints.
The left side of the mantel used the chunky candle holders and the basket in one of the above mantels. I added two cute faux ferns in pottery containers.
I also used some of the same elements on the other side of the mantel too.
The tall fern was also from a local shop. I popped it into a fun modern pot.
And here’s the mantel in the great room…
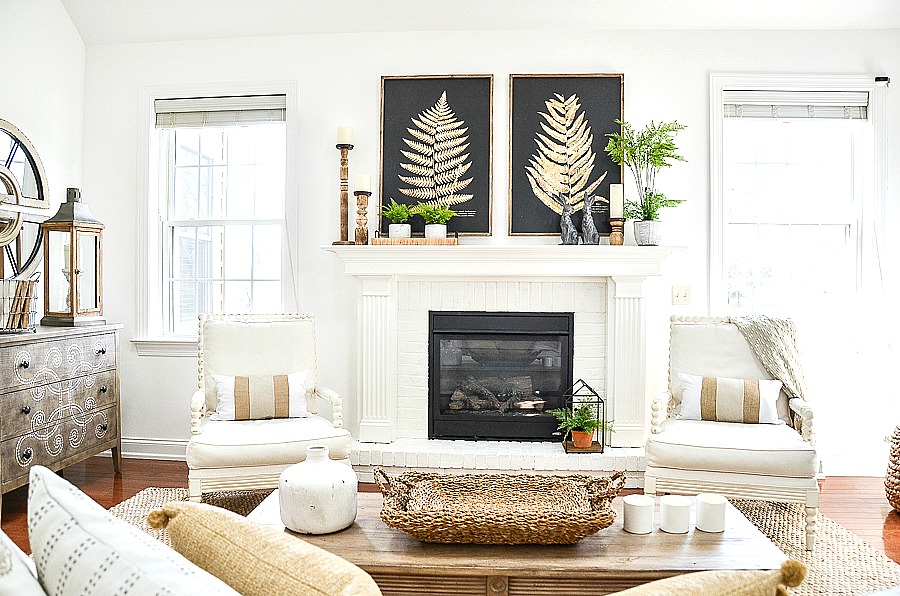
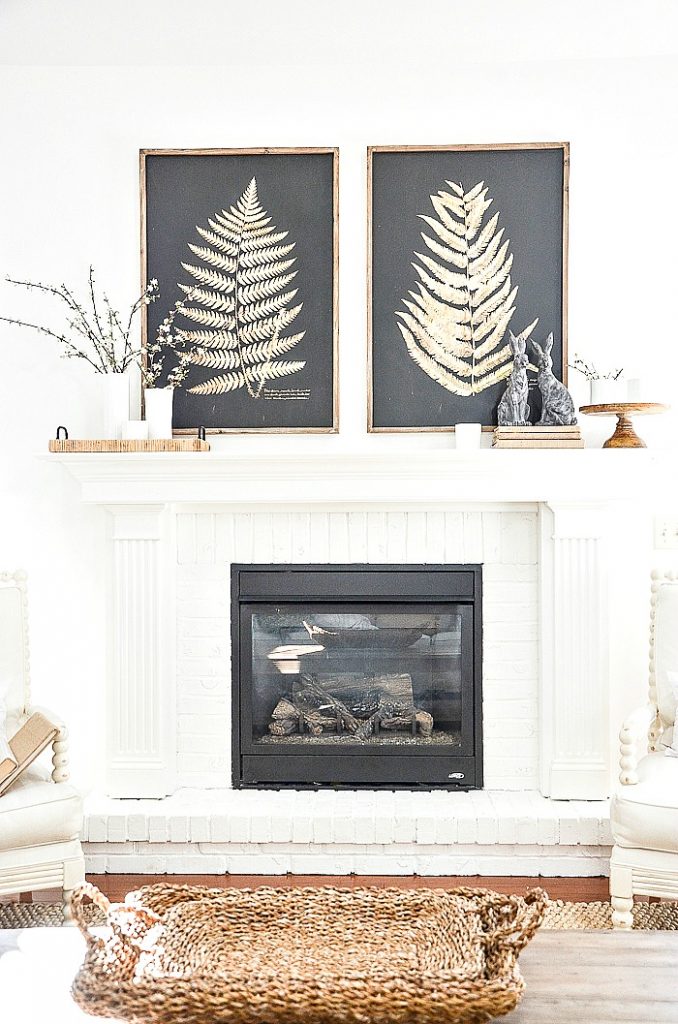
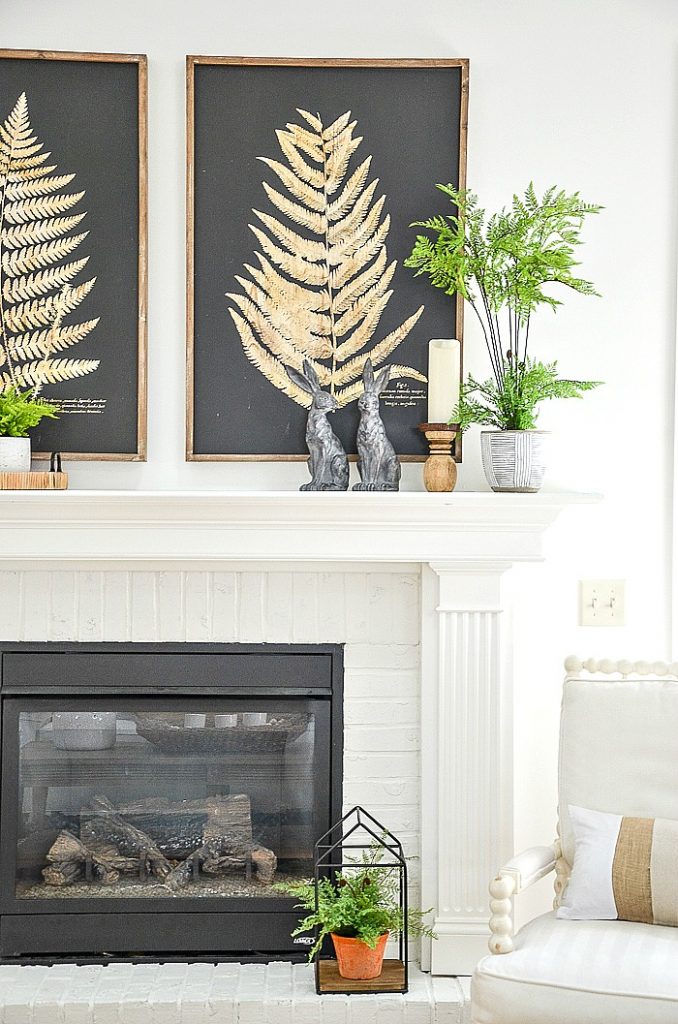
MY FAVORITE FERN MANTEL 6
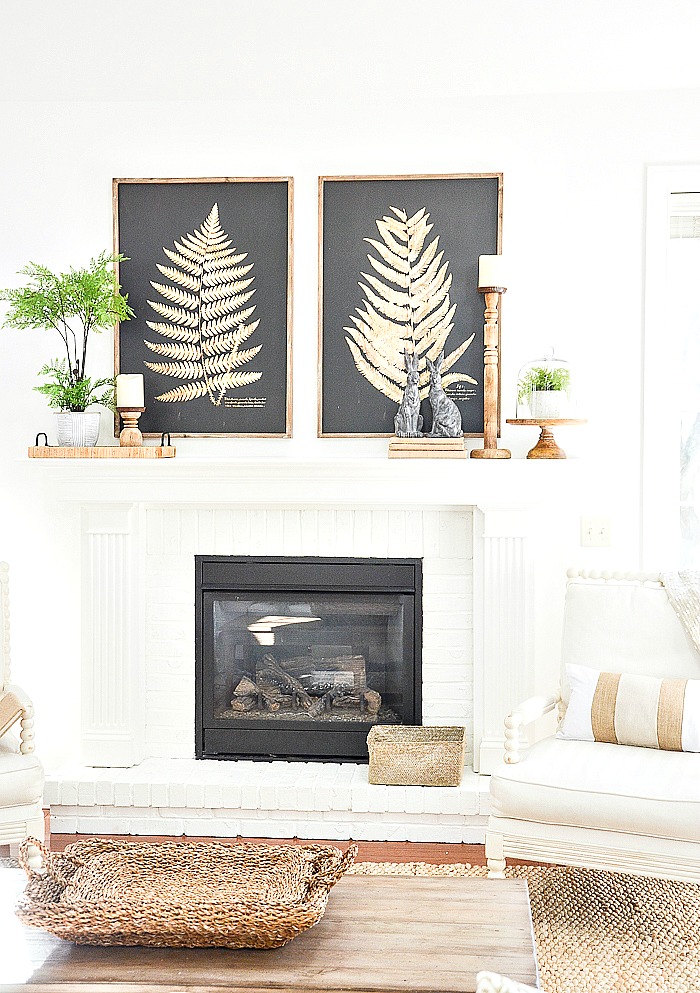
Of all the spring mantels I’ve done this year, I think this one is my favorite!
Just like the first fern mantel, I balanced the left and the right side of the mantel. And I used most of the same elements as the previous mantel with a bit of a twist.
Here’s the left side…
And here’s the right. I think the right side of this mantel is my favorite.
The fern under the cloche speaks to me!
Ready to review…
Now you know how I style a play and style a mantel. I hope this post gives you insight into how you can style your spring mantel this year!
Here are some pretty spring things you might like to use on your mantel!


The addition of greenery to your mantel is a lovely touch! It is amazing what a bit of nature’s color can do for any space. I think I am partial to mantel # 5 for some reason. Thanks for the ideas!
I really love those faux ferns. Would you mind sharing where you bought them?
They came from a local shop. I tried to find sources that are very similar online for you. Go to the bottom of the post and click on the images. Hope this helps.
I love those fern pictures. Can you share where they came from?
Thanks
Hi Suzanne see my answer to Suzie’s comment.
I would love to know where you found those lovely fern prints.
Hi Suzie, I’m trying my hardest to find an online source. They came from a local shop. I know Hayneedle used to carry them but they are out of stock right now.
I do not have a photo but I found some fake fern stems at my local dollar tree store and spray painted them gold (for fall) Fir spring/summer I leave them green. Then I just glued them ( I used Elmer’s school glue because it dries clear) on to black construction paper. Not exactly classy maybe, but my budget dictates I go to what I can afford and it looks pretty spot on if you are careful with the glue…I got my frames at my local dollar store as well. Hope you find what you are looking for, but if not..just do what you can to re-create it?
LOVE your name, Selah! And yes, you are so right about recreating things you love.
I love the use of ferns. It’s Spring and Summer. BEAUTIFUL. Thank you for inspiration and sharing sources.
I love the simplicity and elegance of all the mantle designs. I like that you not feel the need to cover every inch of space. Each piece stands on its own and makes a beautiful statement. One’s senses are not overwhelmed with “clutter”. Thanks for sharing your beautiful home and delicious recipes.
You just put me in the mood for spring decorating. It’s a bit early but the change always refreshes one’s living space. I love mantel #6 but #5 was pretty & balanced, as well.
All the mantles are styled beautifully ! I think what you used for all of them goes perfectly with your lovely fern prints on the wall. Gotta get ready for spring myself as I am really in the mood now!
You are so creative! 6 ways?! That’s crazy good! Pinned.
Aww, thanks Cindy!
I love the mantels! And the large black fern prints!! Where are they from?
This is everybody’s favorite question, Pam. They are from a local shop. I found them on Hayneedle but they are out of stock right now.
The ferns are my favorite also.The green looks so pretty with all the natural wood and ties into the fern prints, simple and elegant.