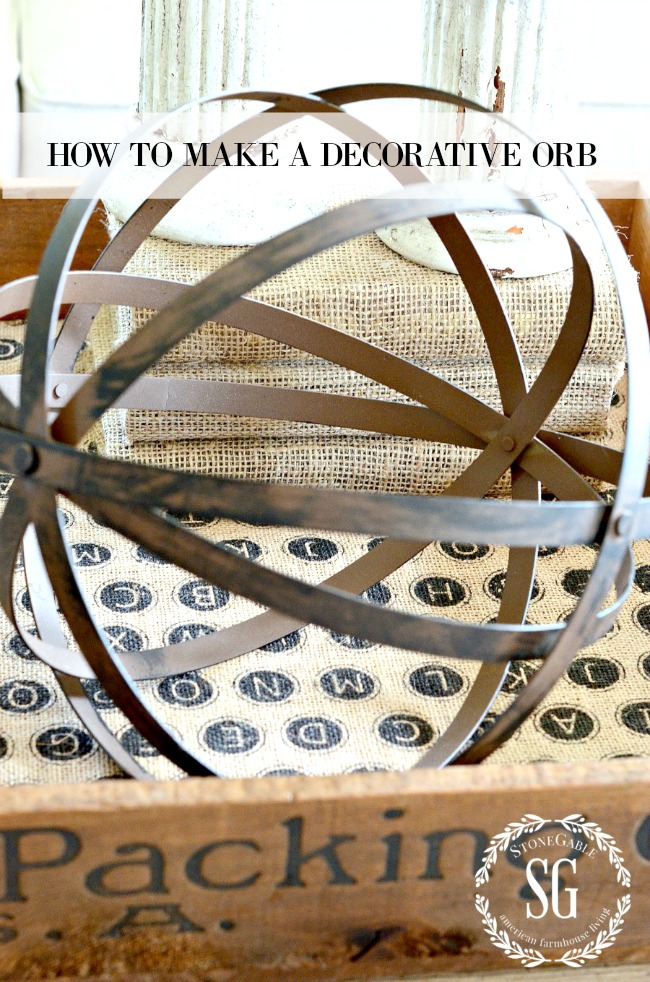
HOW TO MAKE A DECORATIVE ORB
I have such a crush on decorative orbs! They add tons of texture, interest, and appeal to our homes! And they are so on trend right now! If you are like me, you love your home but are always on the lookout for fresh new ways to decorate it. I am comfortable with my classic furnishings but also want to add things that are popular right now too! How about you? That’s where decorative ORBS come in… they are a great way to update our homes. But they can be quite expensive. So let’s make some ourselves. This is one of those DIY’s that is so stinkin’ easy and the end result is so so impressive. Come on, let’s get busy!
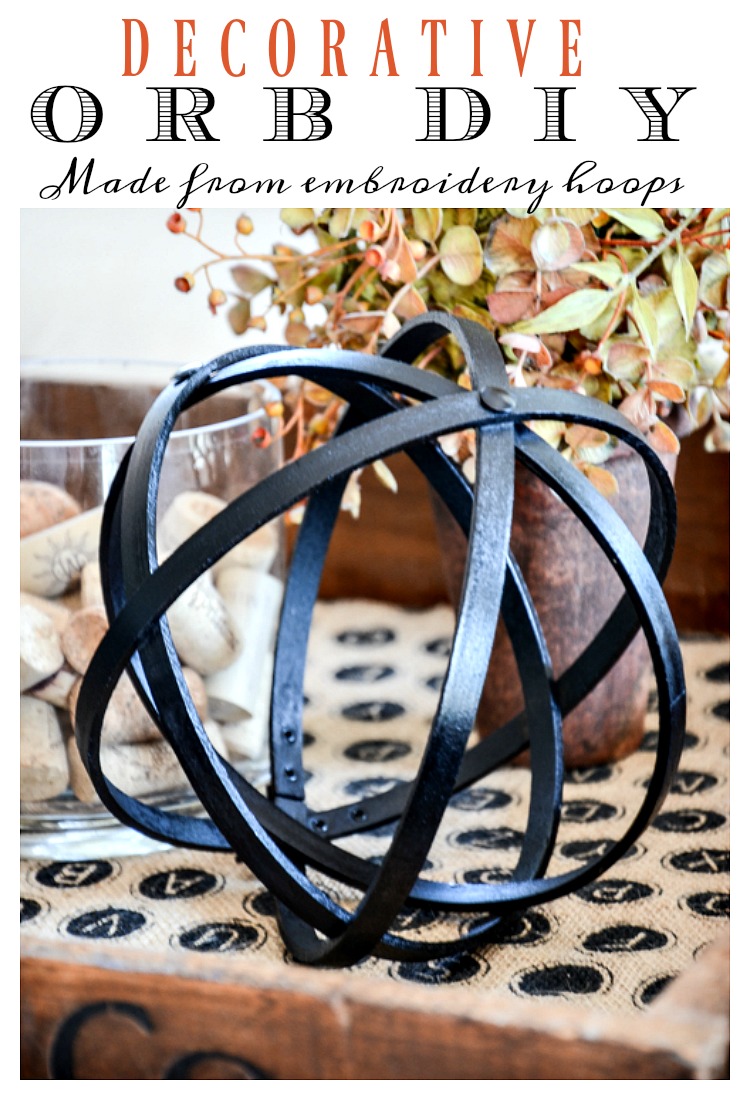
Today is HOME STYLE SATURDAY. And I’m sharing one of my favorite and most easy home decor diy’s. These orbs look really amazing and are so worth giving a try!
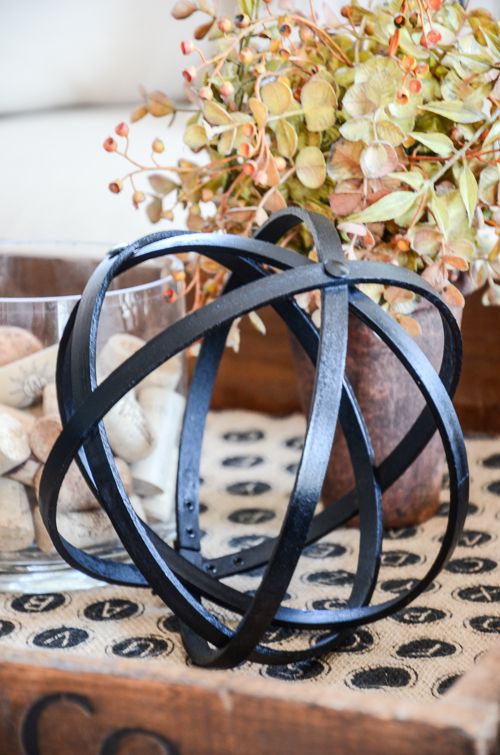
Aren’t these orbs so so pretty! And they can be spray painted to any color or metal. Today, I created iron and antique bronze decorative orbs for my living room. Ready to make some too? Here’s how…
Things you will need:
-
- 2 embroidery hoops the same size You can get them here:
- 3 thumbtacks any color
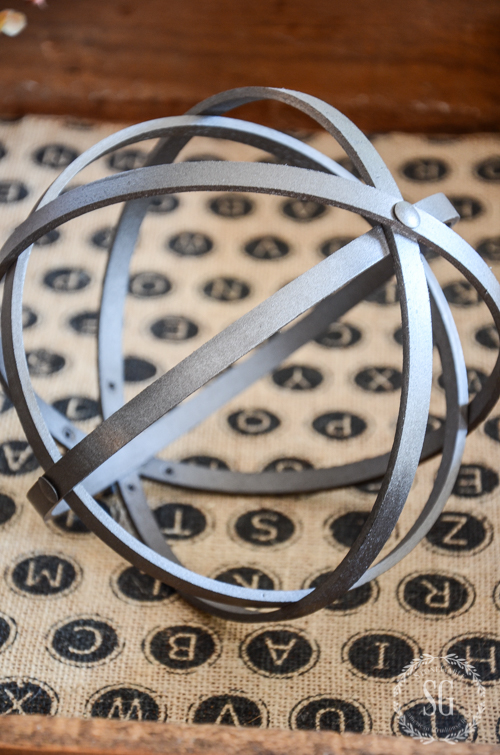
- spray paint I used satin black to look like iron and satin antique bronze.
Can you believe these pretty orbs are made from inexpensive embroidery hoops?
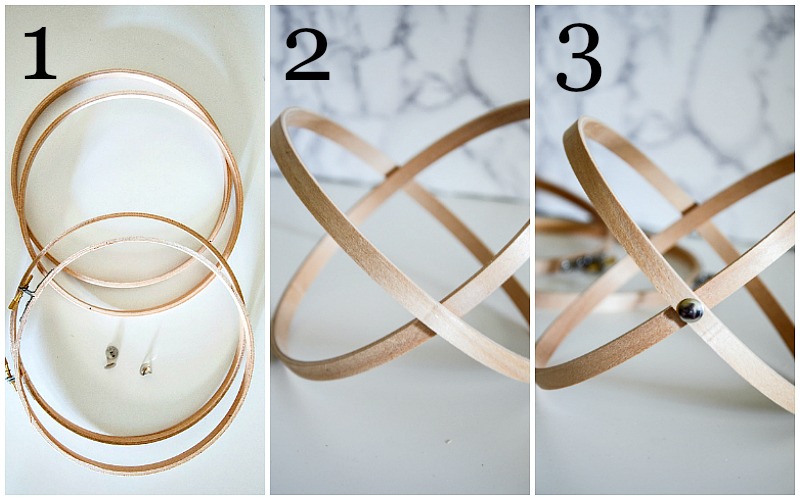
1. The material. Pull the embroidery hoops apart. Put the inside hoops in one pile and the outside hoops with the tightening fixtures in another pile.
2. Work with the inside embroidery hoops first. Put one hoop inside the other to make an “X”. See image above. This is not rocket science so don’t get stressed out about making them perfectly symmetrical. Close is good enough.
3. Push a thumbtack into the intersection of the inner hoops. Yes, they do push in but may need a little extra thumb pressure. See image above. Push the thumbtacks into both intersections.
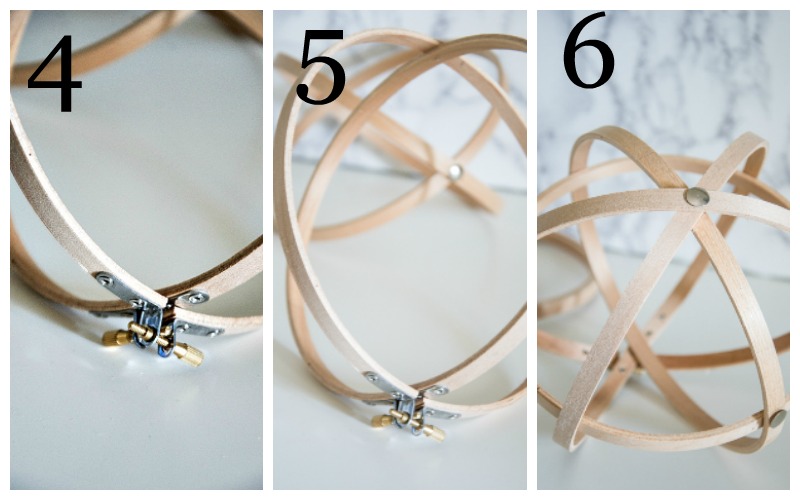
4. Now let’s work with the outside hoops. Loosen the tightening fixtures. Mine have a spring-type action.
5. Open them both up without them coming apart and put one hoop inside the other the same way you did with the inner hoops. Intersect the tightening fixture and tighten both. Make an “X” and thumbtack the one intersection like you did for the small hoops.
6. No for the fun part! Put the smaller hoops INSIDE of the larger hoops. You can do this any way you want. Just make sure everything looks sorta even.
Paint them with your favorite spray paint.
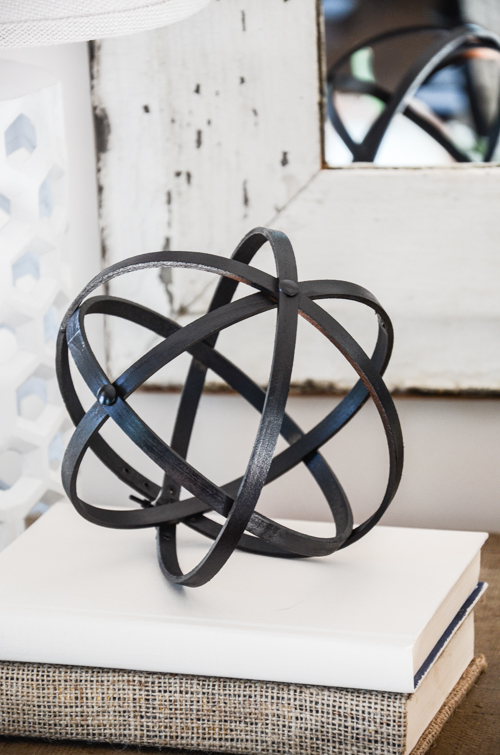
I just love these industrial accents! The next ones I’m making will have a hammered metal finish! So fun!!!! And I can’t wait to show you a light fixture I made from giant hoops! So easy!
When you make these how will you use them?
![]()
Maison de Pax | How to Care for Marble Countertops

On Sutton Place | Arranging Grocery Store Flowers: Tips & Tricks

Savvy Southern Style | New Paint Color Reveal

Shabbyfufu | Amazing Spring Decor Ideas To Try Right Now

So Much Better With Age | How to Sew Blackout Lining to Store Bought Curtains

StoneGable | How To Make An Easy Decorative Orb

Designthusiasm | Winter Table: Vintage Dishes with a Dough Bowl Centerpiece

You might like to follow me on Pinterest and see what I’m finding to pin every day HERE.
Yvonne, I love this idea!! I love To decorate with ORBS and I’m going to make a few to use as topiary forms in and around my garden. Thank you for sharing!
So awesome and easy, Yvonne! Thanks for the inspiration!
Thank you for the inspiration and great directions! I love the orbs but the metal ones are always pricey, yours look great and all the metallic spray paints available could work with various decor! I’d even be tempted to add them to the garden, even if they only last two seasons, they are cheap enough to replace!
This is a great and easy tutorial. How do you think of these things? I love orbs and will see if my friends want to get together for a craft day.
What a neat idea, Yvonne! And fun to make I bet, I think I’ll give this a try. It would also make a great gift for a friend.
I love orbs! I have wanted to make some of these, but haven’t yet. But they sound so easy, I think I better make me some!
Wow! I currently only have plastic embroidery hoops in the house, but after seeing this, I’m going to have to go get some wooden ones. And the color possibilities for matching or contrasting with a room are seemingly endless with your method!